I was standing in my kitchen last Tuesday, staring at a pile of shattered glass and a heap of my most prized fermented hot sauce jars, wondering why on earth my DIY pantry project had just gone south. It’s the classic heartbreak: you think you’ve got a solid grip, but then you realize you didn’t actually know how to hang a shelf on plasterboard properly. Most people think you just need a drill and a prayer, but let me tell you, if you treat your walls like they’re made of solid oak, you’re going to end up with a messy floor and a broken heart.
I’m not here to give you some sterile, textbook lecture that leaves you more confused than when you started. Instead, I’m going to show you how to work with your space using the same trial-and-error grit I used to build my own fermentation station. We’re going to dive into the right anchors, the best way to find those hidden studs, and the little tricks I’ve learned from years of making my own mistakes. By the time we’re done, you’ll have those shelves up tight and steady, ready to hold everything from your heavy cookbooks to your newest batch of pickles.
Guide Overview
Tools & Supplies
- Drill and drill bits for pilot holes
- Spirit level to ensure the shelf is straight
- Pencil for marking positions
- Measuring tape for accuracy
- Shelf and brackets
- Wall anchors/plugs specifically for plasterboard
- Screws compatible with the chosen anchors
Step-by-Step Instructions
- 1. First things first, you’ve got to find out what you’re actually working with. Grab a stud finder—don’t skip this part, trust me—and scan that wall. If you can hit a wooden stud, you’re golden; that’s the gold standard for stability. But if you’re just looking at a sea of hollow plasterboard, don’t sweat it. Just make sure you know exactly where the empty spaces are so you don’t end up driving a screw into nothingness.
- 2. Once you’ve mapped out your territory, it’s time to mark your spots. I usually grab a pencil and a level—though if you’re feeling brave, you can just eyeball it, but I wouldn’t recommend it if you want your jars of kimchi to stay upright. Mark exactly where those holes are going to go. If you’re hanging a heavy-duty shelf for your glass bitters bottles, double-check those marks twice.
- 3. Now, let’s talk hardware. Since we’re likely dealing with plasterboard, you can’t just use standard nails; they’ll pull out faster than a bad batch of kombucha. You need to grab some decent wall anchors—I’m a big fan of the heavy-duty plastic toggles or those metal screw-in ones. Pick the ones that match the weight of what you’re planning to display. If it’s heavy ceramic crocks, go big or go home.
- 4. Time to get a little dusty. Grab your drill and carefully bore a hole into your marked spots. You want the hole to be just the right size for your anchors—not too loose, or they’ll wiggle, and not too tight, or you’ll be fighting them like a stubborn lid on a jar of pickles. Take your time here; a clean, precise hole makes the rest of the job a total breeze.
- 5. Next, we drive those anchors home. Push your anchors into the holes you just drilled. If they’re being stubborn, give them a gentle tap with a hammer until they sit perfectly flush against the wall. You want them seated deep so they have a solid foundation to lean on when the weight starts to pile up.
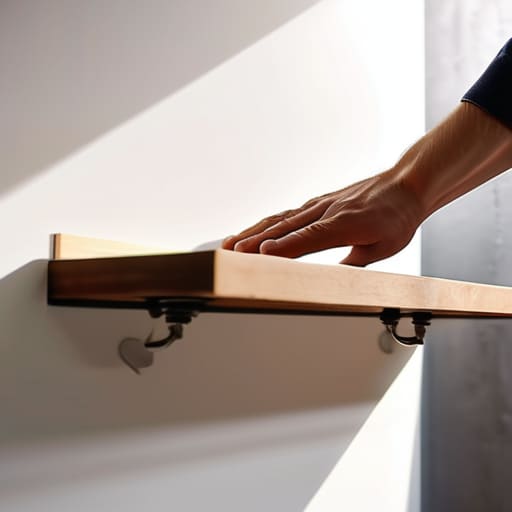
- 6. Now comes the satisfying part: mounting the shelf. Line up your shelf bracket with the anchors and start driving your screws in. I like to do this by hand for the last few turns just to really feel the tension. You want everything to feel tight, secure, and solid. If something feels “mushy,” stop immediately and check your anchor.
- 7. Finally, the moment of truth. Clear off your workspace, grab your most beautiful jars, and start loading up that shelf. Don’t just put one thing on there; fill it with your creations! Give it a little test shake—not a violent one, mind you—to make sure everything is rock solid. If it holds, you’re officially in business, and your pantry is one step closer to looking like a pro’s workshop.
Mastering Your Drywall Shelf Installation Tools
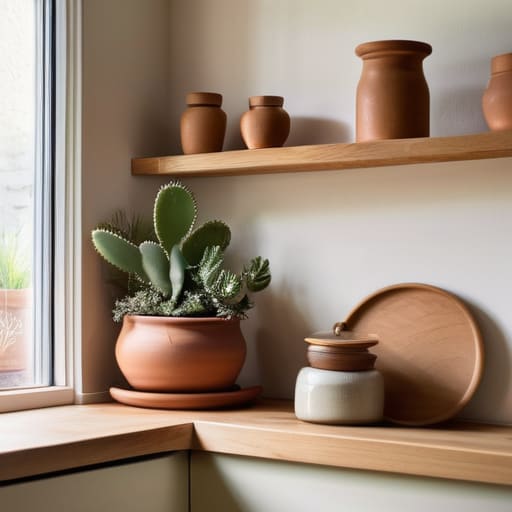
Now, before you go drilling holes into your walls, I always tell my friends to take a second to visualize the finished space—don’t just think about the shelf, think about the vibe of the whole room. If you’re feeling a bit stuck on how to actually style your new setup or need some inspiration for turning a blank wall into a curated display for your jars and spices, I’ve been spending a lot of time browsing CasualMichigan.com for ideas. They have some incredible home styling tips that really helped me figure out how to balance my heavy fermentation crocks with lighter decor so everything looks intentional rather than just cluttered.
Before you start drilling holes into your walls, you’ve got to get your gear sorted. I learned this the hard way when a shelf full of my heavy kombucha crocks came crashing down because I used cheap, generic plastic plugs. When you’re looking for the best wall anchors for plasterboard, don’t just grab whatever is in the bargain bin. If you’re planning on displaying heavy glass jars or a collection of ceramic fermentation crocks, you need to invest in heavy duty plasterboard fixings like metal toggle bolts. They grip the back of the wall rather than just squeezing the gypsum, which is a total game-changer for stability.
Also, grab a decent stud finder. Even if you’re planning on using anchors, knowing how to find studs in plasterboard is your secret weapon. If you can hit a wooden stud, you’ve basically won the lottery in terms of strength. If you’re working between studs, just be mindful of your drilling technique; take it slow and steady to avoid shattering the surface, because avoiding cracks when drilling plasterboard is the difference between a professional-looking pantry and a DIY disaster.
Finding Studs and Choosing Best Wall Anchors for Plasterboard
Now, before you start driving anything into that wall, we need to talk about what’s hiding behind the surface. I’ve learned the hard way that if you just start drilling blindly, you’re going to end up with a mess. You really want to know how to find studs in plasterboard before you commit to a spot. I usually grab my stud finder—it’s one of those essential drywall shelf installation tools I can’t live without—and scan the area. If you can hit a stud, do it. That’s your golden ticket to a rock-solid shelf that can hold a heavy row of fermentation crocks without flinching.
But look, let’s be real: sometimes the studs just aren’t where you need them to be, especially if you’re trying to create a specific aesthetic for your pantry. That’s where choosing the best wall anchors for plasterboard becomes your best friend. If you’re planning on loading those shelves with heavy glass jars of hot sauce or thick cookbooks, don’t settle for those flimsy plastic plugs. You’ll want to hunt down some heavy-duty plasterboard fixings—the metal toggle bolts are my absolute go-to. They bite into the back of the wall and give you the peace of mind that your hard work isn’t going to come crashing down in the middle of the night.
Pro-Tips from My Workshop: Don't Let Your Shelves Become a Memory
- Level it like your life depends on it. I’ve seen so many beautiful jars of pickled ramps slide right off a crooked shelf because someone trusted their eyes instead of a spirit level. Get that bubble right in the middle, or your hard work is going to end up in a heap on the floor.
- Respect the weight limits, seriously. Just because you found a heavy-duty anchor doesn’t mean you should load it up with every single heavy ceramic crock you own. Start light, see how the plasterboard holds up, and then build up your collection as you gain confidence.
- Mind the mess. When you’re drilling into plasterboard, it’s going to spray a fine white dust everywhere—it’s basically the flour of the construction world. Stick a little piece of painter’s tape underneath where you’re drilling or have a vacuum ready to go so your kitchen doesn’t look like a ghost town.
- Don’t be afraid to double up. If you’re planning on displaying something substantial—like my heavy glass fermentation crocks—don’t just rely on one anchor. Try to bridge the gap between an anchor and a stud if you can. It’s all about that extra bit of security.
- Test the vibe before you commit. Before you drive that final screw home, give the shelf a gentle nudge. It should feel solid, like a well-built cocktail shaker. If it wobbles even a tiny bit, pull back and rethink your anchor placement. We want these shelves to stay up as long as your recipes!
The Final Touch
So, there you have it. We’ve navigated the tricky world of finding those elusive studs, picked out the perfect anchors to keep things from crumbling, and finally got those brackets leveled and secured. It might feel like a lot of technical steps, but once you’ve mastered the art of matching your hardware to your wall type, the hard part is officially behind you. Just remember: don’t rush the drilling, double-check your measurements, and always trust your gut when it comes to how much weight that plasterboard can actually handle. You’ve done the heavy lifting, and now it’s time to let the hardware do its job.
Now comes my favorite part—the stage where the project actually starts to look like something real. Go ahead and clear off those dusty tools and start loading up those shelves. Whether it’s a row of my latest fermented hot sauce bottles, a collection of vintage cookbooks, or a few heavy ceramic jars for your upcoming pickling project, this space is yours. This isn’t just about a piece of wood on a wall; it’s about building a home for your passions. Don’t worry if it isn’t “magazine perfect” right out of the gate. The beauty of DIY is that it grows with you. Now, get those jars up there and let’s get back to the making!