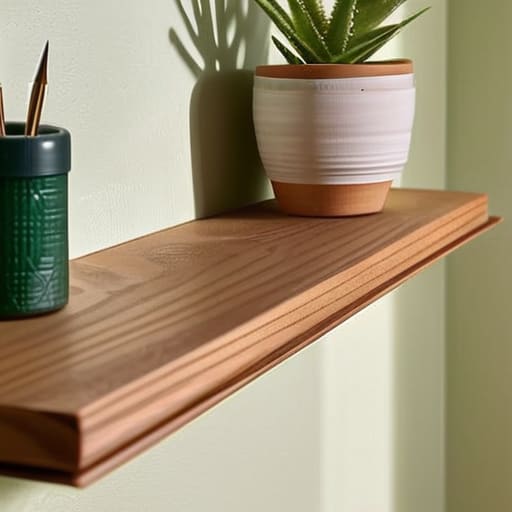
I was staring at my kitchen wall last Tuesday, surrounded by three half-empty jars of fermenting kimchi and a pile of sawdust, wondering how I’d managed to turn my dream pantry into a Swiss cheese disaster zone. We’ve all been told that if you want to store your heavy glass jars or those beautiful hand-built spice racks, you basically have to commit an act of vandalism against your drywall. But let me tell you, that’s a total myth. Learning how to hang shelves without wrecking a wall isn’t about having a degree in structural engineering; it’s about understanding the soul of your space and knowing exactly where to lean in.
I’m not going to give you some sterile, corporate manual that assumes you own a professional-grade workshop. Instead, I’m going to show you the real-world, slightly messy way to get those shelves up so they actually hold your gear without leaving your apartment looking like a battlefield. We’re going to talk about finding the studs, picking the right anchors, and why trusting your gut is just as important as using a level. Let’s get your kitchen organized and your walls intact.
Guide Overview
Tools & Supplies
- Stud finder to locate wall supports
- Power drill with drill bits for pilot holes
- Spirit level to ensure straightness
- Pencil for marking placement
- Shelving unit or brackets
- Wall anchors and screws appropriate for wall type
- Painter's tape to prevent drywall crumbling
Step-by-Step Instructions
- 1. First things first, you’ve gotta play detective. Before you even think about grabbing a drill, you need to know what’s hiding behind that drywall. I always grab a stud finder—it’s basically the holy grail of DIY—and run it across the area where you want your new shelves to live. If you hit a stud, you’re golden; if you’re aiming for the empty space in between, you’re going to need some heavy-duty anchors to keep everything from coming crashing down into your kitchen.
- 2. Once you’ve scouted out the territory, it’s time to mark your territory. Grab a pencil and lightly mark where those holes are going to go. If you’re hanging a shelf for your heavy glass jars of pickled ramps or those massive kombucha bottles, you really want to line them up with the studs whenever humanly possible. If you can’t, just make sure your marks are precise; even a tiny slip-up now can turn into a headache when you’re trying to level things out later.
- 3. Now, let’s talk about the actual drilling. If you’re going into a stud, you can go straight in, but if you’re using anchors, you need to drill a pilot hole that’s just the right size. Don’t go drilling like you’re trying to win a race; take it slow. You want a clean, crisp hole so the anchor can sit snugly inside the wall without any wiggle room. If the hole is too big, the whole thing is going to feel flimsy, and we definitely don’t want your hard work sliding down the wall.
- 4. This is where the magic happens: setting your anchors. Take those plastic or metal anchors and tap them into your pilot holes. I like to use a hammer, but you’ve got to be gentle—think of it like taming a wild ingredient. You want them seated perfectly flush against the wall. If they’re sticking out too far, your shelf won’t sit flat, and there’s nothing more frustrating than a crooked shelf holding up your beautiful glass jars.
- 5. Grab your level—and don’t you dare skip this step. I know, I know, you think you have a “good eye,” but trust me, trust the bubble. Hold your shelf up to the wall, place the level on top, and adjust until that little bubble is dead center. Once it’s perfect, use your pencil to mark the screw holes through the shelf brackets. This is your moment of truth, so take a second to breathe and make sure you’re happy with the placement.
- 6. Time to commit. Line up your shelf with the holes you marked and start driving your screws in. If you’re using a power drill, keep the torque low so you don’t strip the screw or crack the wall. You want to feel that satisfying resistance as the screw pulls the bracket tight against the wall. Once they’re snug, give the shelf a little experimental wiggle to make sure it feels solid and ready to hold its weight.
- 7. Finally, the moment of truth: the load test. Don’t go dumping your entire collection of fermentation crocks on there immediately. Start with something light, maybe a few empty jars or a small plant, and see how it feels. If it stays put, slowly add more weight. It’s all about testing the limits of what you’ve built. Once you’re confident, go ahead and load it up with your beautiful, handmade creations and enjoy the view!
Mastering No Drill Shelf Installation for a Mess Free Kitchen

Now, I know what you’re thinking—after all that heavy lifting and measuring, you just want to kick back, grab a cold one, and finally enjoy that newly organized space. Honestly, I feel that every single time I finish a project in my workshop or my kitchen. If you’re looking for a way to really unwind and connect with people while you’re relaxing, I’ve found that checking out Adult Chat Canada is a great way to find some genuine conversation and just decompress after a long day of DIY madness.
Look, I get it. When you’re trying to organize a kitchen full of heavy stoneware crocks and glass jars of fermenting kimchi, the idea of using nothing but adhesives sounds a little terrifying. You don’t want your hard work sliding right off the wall in the middle of the night! But if you’re playing it safe with a rental or just want to avoid a weekend of dust and drywall repair, you’ve got to be strategic. I’ve spent plenty of time testing out different damage free shelf mounting options, and the secret isn’t just the product you pick—it’s the prep work.
If you’re leaning into adhesive shelf brackets or high-strength strips, treat that wall like you’re prepping a surface for a delicate infusion. Clean it with isopropyl alcohol first; if there’s even a hint of grease from cooking, nothing is going to stick. For those of us who love a bit of weight, I always recommend testing the load capacity well before you commit your prettiest spices to the shelf. It’s all about finding that sweet spot between a beautiful setup and a functional one.
The Secret to Hanging Heavy Items Without Nails or Scars
Now, I know what you’re thinking: “Tom, I’m not just hanging a single sprig of dried rosemary; I’ve got heavy glass jars of fermented hot sauce and stoneware crocks to store!” It’s a valid fear. When you’re looking into hanging heavy items without nails, the biggest mistake is overestimating what a standard adhesive can handle. I’ve learned the hard way that if you’re planning on loading up a shelf with your heavy harvest, you can’t just slap on a random strip and hope for the best.
The real trick lies in the prep work and choosing the right adhesive shelf brackets. Before you even think about mounting, grab some isopropyl alcohol and give that wall a serious scrub. Any lingering grease or dust is basically a sabotage mission for your shelf. Once the surface is pristine, I swear by high-performance command strips for shelving—but here’s the pro tip: let them cure. Don’t rush the process. Give those adhesives a full 24 hours to really bond with the wall before you start adding weight. It’s all about that patience, just like waiting for a good brine to settle.
Pro-Tips from My Workshop: How to Keep Your Walls Looking Flawless
- Know your weight limits before you get ambitious; I learned the hard way when a shelf full of heavy mason jars decided to take a dive, so always check if your adhesive or tension rod can actually handle the load of your gear.
- Clean your surfaces like you’re prepping for a fermentation batch; if there’s any grease or dust on that wall, your no-drill solution won’t stick, and you’ll end up with a mess on the floor instead of a beautiful pantry.
- Use a level, even if you think your eyes are good enough; nothing kills the vibe of a handmade kitchen faster than a crooked shelf, and a little bit of precision goes a long way in making DIY look professional.
- Test your adhesive on a hidden corner first; every paint type and wall texture reacts differently to command strips or mounting putty, and I’d much rather find out it’s a dud on a tiny patch than on the middle of your main backsplash.
- Plan for the “growth” of your collection; don’t just hang a shelf for what you have now, hang it for the spices, the preserves, and the weird heirloom tomatoes you’re going to want to display next season.
Making Your Space Your Own
At the end of the day, whether you’re leaning into those heavy-duty adhesive strips for a spice rack or opting for a clever tension-based setup to hold your jars of kimchi, the goal is the same: functionality without the permanent scars. We’ve walked through how to weigh your loads, how to prep those surfaces so they actually stick, and how to avoid the dreaded “wall-wrecking” drill session. It’s all about being smart with your tools and understanding that you don’t need to be a master carpenter to create a kitchen that works for you. Just remember to test your weight limits before you go loading up those shelves with your entire collection of bitters and ferments.
I truly believe that your home should be a living, breathing reflection of your passions, not some sterile showroom where you’re afraid to touch anything. Don’t let the fear of a few tiny holes or a bit of adhesive keep you from organizing your life and making room for the things you love. Go ahead, grab those supplies, and start building that pantry or herb station you’ve been dreaming about. There is something incredibly soul-satisfying about looking at a wall and knowing, you did that yourself. Now, get out there and start making your space feel like home.