
As a flight instructor, I’ve learned that precision and patience are key to mastering any complex task, whether it’s navigating through turbulent skies or cooking a delicate meal. This is why I’m excited to share with you a guide to poaching eggs perfectly, a simple yet often frustrating process that can be demystified with the right approach. I still remember my first attempt at poaching eggs – it was a disaster, with egg whites scattering everywhere and a yolky mess left behind. But with practice and patience, I’ve honed my skills, and now I’m eager to pass on my knowledge to you.
In this article, I promise to provide you with honest, no-hype advice on how to poach eggs like a pro. You’ll learn the fundamental steps to achieve that perfect, runny yolk every time, from preparing the right water conditions to gently coaxing the egg into its delicate dance. By the end of this guide, you’ll be equipped with the confidence and skills to tackle a guide to poaching eggs perfectly, and you’ll be able to impress your friends and family with your newfound culinary expertise. So, let’s get cracking and take to the skies of breakfast, where the only turbulence is the excitement of creating a delicious meal!
Table of Contents
Guide Overview: What You'll Need
Total Time: 10 – 15 minutes
Estimated Cost: $5 – $10
Difficulty Level: Easy
Tools Required
- Medium Saucepan with a lid
- Slotted Spoon for removing eggs
- Timer for precise cooking
- Egg Poacher or Small Metal Strainer optional, but recommended
Supplies & Materials
- Eggs fresh
- Water enough to fill the saucepan to a depth of 5 inches
- White Vinegar 1 tablespoon per 4 cups of water
- Salt optional, for flavor
Step-by-Step Instructions
- 1. First, let’s start by cracking the code of egg poaching, and that begins with selecting the freshest eggs possible. The fresher the egg, the better it will hold its shape and the easier it will be to poach. I like to think of this step as _pre-flight checks_, where every detail counts for a smooth operation.
- 2. Next, fill a medium-sized saucepan with water, and place it on the stove over medium heat. It’s essential to use a saucepan that’s large enough to hold the egg and water, allowing the egg to cook without sticking to the bottom or sides. As I always say, a good foundation is key, just like how a sturdy aircraft needs a strong base to take off safely.
- 3. Now, add a tablespoon of white vinegar to the water. The acidity in the vinegar helps to set the whites of the egg faster, keeping them from running all over the pan. This step is akin to _navigating through turbulence_ – it might seem like a small detail, but it can make all the difference in the outcome.
- 4. Bring the water to a _gentle simmer_. You want to see tiny bubbles rising to the surface, but not a full-on boil. This is where patience comes into play, much like waiting for the perfect moment to land a plane. Once the water has reached the right temperature, reduce the heat to a low setting.
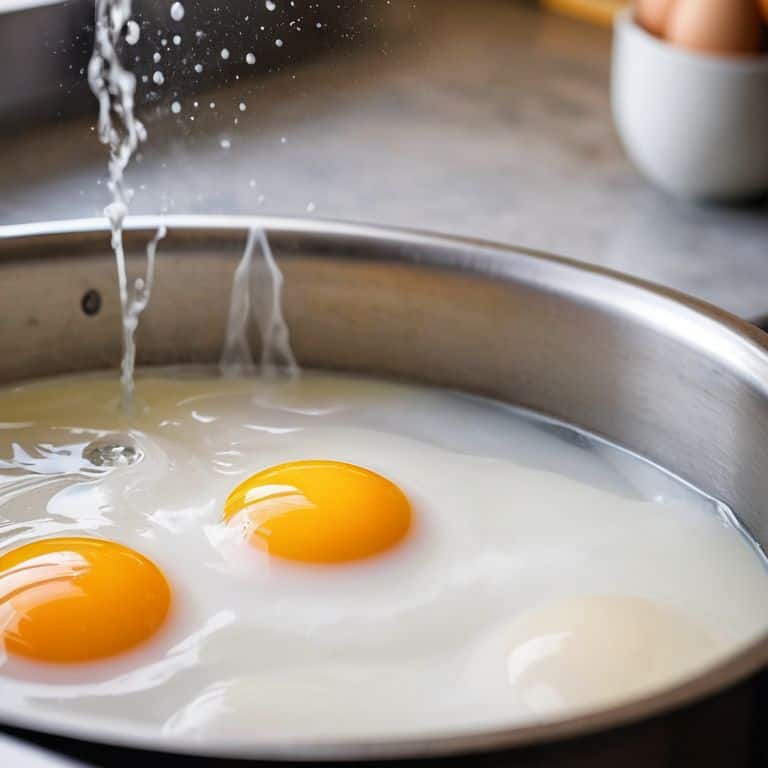
- 5. Create a whirlpool in the water by stirring it in one direction with a spoon. This vortex effect will help to keep the egg white from spreading out too much, allowing it to cook evenly. It’s a bit like creating a _flight plan_ – you need to consider the conditions and adjust your approach accordingly.
- 6. Crack an egg into a small bowl or ramekin. This will make it easier to slide the egg into the water without breaking. I like to think of this step as _preparing for takeoff_ – you need to have all your elements in place before you can proceed.
- 7. Reduce the water to a very low simmer, almost a standstill, and then gently pour the egg from the bowl into the center of the whirlpool. Try to do this _smoothly and calmly_, just as you would when landing a plane – it’s all about the gentle touch.
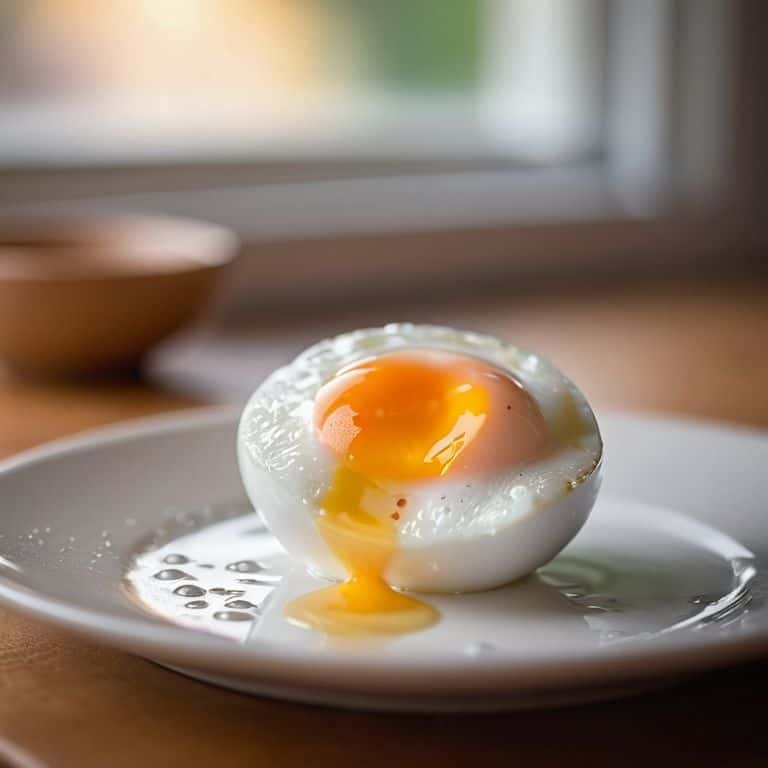
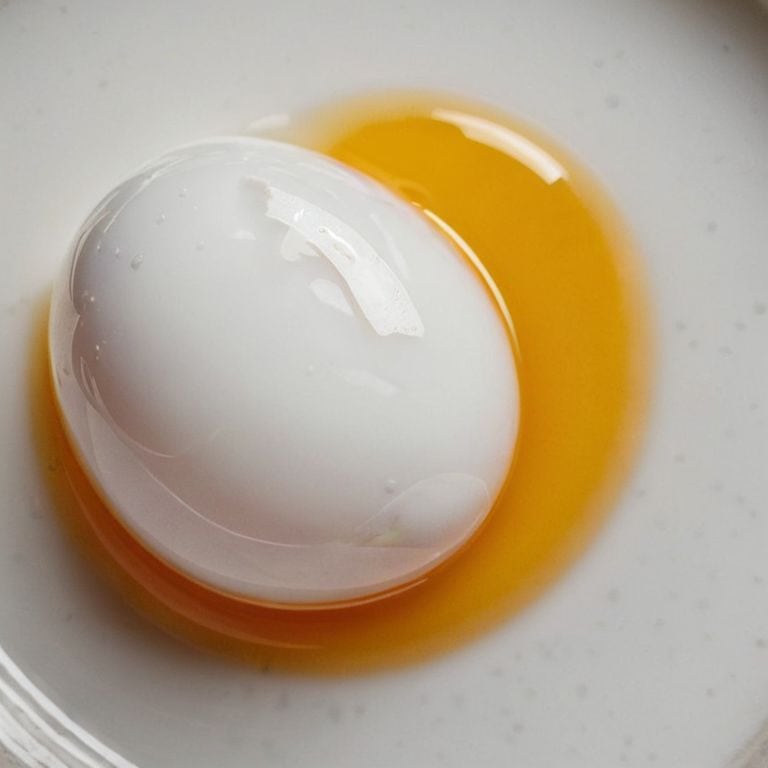
- 8. Let the egg cook for 3-5 minutes, or until the whites are set and the yolks are cooked to your desired doneness. You can check on the egg by lifting it out of the water with a slotted spoon. This is the final approach – the moment of truth, where all your preparation comes together.
- 9. Once the egg is cooked, remove it from the water with the slotted spoon and drain off any excess water. You can then place the egg on a paper towel to dry off any remaining moisture. This last step is like _securing the aircraft_ after landing – you need to make sure everything is safe and secure before calling it a day.
A Guide to Poaching Eggs Perfectly
As we dive deeper into the world of poached eggs, it’s essential to consider a few tips for poaching eggs without vinegar. Many recipes call for vinegar to help the egg white set, but you can achieve similar results with a gentle water flow and the right temperature. The perfect poached egg water temperature is between 180°F and 190°F, which allows for a delicate cooking process.
Using a poaching cup for eggs can be a game-changer, especially for beginners. These cups help contain the egg and prevent it from breaking apart in the water. When it comes to poached egg cooking time guidelines, a good rule of thumb is to cook for 3-5 minutes, depending on the desired yolk doneness.
If you encounter any issues, don’t worry – troubleshooting common poaching egg issues is easier than you think. For example, if your egg is sticking to the bottom of the pan, try stirring the water gently before adding the egg. And, if you’re short on time, you can even poaching eggs in a microwave safely by cracking an egg into a microwave-safe container, adding a tablespoon of water, and cooking for 30-45 seconds.
Perfect Water Temperature Matters
To achieve the perfect poach, it’s essential to get the water temperature just right. Think of it like navigating through turbulent air – you need to be calm and precise. The ideal temperature for poaching eggs is between 180°F and 190°F. If the water is too hot, the eggs will cook too quickly, resulting in an overcooked exterior and an undercooked interior.
I like to use the analogy of a steady flight path to describe the importance of consistent water temperature. Just as a plane needs to maintain a steady altitude to ensure a smooth ride, the water needs to maintain a consistent temperature to cook the eggs evenly. By monitoring the temperature and making adjustments as needed, you’ll be able to achieve a perfectly cooked poached egg every time.
Tips for Poaching Without Vinegar
When poaching eggs without vinegar, it’s essential to create a gentle whirlpool in the water to keep the egg white from dispersing. I like to think of it as navigating through calm skies – you want to maintain a steady and peaceful environment. To achieve this, crack the egg into a small bowl or ramekin first, and then create a whirlpool in the water by stirring it in one direction with a spoon.
Gently pour the egg into the center of the whirlpool, and let it cook for 3-5 minutes, or until the whites are set and the yolks are cooked to your desired doneness. Remember, patience is key, just like waiting for the perfect weather conditions for a flight. By following these simple steps, you’ll be able to poach eggs without vinegar like a pro, and enjoy a delicious breakfast that’s sure to take off.
Navigating the Skies of Breakfast: 5 Key Tips for Poaching Eggs Perfectly
- Egg Selection and Freshness Matter: Choose eggs that are as fresh as possible for the best poaching results
- Create a Whirlpool: Stir the water in one direction to create a whirlpool, then gently add the egg to the center to keep it from spreading out
- Perfect Water Temperature Matters: Aim for a temperature between 180°F and 190°F for the ideal poach
- Use the Right Tool for the Job: A slotted spoon is your best friend when it comes to gently removing poached eggs from the water
- Don’t Overcook: Poach eggs for 3-5 minutes, or until the whites are set and the yolks are cooked to your desired doneness
Key Takeaways for Poaching Eggs to Perfection
To achieve perfectly poached eggs, it’s crucial to maintain the right water temperature, as this directly affects the cooking process and the final texture of the eggs.
Using vinegar in the water is optional, but it can help in keeping the egg white together, making the poaching process more manageable for beginners.
Practice makes perfect, so don’t be discouraged if your first few attempts at poaching eggs don’t turn out as expected – with time and patience, you’ll master the technique.
The Art of Egg Poaching
Just as a smooth landing requires a steady hand and a gentle touch, poaching the perfect egg demands patience, precision, and a deep understanding of the delicate dance between water and heat.
Daniel Sato
Mastering the Art of Poaching Eggs
As we conclude this journey to poaching eggs perfectly, let’s summarize the key points that will make you a master of this technique. We’ve covered the importance of using fresh eggs, the right water temperature, and the technique of creating a whirlpool to help the egg white set. We’ve also discussed useful tips, such as not using vinegar and ensuring the water is at a perfect simmer. By following these steps and practicing regularly, you’ll be able to achieve that perfect, runny yolk every time.
Now that you have the tools and knowledge to poach eggs like a pro, remember that practice makes perfect. Don’t be discouraged if your first few attempts don’t turn out as expected – with time and patience, you’ll be creating delicious, perfectly poached eggs that will impress your friends and family. As I always say, ‘Flying through the kitchen is all about navigating the basics with finesse,’ and with this guide, you’re well on your way to becoming a skilled navigator of the culinary skies.
Frequently Asked Questions
What are some common mistakes to avoid when poaching eggs?
When poaching eggs, common mistakes to avoid include cracking eggs directly into the water, not using a gentle flow, and overcooking. Think of it like turbulence in flight – you want to navigate smoothly. Crack eggs into a small bowl first, create a whirlpool, and cook for 3-5 minutes for a perfect poach.
How do I know if the water is at the perfect temperature for poaching eggs?
Think of it like checking the engine temperature before takeoff – you want it just right. For poaching eggs, the perfect water temperature is between 180°F and 190°F. Use a thermometer to check, or look for a gentle simmer with tiny bubbles rising to the surface. That’s your cue to add the egg and start the poaching process.
Can I poach eggs without using a special egg poaching tool or device?
Absolutely, you can poach eggs without special tools. I like to think of it as navigating through turbulence – it requires a bit more finesse, but with the right technique, you’ll reach your destination smoothly. Simply create a whirlpool in the water, gently add the egg, and let it cook for 3-5 minutes, then remove with a slotted spoon.