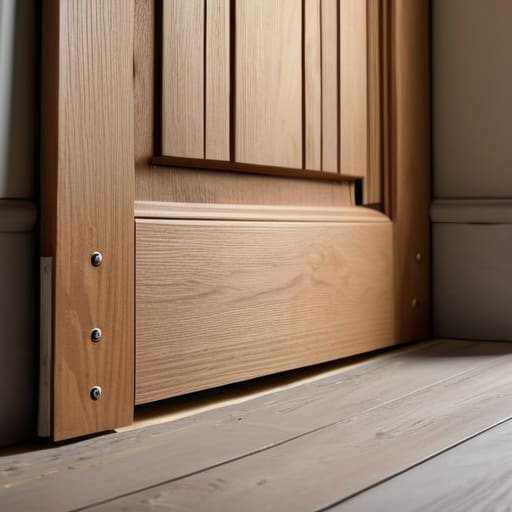
I was right in the middle of a delicate fermentation session—checking the bubbles on a fresh batch of kimchi—when that rhythmic, agonizing thud-scrape, thud-scrape started coming from the pantry door. It’s one of those tiny, nagging household irritations that just eats away at your creative flow. You think you need to call in a professional or replace the entire frame, but honestly, most people overcomplicate the process of making a door stop sticking when the fix is usually much more tactile and satisfying. I’ve learned through plenty of trial and error (and a few bruised knuckles in my workshop) that a stubborn door isn’t a sign of a broken house; it’s just a sign that something needs a little elbow grease and a bit of fine-tuning.
Forget those overly complicated, expensive contractor quotes that make you feel like you need a degree in engineering just to swing a door shut. I’m going to walk you through the real-world, hands-on ways to tackle this, whether it’s a quick sanding session or a simple hinge adjustment. We’re going to get in there, find the friction, and get things moving smoothly again so you can get back to what actually matters.
Guide Overview
Tools & Supplies
- Screwdriver (to tighten loose screws)
- Sandpaper (to smooth rough edges or surfaces)
- Door wedge or rubber stopper (1 unit)
- Adhesive mounting strips (1 pack)
Step-by-Step Instructions
- 1. First things first, you’ve got to diagnose the culprit before you start swinging tools around. Grab a chair or just lean in close and watch the door move slowly. Is it rubbing against the frame at the top, or is the bottom corner dragging across the floor like it’s tired? Sometimes it’s just a loose screw in the hinge that’s caused the whole thing to sag, so give those screws a quick turn with a screwdriver just to see if that fixes the lean before we move on to the heavy lifting.
- 2. If the hinges are tight but the door is still acting up, it’s time to look at the hinge pins. This is where things get a little tactile. Take a hammer and a nail set (or even a thick screwdriver if you’re feeling adventurous) and give the pin a gentle tap from the bottom until it pops right out. Pro tip from my woodworking days: lay a rag down on the floor so you don’t scratch your wood when that pin inevitably goes flying.
- 3. Once you’ve got those pins out, take a good look at them. If they’re bent—and trust me, I’ve seen some seriously wonky pins in my time—that’s your problem right there. You can try to straighten them out with a hammer on a flat surface, but honestly, if they’re badly mangled, just head to the hardware store and grab some fresh ones. It’s a small investment to save yourself a massive headache later.
- 4. Now, let’s talk about the “rub zone.” If the door is hitting the frame, you might need to do a little bit of selective sanding. Don’t go overboard and take a huge chunk out of your door; just find exactly where the friction is happening and sand that specific spot down. I like to use a medium-grit sandpaper to start—think of it like seasoning a cast iron skillet, you want to work with the material, not fight it.
- 5. If the door is dragging on the floor, you’re looking at a trimming job. This is where you really get your hands dirty. Mark the area that’s catching with a pencil, then use a hand plane or a jigsaw to shave off just a tiny bit of the bottom edge. It’s a bit like slicing a radish for a quick pickle—you want to be precise and steady so you don’t end up with a gap that’s way too big.
- 6. Before you call it a day, you’ve got to put everything back together and test the flow. Reinsert your pins, tighten those hinges, and swing the door back and forth a few times. You’re looking for that smooth, effortless glide that makes you feel like you’ve actually mastered your space. If it still feels a little “off,” don’t sweat it; just go back to step one and see what else is hiding in the cracks.
Removing Door Stop Friction With a Little Hands on Grit
Look, I know that sometimes you hit a wall where a simple sanding session or a quick hardware tweak just isn’t going to cut it, and you realize you might be in over your head with a more serious structural issue. When I’m working on my pantry shelves or fixing up an old farmhouse door, I always make sure I have a solid grasp on the fundamentals of home repair before I go swinging a hammer. If you ever feel like you’re staring at a problem that requires a bit more technical know-how, I always suggest you see for yourself how much easier things become when you approach every fix with the right DIY mindset and a bit of foundational knowledge.
Now, if you’ve followed the steps above and the door is still acting up, don’t throw in the towel just yet. Sometimes, the issue isn’t just about where the stopper sits, but the sheer physics of the movement. I’ve found that door stop rubbing against door surfaces is often caused by a slight misalignment in the hinge side rather than the stopper itself. Before you start drilling new holes, take a second to check if your door is actually hanging plumb. If it’s leaning even a fraction of an inch, no amount of repositioning will solve the headache.
When you’re deep into door hardware troubleshooting, I always recommend a “feel test.” Close the door slowly and watch exactly where the contact happens. If you’re dealing with those pesky floor-mounted versions, you might find that a tiny bit of grit or a loose screw is the culprit. Adjusting floor mounted door stops can sometimes be as simple as tightening a baseplate or adding a small rubber bumper to dampen the impact. It’s all about that tactile feedback—once you feel the resistance disappear, you know you’ve nailed it.
Door Hardware Troubleshooting to Get Your Space Moving Again
Sometimes, the culprit isn’t the stopper itself, but the hardware that’s supposed to be working with it. I’ve learned through a few failed DIY projects that if you’re dealing with a door stop rubbing against door surfaces, you might actually be looking at a hinge issue. If your door has started to sag even a fraction of an inch, it’s going to swing into that stopper with way more force than intended. Before you start hacking away at the floor, take a second to check your hinge screws. A quick tightening can often realign the whole thing and save you a massive headache.
If the hardware is solid but the placement is just off, you might need to look into adjusting floor mounted door stops or even swapping them out entirely. I’m a big fan of the spring-loaded variety; they have a bit of “give” that absorbs the impact, which is much kinder to your woodwork than a rigid metal nub. Think of it like adjusting the acidity in a ferment—sometimes you don’t need to change the whole recipe, you just need to fine-tune the tension to get the perfect result.
Pro-Tips from the Workbench: A Few Secrets to Keep Things Swinging Smoothly
- Listen to the wood; sometimes a door isn’t just sticking, it’s telling you it’s thirsty. If the frame feels dry and parched, a little bit of beeswax or even a specialized wood lubricant can work wonders to stop that annoying squeak and friction before it starts.
- Don’t fear the sandpaper; if you’ve just shaved down a high spot, don’t just leave it raw. Give it a quick, light sanding with a fine-grit paper to smooth out the grain. It’s like seasoning a cast-iron skillet—that smooth finish is what makes the magic happen.
- Check your alignment like you’d check a fermentation pH; it’s all about the balance. If the door is sagging, your hinges might be pulling away. A quick tighten of those screws can realign the whole thing and save you from having to sand down the bottom of the door.
- Mind the humidity; just like my kombucha SCOBY reacts to the room temperature, your wooden doors react to the air. If it’s a humid summer, the wood is going to swell. Don’t panic and start hacking away at the frame—sometimes you just have to wait for the season to shift.
- Keep your hardware clean; I’ve learned from years of making bitters that buildup ruins everything. Grime and old grease on your hinges can act like glue. Wipe them down and apply a tiny drop of machine oil to keep the movement fluid and effortless.
Getting Your Groove Back
At the end of the day, fixing a sticking door isn’t about having a master carpenter on speed dial; it’s about having the patience to troubleshoot the small stuff. Whether you had to sand down a rough edge, tighten up some loose hardware, or realign the whole frame, you’ve taken a piece of your home back into your own hands. We covered everything from the grit needed to smooth out friction to the finer details of hardware adjustment, and honestly, most of these issues are just minor hiccups waiting for a little attention. Once you’ve addressed the source of that annoying drag, you’ll notice how much smoother the entire energy of the room feels.
I know it can feel a bit daunting when you first pick up a tool, but trust me, the satisfaction of a door that swings perfectly without a single groan is totally worth the effort. My kitchen is full of half-finished experiments and slightly wonky shelves, but I wouldn’t have it any other way because every little fix makes the space feel more personal. Don’t be afraid to get a little messy or make a mistake along the way—that’s just part of the process. Now, go grab your tools, finish that job, and get back to making something delicious!