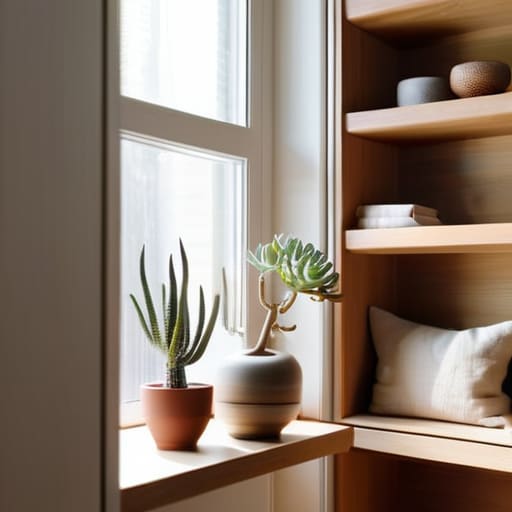
I was standing in my tiny kitchen last Tuesday, staring at a mountain of half-empty kombucha bottles and jars of fermenting kimchi, realizing I had absolutely nowhere to put them. My counters were a disaster zone, and my “workspace” had basically shrunk to the size of a cutting board. Most people will tell you that you need a massive renovation or a huge budget to fix a cramped living situation, but that’s a total lie. The truth is, learning how to build simple storage for a small flat isn’t about buying expensive, pre-made furniture; it’s about seeing the potential in every empty corner and every vertical inch of your walls.
Now, if you’re anything like me, you probably realize that even the most beautifully crafted shelves need a solid foundation of tools to actually get the job done. I’ve learned the hard way that trying to wing a build with a dull saw or a cheap measuring tape is a recipe for a headache, so I always tell my friends to invest in the right gear before they even pick up a hammer. If you’re looking to stock up on some reliable essentials to help turn these sketches into reality, you can find some great options here that will make your little DIY workshop feel like the real deal. Don’t be afraid to go a little heavy on the quality when it comes to your basics; your future self—and your knuckles—will definitely thank you.
In this guide, I’m stripping away the complicated blueprints and the high-end hardware store nonsense. I’m going to show you how to use basic tools and some grit to create custom nooks, floating shelves, and clever little organizers that actually fit your life. We aren’t aiming for showroom perfection here—we’re aiming for functional, handmade soul. Whether you’re a total beginner or you’ve just got a little sawdust on your hands, let’s roll up our sleeves and make some room to breathe.
Guide Overview
Tools & Supplies
- Measuring tape for accurate cuts
- Drill with bits for assembly
- Sandpaper for smoothing edges
- Level to ensure stability
- Plywood sheets (2-3 sheets)
- Wood screws (1 box)
- Wood glue (1 bottle)
- Paint or varnish (1 can)
Step-by-Step Instructions
- 1. First things first, grab a notebook and a measuring tape—and don’t be afraid to get a little imprecise at first. Walk through your flat and look for those weird, “dead” spaces that nothing seems to fit into, like the gap between your fridge and the wall or that awkward corner by the door. I like to use a piece of masking tape to mark out where I think a shelf or a bin might go, just to see if it’s going to feel too crowded. You aren’t looking for perfection here; you’re just mapping out the potential of your space.
- 2. Next, head down to your local lumber yard or even a big-box hardware store to hunt for your materials. Since we’re working with limited square footage, I always lean towards lightweight but sturdy options like pine or even reclaimed wood if you can find it. If you’re building something for the kitchen to hold your jars of kimchi or hot sauce, make sure you pick something that can handle a little moisture. Don’t get hung up on buying the most expensive wood; the character of a slightly imperfect plank is what gives a DIY project its soul.
- 3. Now, it’s time to get the cutting done. If you don’t own a power saw, don’t sweat it—most hardware stores will make the big, scary cuts for you for a few bucks. I usually aim for simple, clean lines: rectangular shelves or basic wooden crates. The goal is to create modular pieces that you can stack, move, or rearrange as your collection of spices, jars, or books grows. Remember, the beauty of making it yourself is that you can tailor the dimensions to fit your exact, quirky little nook.
- 4. Once you’ve got your pieces, grab some sandpaper and start smoothing things out. This is the part of the process where you can really connect with the material. I find that sanding by hand is a great way to feel the grain and catch any rough spots that might snag your clothes or scratch your walls. You don’t need a high-gloss, factory finish; a soft, matte texture feels much more at home in a lived-in, creative space.
- 5. Time to bring it all together with some screws or even just some heavy-duty brackets. If you’re installing floating shelves, make sure you’re finding those studs in the wall—nothing kills the vibe like a shelf full of heavy glass jars coming crashing down in the middle of the night. If you’re more of a “no-drill” kind of person, you can build free-standing wooden crates that stack beautifully on top of each other. I like to leave a little bit of wiggle room in my designs so I can adjust them later if my pantry starts expanding.
- 6. Finally, give your new creation a bit of personality. You could slap on a dark walnut stain if you’re feeling moody, or just leave the raw wood exposed to keep things feeling airy and bright. I often use whatever leftover oils I have in the kitchen—like a food-safe beeswax—to give the wood a natural, tactile glow. Once it’s finished, start loading it up with your gear, and don’t be surprised if it feels better than anything you could have bought from a showroom.
Vertical Storage Ideas for Apartments Reaching for the Sky
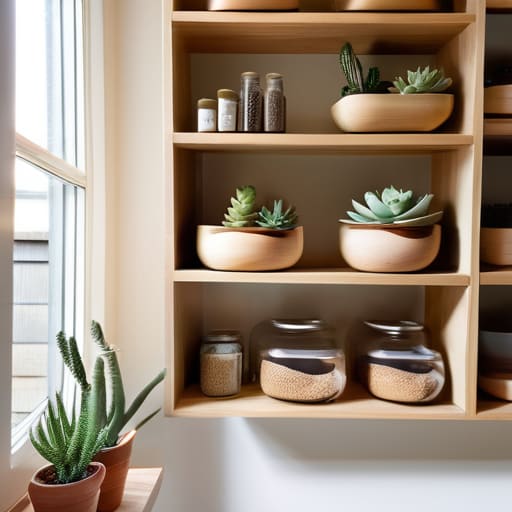
When you’re living in a tight spot, you have to stop looking at your floor and start looking at your walls. I learned this the hard way when I moved into my first studio; I felt like I was tripping over my own fermentation crocks! The secret is leaning into vertical storage ideas for apartments to reclaim that dead air space. I’m a huge fan of mounting heavy-duty floating shelves or even building a custom floor-to-ceiling spice rack for my jars. It’s not just about utility; it’s about turning your storage into a visual showcase of everything you’ve crafted.
If you’ve got a bit more grit and a saw handy, don’t overlook the gaps between your furniture and the walls. I once built some slim, rolling pantry units that slide right into those awkward, narrow cracks—talk about multipurpose storage hacks that actually work! Even the space above your door frame is prime real estate for a sturdy ledge. Don’t be afraid to get a little experimental with heights; if you aren’t reaching for the ceiling, you’re leaving flavor—and space—on the table.
Modular Shelving for Tiny Homes Built by Your Own Hands
Now, if you’re like me and your collection of fermentation crocks and spice jars is starting to outgrow your counter space, you need to think about modular shelving for tiny homes. I’m not talking about those flimsy, flat-pack units that wobble if you sneeze too hard. I’m talking about building something sturdy—maybe a series of reclaimed wood crates or slotted plywood frames—that you can rearrange as your life (and your pantry) evolves. The beauty of a modular setup is that it grows with you. If you move to a bigger spot or finally decide to commit to that massive sourdough starter, you just add another unit.
The real secret to making this work in a tight footprint is focusing on adaptability. I always tell people to build with “plug-and-play” logic; use dowels or simple screw-in brackets so you can swap out a wide shelf for a narrow one in minutes. It’s all about those multipurpose storage hacks that keep your gear accessible without cluttering your visual field. Don’t be afraid to get a little experimental with the dimensions—measure your weirdest nook, grab some scrap wood, and just start building.
Pro-Tips from My Workshop: A Few Things I Learned the Hard Way
- Measure twice, cut once, and then measure a third time—especially in a tiny flat where every millimeter counts. I once built a spice rack that was just a hair too wide for my nook, and let me tell you, seeing that beautiful cedar wood go to waste because of a sloppy measurement is a heartbreak you don’t want.
- Don’t be afraid to mix your materials. I love pairing raw, rugged wood with some industrial metal brackets or even repurposed vintage crates. It gives your storage that “soul” that store-bought plastic bins just can’t touch, and it makes your space feel like a home, not a showroom.
- Think about the “flow” of your daily life before you start drilling holes. If you’re building a shelf for your fermentation jars, make sure it’s at a height where you aren’t straining your back every time you want to check on your kombucha. Build for the way you actually move.
- Embrace the “unfinished” look if it works for you. You don’t need a professional spray booth to make something look good; sometimes a simple hand-rubbed oil or a bit of beeswax is all you need to make a piece of scrap pine look like a designer heirloom.
- Leave a little room for error and evolution. I always build my shelves with a tiny bit of “wiggle room” in the design. Your needs change—maybe you decide to start a massive indoor herb garden next month—and you want your storage to be able to adapt without you having to tear the whole thing down.
The Final Polish
Look, we’ve covered a lot of ground today, from reclaiming that wasted wall space with vertical setups to getting your hands dusty building modular shelves that actually fit your life. Whether you’re tucking away your jars of spicy kimchi or organizing a mountain of kitchen tools, the goal was never just about “tidying up.” It was about reclaiming your territory and making a cramped floor plan feel like a custom-built workshop. Remember, it doesn’t matter if your lines aren’t perfectly straight or your wood grain is a bit wonky; what matters is that these pieces were designed specifically for you and the way you move through your space.
At the end of the day, don’t let the fear of a crooked screw or a wasted piece of plywood keep you from starting. Your home shouldn’t be a museum of store-bought, plastic organizers that don’t quite work; it should be a living, breathing reflection of your own creative grit. Every time you pull a tool from a shelf you built yourself, you’re proving that you don’t need a massive house to live a big, flavorful life. So, grab your drill, clear off that workbench, and start making something real. I can’t wait to see what you build.