I still remember the first time I decided to tackle a DIY bathroom upgrade in my own home – the feeling of uncertainty, the fear of making a mistake, and the thrill of potentially creating something amazing. The myth that DIY projects have to be expensive, time-consuming, or require a professional’s touch is just that – a myth. With the right mindset and a bit of creativity, anyone can turn their outdated bathroom into a spa-like retreat. I’ve learned this from my experience in experimenting with different ingredients and techniques in my kitchen, where I love to ferment and infuse new flavors. Now, I’m excited to apply the same principles to DIY bathroom upgrades.
In this article, I’ll share my honest, no-hype advice on how to make your DIY bathroom upgrades a success. I’ll walk you through the process of transforming your space with fresh tile, new fixtures, and a whole lot of personality. You’ll learn how to overcome common obstacles, work with local and seasonal materials, and create a space that truly reflects your style. My goal is to empower you with the knowledge and confidence to take on your own DIY bathroom upgrades, and to show you that with a bit of experimentation and creativity, you can achieve amazing results.
Table of Contents
Guide Overview: What You'll Need
Total Time: 2 hours 30 minutes
Estimated Cost: $100 – $500
Difficulty Level: Intermediate
Tools Required
- Utility Knife (with extra blades)
- Drill (with screwdriver and drill bits)
- Pliers (for gripping and bending)
- Trowel (for applying adhesive and grout)
- Level (for ensuring even installation)
- Measuring Tape (for measuring 6 inches or 12 inches of space)
- Wrench (for tightening and loosening fixtures)
Supplies & Materials
- Ceramic Tiles (for flooring or walls)
- Adhesive (for securing tiles)
- Grout (for filling gaps between tiles)
- Paint (for walls or ceiling)
- Drywall Patch Kit (for repairing walls)
- 2-in x 4-in Lumber (for creating shelves or supports)
- Shower Curtain or Door (for enclosing the shower area)
- Light Fixtures (for providing adequate lighting)
Step-by-Step Instructions
- 1. First, let’s start with the basics – gutting the old bathroom. This means removing any existing fixtures, such as the sink, toilet, and shower, to make way for the new upgrades. I like to think of this step as a fresh start, a chance to wipe the slate clean and get creative with my design.
- 2. Next, we need to assess the space and plan our attack. Take some time to measure the room, consider the natural light, and think about the overall aesthetic you want to achieve. For me, it’s all about creating a relaxing oasis, a space where I can unwind and recharge after a long day.
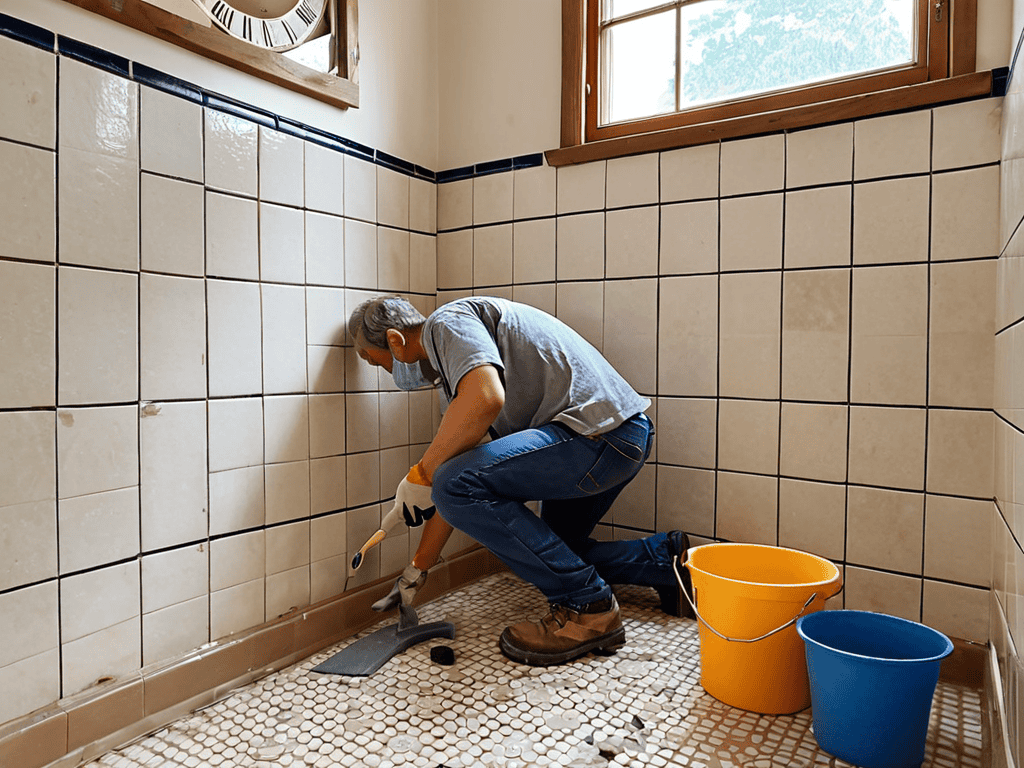
- 3. Now it’s time to get our hands dirty and start demolishing the old tile. This can be a messy and labor-intensive process, but trust me, it’s worth it. I like to use a combination of elbow grease and the right tools to get the job done efficiently.
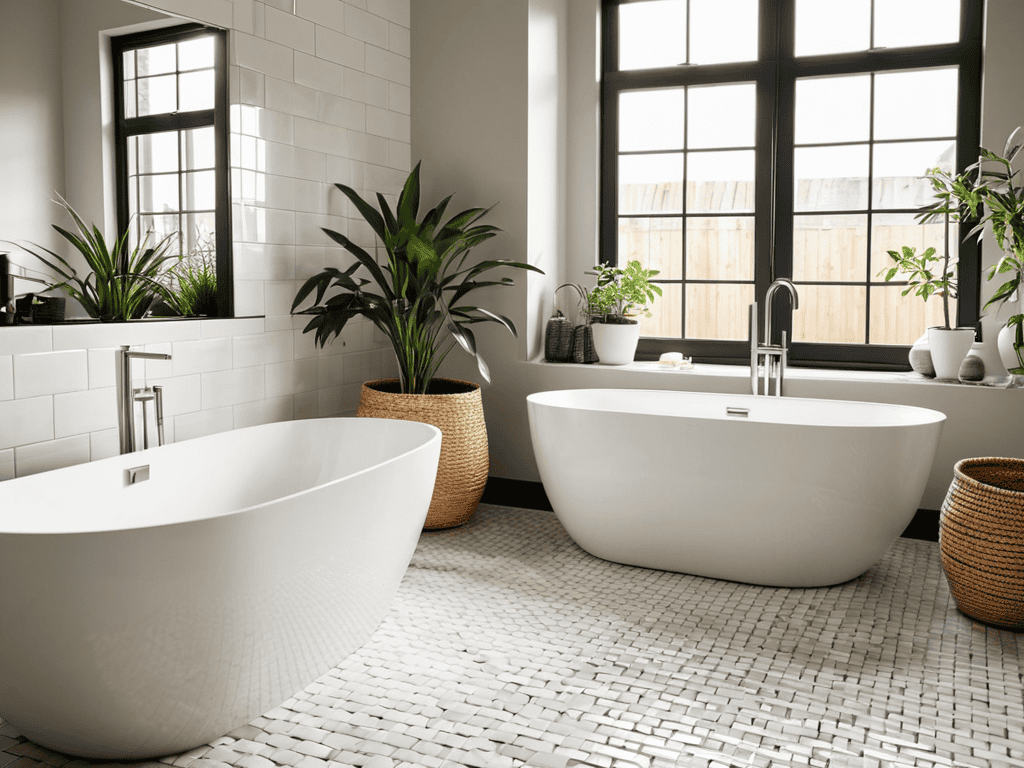
- 4. With the old tile removed, we can start thinking about the new flooring options. I’m a big fan of hexagonal tile, it adds a touch of elegance and sophistication to the space. Plus, it’s relatively easy to install, even for a DIY novice like myself.
- 5. Once the flooring is in place, it’s time to move on to the fixture installation. This includes the sink, toilet, and shower, all of which require some careful planning and execution. I like to take my time with this step, double-checking all the connections and ensuring everything is secure and level.
- 6. Next up, we have the painting and finishing touches. This is where we can really let our personalities shine and add some color and flair to the space. I’m a fan of bold, bright colors, but you can choose whatever style suits your taste.
- 7. Finally, it’s time to add the final decorations and touches to our newly upgraded bathroom. This might include things like plants, artwork, or other decorative elements that make the space feel truly unique and special. For me, it’s all about creating a cozy retreat, a space where I can escape the stresses of everyday life and just relax.
Diy Bathroom Upgrades Unleashed
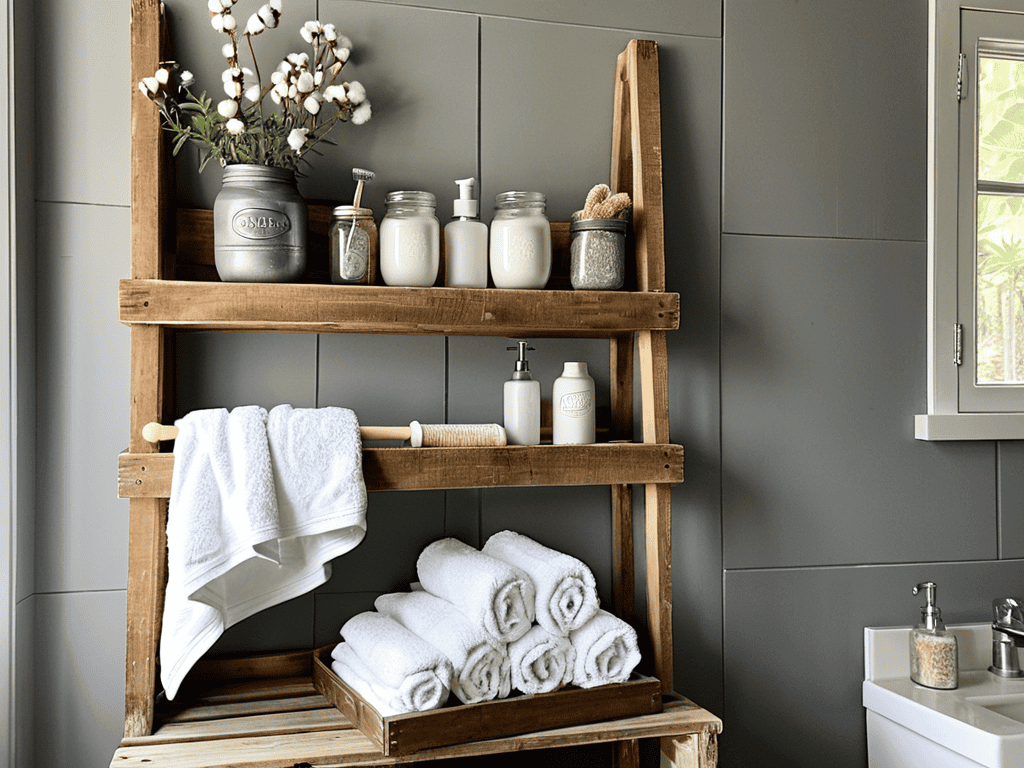
As I always say, the key to a successful bathroom renovation on a budget is to get creative with the materials you already have. Don’t be afraid to think outside the box and repurpose items like old mason jars or wooden crates to create unique storage solutions. For example, you can use mason jars to store small items like q-tips or cotton balls, while wooden crates can be turned into shelves for towels or toiletries. This not only saves you money but also adds a touch of personalized charm to your bathroom.
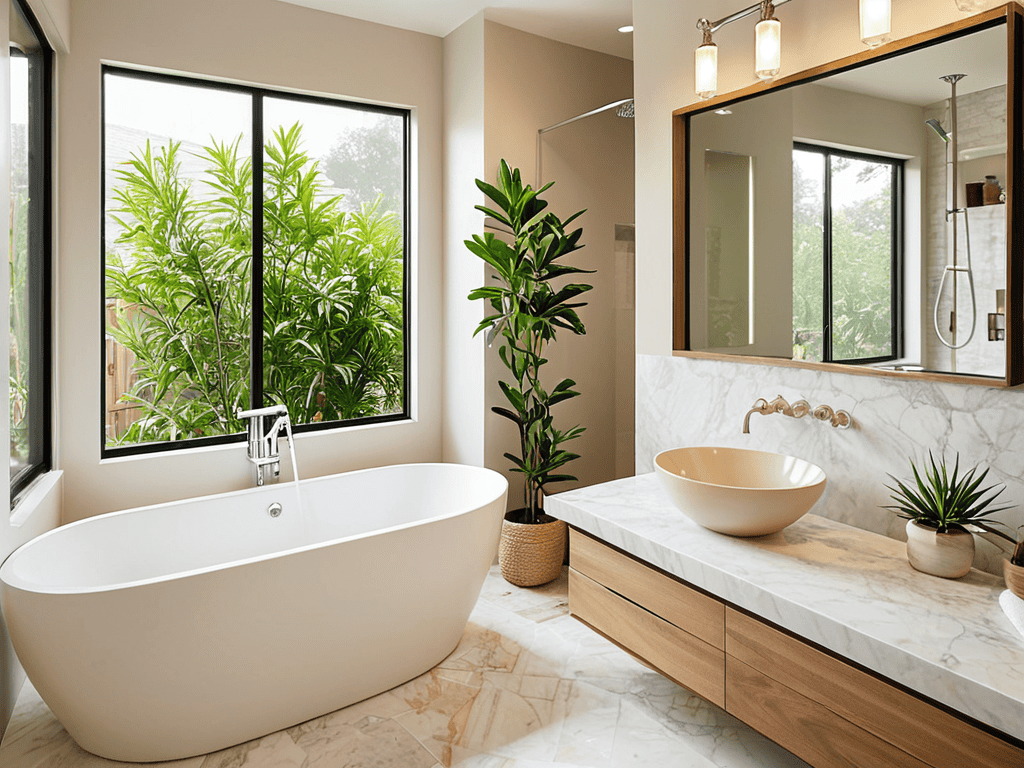
When it comes to modern bathroom decor ideas, lighting can make or break the ambiance. Consider installing new fixtures or updating your existing ones to create a brighter, more inviting space. Layered lighting is also a great way to add depth and visual interest to your bathroom. You can achieve this by combining overhead lighting with table lamps or sconces to create a warm and cozy glow. Additionally, don’t forget to incorporate some greenery, like a small potted plant or a vase with fresh flowers, to bring in a natural touch.
To take your bathroom to the next level, don’t overlook the importance of small bathroom storage solutions. Invest in a few clever storage units, like a wall-mounted cabinet or a over-the-toilet shelf, to keep your essentials within reach. You can also use waterproof bins to store items like towels, toiletries, or cleaning supplies, keeping them dry and organized. By implementing these tips, you’ll be well on your way to creating a bathroom that’s not only functional but also beautiful and relaxing.
Bathroom Renovation on a Budget Boom
As I was researching ideas for my own bathroom renovation, I stumbled upon a fantastic resource that I just can’t wait to share with you – and it’s all about exploring the local design scene. I was browsing through a website, `sexwien`, which led me to discover some amazing local artisans and designers who specialize in creating unique, handmade pieces that can add a touch of personality to any bathroom. From custom-made vanities to one-of-a-kind lighting fixtures, I found some truly inspiring ideas that I’m eager to incorporate into my own project, and I think you will too!
The thrill of renovation without breaking the bank! I’ve found that with a little creativity, you can achieve a high-end look without the hefty price tag. For me, it’s all about repurposing and upcycling – think old mason jars as vanity lighting or reclaimed wood for shelving. Not only does it add character, but it’s also eco-friendly and easy on the wallet. By getting crafty, you can stay within your budget and still end up with a bathroom that’s both stylish and functional.
I’ve had my fair share of budget-friendly wins, from refinishing old fixtures to making my own decorative tiles. It’s amazing how a little bit of paint and elbow grease can completely transform a space. Plus, the sense of accomplishment you’ll feel when it’s all done is priceless. So, don’t be afraid to think outside the box and get creative – your wallet (and the planet) will thank you!
Modern Bathroom Decor Ideas Unlocked
Now that we’ve unleashed the potential of DIY bathroom upgrades, let’s dive into the fun part – modern bathroom decor ideas. I’m talking sleek fixtures, bold colors, and textures that’ll make your bathroom feel like a luxurious retreat. For me, it’s all about mixing old and new, like pairing a vintage vanity with a modern faucet. And don’t even get me started on the power of plants – a little greenery can completely transform the ambiance of your bathroom.
I’ve seen some amazing makeovers that incorporate reclaimed wood, industrial lighting, and even handmade tiles. The key is to experiment and find what works for you. Whether you’re into minimalist chic or eclectic charm, the possibilities are endless. So, don’t be afraid to think outside the box and get creative with your bathroom decor – after all, it’s a space where you can truly relax and unwind.
5 Essential Tips to Nail Your DIY Bathroom Upgrade
- Start with a clear vision: before you begin demolition, gather inspiration and create a mood board to guide your design decisions
- Measure twice, cut once: take the time to accurately measure your space and materials to avoid costly mistakes and delays
- Get creative with repurposed materials: think outside the box and consider using reclaimed wood, vintage fixtures, or repurposed containers to add unique character to your space
- Don’t forget the details: pay attention to the little things like grout color, faucet finish, and lighting fixtures to bring your design together and create a cohesive look
- Be patient and flexible: DIY bathroom upgrades can be unpredictable, so be prepared to troubleshoot and adjust your plan as needed to ensure a successful and stress-free renovation
Key Takeaways to Revamp Your Bathroom
By embracing DIY bathroom upgrades, you can transform your space into a relaxing oasis without breaking the bank, using creative solutions like repurposing old furniture or upcycling materials
With a little creativity and some elbow grease, you can unlock modern bathroom decor ideas that reflect your personality, from statement lighting to bold color schemes, making your bathroom a true reflection of your style
Whether you’re on a budget or looking to splurge, DIY bathroom upgrades offer the freedom to experiment, get hands-on, and turn your vision into a reality, making the renovation process an enjoyable and empowering experience
The DIY Difference
When you build it with your own hands, every tile, every fixture, and every detail tells a story of who you are and what you value – that’s what makes a DIY bathroom upgrade so much more than just a renovation, it’s a reflection of you.
Tom Navarro
Wrapping Up Your DIY Bathroom Upgrade
As we’ve explored the world of DIY bathroom upgrades, it’s clear that with a little creativity and some elbow grease, you can transform your space into a relaxing oasis. From budget-friendly renovations to unlocking modern decor ideas, the key is to have fun and make the space truly yours. Whether you’re looking to increase your home’s value or simply want to enjoy a more peaceful bathing experience, the steps outlined here are designed to be accessible and achievable, even for those new to DIY projects.
So, as you put down your tools and step back to admire your handiwork, remember that the true beauty of DIY lies not just in the end result, but in the journey of creation itself. It’s about embracing your inner maker, experimenting with new ideas, and enjoying the process of turning your house into a home, one DIY project at a time. With your newly upgraded bathroom, you’ll not only have a more beautiful and functional space, but also a sense of pride and accomplishment that comes from knowing you made it all happen with your own two hands.
Frequently Asked Questions
What are some creative ways to repurpose old bathroom materials to save money and reduce waste?
I love breathing new life into old materials. For a bathroom revamp, consider repurposing vintage windows as mirrors, transforming old tubs into planters, or upcycling broken tiles into mosaic art. Get creative and give those discarded gems a second chance – your wallet and the planet will thank you!
How can I ensure my DIY bathroom upgrades are safe and meet local building codes?
Safety first, my friend! Before you start demo-ing, check with your local government for building codes and permits required. I like to think of it as a pre-game warm-up – gets you ready for a successful renovation. Trust me, it’s worth the extra step to avoid any headaches down the line.
What are some tips for choosing the right fixtures and finishes to match my bathroom's unique style and era?
For a killer combo, choose fixtures and finishes that vibe with your bathroom’s era – think vintage faucets for a retro look or sleek, low-profile handles for a modern feel. Don’t be afraid to mix and match, and remember, the finishes should complement each other, like brass and marble or chrome and glass.