
I still remember the first time I made ravioli from scratch – it was a game-changer. I had always been intimidated by the idea of making filled pasta, but after diving into the world of artisanal production, I discovered that it’s not as daunting as it seems. In fact, I believe that anyone can create delicious, homemade ravioli with the right guidance. That’s why I’m excited to share my take on a guide to making filled pasta like ravioli, and show you that it’s easier than you think to get started.
In this article, I’ll be sharing my no-nonsense approach to making filled pasta, including tips and tricks I’ve learned from my experience as a former craft cocktail bartender and current DIY food blogger. You can expect to learn the basics of making ravioli from scratch, from selecting the right ingredients to mastering the perfect filling. I’ll also be sharing some of my favorite recipes and techniques for creating unique and delicious flavor combinations. By the end of this guide, you’ll be equipped with the knowledge and confidence to start making your own amazing filled pasta at home, and I’m excited to be a part of your culinary journey.
Table of Contents
Guide Overview: What You'll Need
Total Time: 2 hours 30 minutes
Estimated Cost: $20 – $40
Difficulty Level: Intermediate
Tools Required
- Rolling Pin for rolling out pasta dough
- Pasta Cutter or a sharp knife
- Round Cookie Cutter or a ravioli cutter
- Colander for drying freshly made pasta
Supplies & Materials
- All-Purpose Flour 2 cups
- Eggs 2 large eggs
- Salt 1 teaspoon
- Water 1 cup
- Filling Ingredients e.g., ricotta cheese, ground beef, spinach
- Olive Oil for preventing pasta from sticking
Step-by-Step Instructions
- 1. First, let’s start with the foundation of our ravioli: the dough. To make it, you’ll need to combine warm water, flour, eggs, and a pinch of salt in a large mixing bowl. I like to use a stand mixer with a dough hook attachment to make the process easier, but you can also do it by hand if you’re feeling adventurous.
- 2. Now that we have our ingredients mixed together, it’s time to knead the dough. This is where the magic happens, and your dough starts to come together. I recommend kneading for at least 10 minutes, until the dough becomes smooth and elastic. You can do this by hand or using your stand mixer with the dough hook attachment.
- 3. While our dough is resting, let’s prepare the filling. For this recipe, we’ll be using a classic combination of ricotta cheese, parmesan cheese, and fresh parsley. I like to add a pinch of nutmeg to give it an extra kick. Simply mix all the ingredients together in a bowl until you get a smooth, creamy consistency.
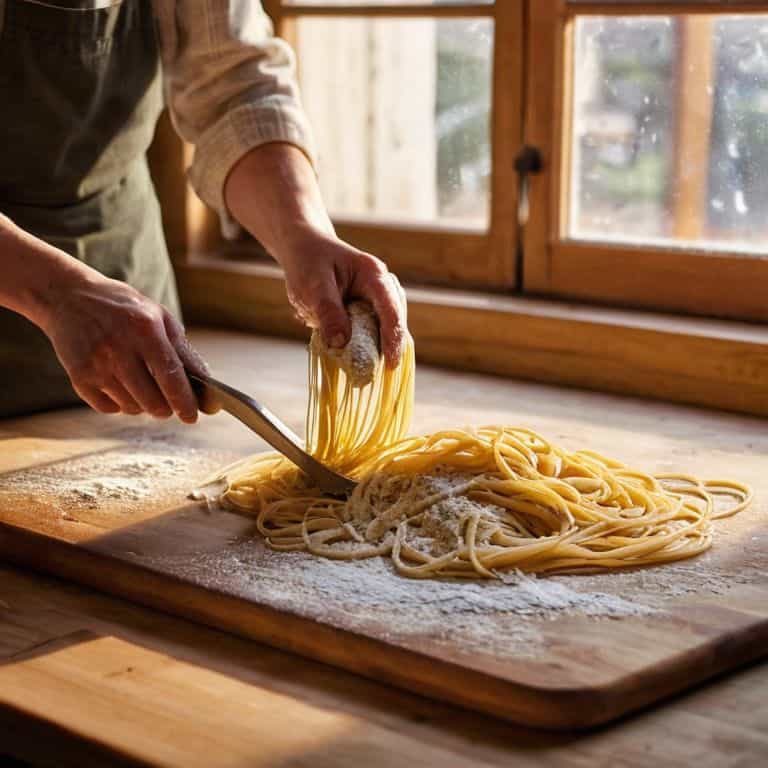
- 4. Now it’s time to roll out the dough. Divide the dough into 4 equal pieces and use a pasta machine or a rolling pin to roll out each piece into a thin sheet. I like to aim for a thickness of about 1/16 inch, so that our ravioli is delicate but still holds its shape.
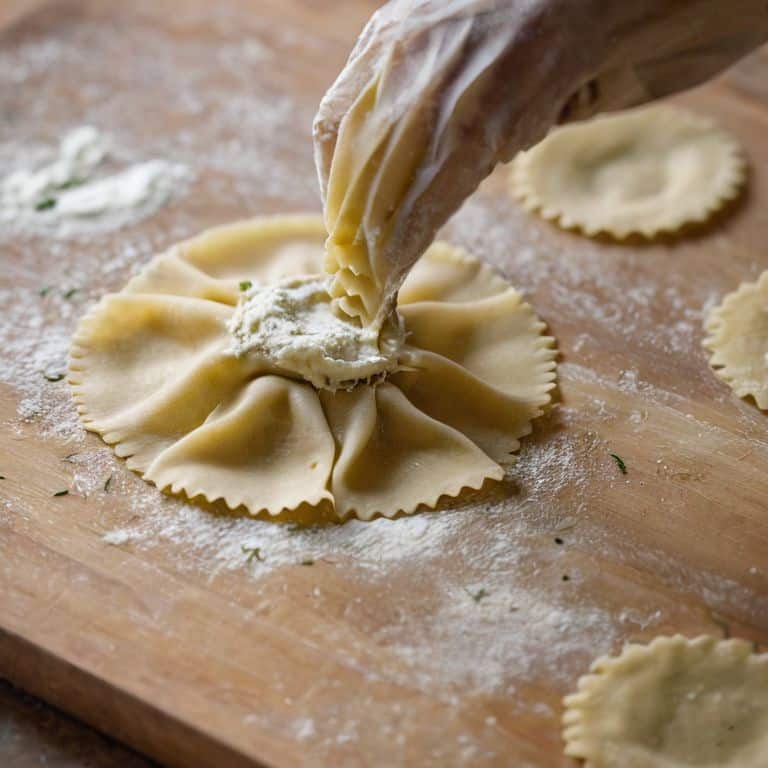
- 5. With our dough rolled out, it’s time to create the ravioli shapes. You can use a ravioli cutter or a glass to cut out the shapes. I like to use a round cutter, so that my ravioli looks like little circles of joy. Simply place a small spoonful of the filling in the center of each shape, and then fold the dough over to create a seal.
- 6. To make sure our ravioli is sealed tight, I like to use a little bit of water to help the dough stick together. Simply dip your finger in water and run it along the edge of the dough, and then press the edges together to create a tight seal.
- 7. Now that we have our ravioli shaped and sealed, it’s time to cook them. Bring a large pot of salted water to a boil, and then gently add the ravioli to the pot. I like to cook them for about 3-5 minutes, until they float to the surface. Use a slotted spoon to remove them from the water, and then serve with your favorite sauce.
Ravioli Revolution
As I continue to experiment with homemade ravioli filling ideas, I’ve come to realize that the possibilities are endless. From classic combinations like ricotta and spinach to more adventurous pairings like butternut squash and sage, the key is to find flavors that complement each other. I’ve also found that using a pasta dough recipe from scratch makes all the difference in the world – the texture and taste are far superior to store-bought alternatives.
When it comes to assembling the ravioli, tips for sealing ravioli are essential to prevent them from opening up during cooking. I’ve learned that a gentle touch and a pinch of patience can go a long way in ensuring that my ravioli stay intact. Additionally, experimenting with different cooking methods for filled pasta has allowed me to discover new textures and flavors – from pan-frying to boiling, each method yields a unique result.
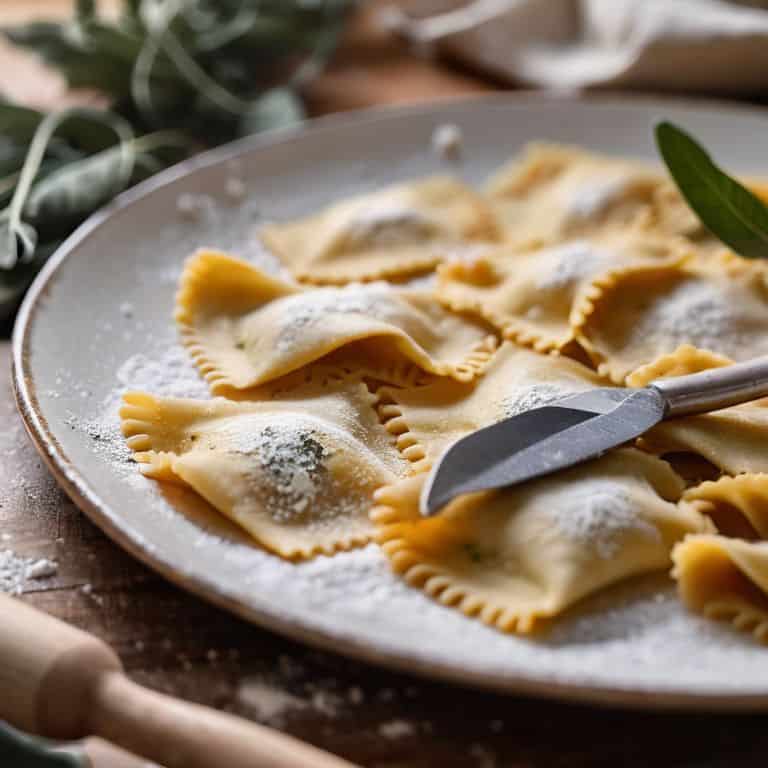
As I delve deeper into the world of traditional Italian ravioli recipes, I’m constantly inspired by the simplicity and elegance of these dishes. By avoiding common mistakes in making ravioli, such as overworking the dough or overfilling the pockets, I’ve been able to create truly delicious and authentic ravioli that rival those found in Italian restaurants. With practice and patience, anyone can become a ravioli master and enjoy the satisfaction of creating traditional italian ravioli recipes from scratch.
Homemade Filling Ideas Unleashed
Now that we’ve sparked the Ravioli Revolution, it’s time to unleash the fun part – creating your own signature fillings. I love experimenting with unexpected combos, like sweet potato and sage or caramelized onion and blue cheese. The key is to balance flavors and textures, so don’t be afraid to think outside the box (or pasta mold).
Try pairing roasted vegetables with fresh herbs, or mixing creamy cheeses with spicy meats. Remember, the beauty of homemade ravioli lies in its endless possibilities, so get creative and make it your own. What’s your dream filling combination?
Tips for Sealing Pasta Perfection
To seal your ravioli like a pro, remember it’s all about the press. You want to make sure the edges are tight, with no air pockets to let the filling escape. I like to use a combination of my fingers and a fork to get the job done. Press those edges firmly, but gently – you don’t want to squeeze out the filling. And don’t be afraid to get a little creative with your seal; a simple press or a decorative crimp can make all the difference in the presentation of your finished pasta.
When sealing, I always say, ‘feel it out.’ Don’t overthink it – just let your fingers guide you. With a little practice, you’ll be sealing like a pasta pro in no time.
Mastering the Art of Ravioli: 5 Essential Tips
- Use fresh, seasonal ingredients to create vibrant and bold fillings that will elevate your ravioli to the next level
- Experiment with different types of pasta dough, such as whole wheat or spinach-infused, to add depth and nutrition to your dish
- Don’t overwork the dough – a gentle touch is key to creating tender, delicate ravioli that will cook evenly and retain their shape
- Invest in a good pasta cutter or ravioli mold to help you achieve uniform shapes and sizes, making the cooking process much easier
- Don’t be afraid to think outside the box when it comes to fillings – try using roasted vegetables, caramelized onions, or even spicy sausage to create unique and mouth-watering flavor combinations
Key Takeaways for a Ravioli Revolution
Embracing the art of homemade filled pasta means experimenting with fresh, seasonal ingredients to create unique and delicious fillings that reflect your personal taste
Mastering the technique of sealing your ravioli is crucial, and it’s all about finding the right balance between filling generosity and seal integrity to ensure your pasta stays intact during cooking
With practice and patience, you can unleash your own ravioli revolution, filling your pantry with an assortment of handmade, cheese-filled, herb-infused, and creatively stuffed pasta that will elevate any meal into a culinary masterpiece
The Heart of Homemade Pasta
When you make filled pasta like ravioli from scratch, you’re not just crafting a meal, you’re weaving a story of love, tradition, and the simple joy of getting your hands dirty with the people and ingredients you love.
Tom Navarro
Wrapping Up the Ravioli Revolution
As we conclude this journey into the world of filled pasta, let’s recap the key elements that make homemade ravioli truly special. From the initial steps of mixing and kneading the dough, to the creative process of crafting your own fillings, and finally to the delicate art of sealing each piece to perfection, every step is an opportunity to infuse your personality into the dish. We’ve also explored the importance of experimentation and seasonal ingredients in creating unique and captivating flavor profiles. Whether you’re a seasoned chef or a curious beginner, the process of making ravioli from scratch is a rewarding experience that connects us to our food and to the people we share it with.
As you embark on your own ravioli-making adventures, remember that the true beauty of this craft lies not just in the end result, but in the journey itself. Don’t be afraid to get a little messy, to try new things, and to make mistakes – for it’s in these moments that we discover our own culinary voice. So go ahead, fill your kitchen with the warmth and aroma of freshly made pasta, and let the joy of creation be your guide as you unleash your own ravioli revolution, one delicious, handmade piece at a time.
Frequently Asked Questions
What are some common mistakes to avoid when sealing ravioli to prevent them from opening up during cooking?
Ah, the sealing struggle is real! To avoid ravioli opening up, don’t overfill them, and make sure to press out excess air. Use a gentle but firm touch to seal the edges, and try using a little water to help the pasta stick together. I also like to use a fork to crimp the edges – it’s an old trick, but it works like a charm!
How can I ensure that my homemade ravioli dough is the right consistency for stuffing and cooking?
For me, it’s all about feel – I like my ravioli dough to be smooth, pliable, and slightly firm to the touch. Think of it like playdough, but not too sticky. If it’s too dry, it’ll crack; too wet, it’ll be a mess. Get in there with your hands, add a pinch of flour or a dash of egg, and knead until it feels just right – then you’re golden!
Are there any specific filling ingredients or combinations that pair particularly well with certain types of sauce or seasoning?
Ah, my friend, that’s where the magic happens! I love pairing rich, meaty fillings with bold tomato sauces, while delicate cheese fillings shine with light, herby sauces. And don’t even get me started on the beauty of matching earthy mushroom fillings with truffle oil – it’s a match made in heaven!