I still remember the first time I tried to store my homemade pasta – it was a disaster. I had spent hours kneading and rolling out the dough, only to have it turn into a soggy, unusable mess after a few days. I soon learned that how to dry homemade pasta for storage is just as important as making it from scratch. The common myth that you need a fancy dehydrator or a lot of special equipment to dry your pasta is simply not true. With a few simple tricks and techniques, you can enjoy your handmade creations for weeks to come.
As someone who’s passionate about experimenting with new recipes and ingredients, I’ve learned that drying homemade pasta is an art that requires patience, attention to detail, and a bit of creativity. In this article, I’ll share my no-nonsense approach to drying homemade pasta for storage, including tips on how to prevent moisture from building up and how to store your pasta to preserve its flavor and texture. You’ll learn how to turn your freshly made pasta into a delicious staple that you can enjoy all year round, without any fancy equipment or complicated processes. By the end of this guide, you’ll be equipped with the knowledge and confidence to dry your homemade pasta like a pro and enjoy the fruits of your labor for months to come.
Table of Contents
Guide Overview: What You'll Need
Total Time: 2 hours 30 minutes
Estimated Cost: $10 – $20
Difficulty Level: Easy
Tools Required
- Clean Towels (for drying)
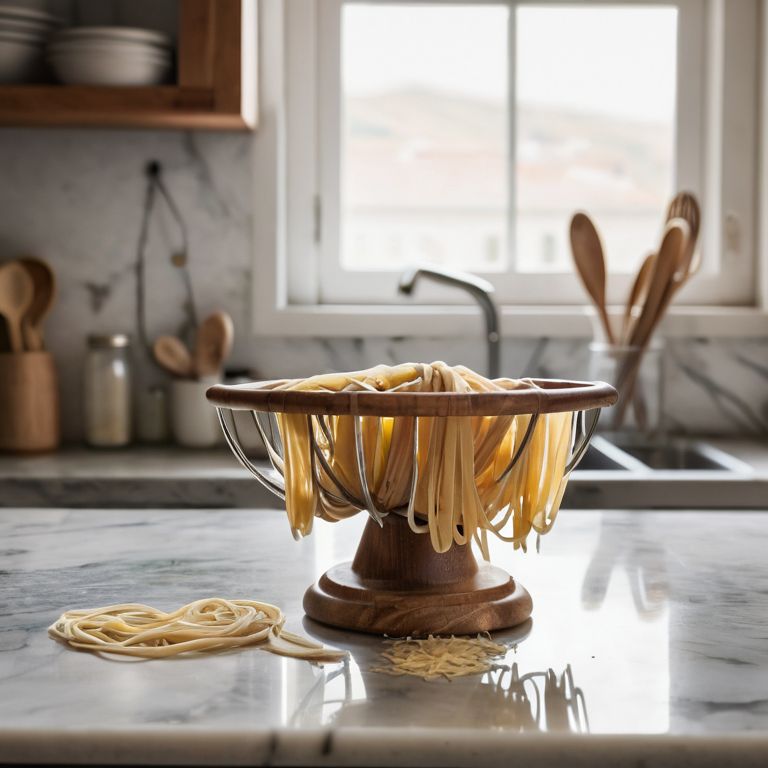
- Pasta Drying Rack (or a clean broom handle)
- Tray or Tray Table (for holding pasta shape during drying)
- Fan (optional, for speeding up drying process)
Supplies & Materials
- Homemade Pasta (freshly made)
- Wax Paper or Parchment Paper (for lining tray or tray table)
- Twine or Clean String (for hanging pasta to dry, if necessary)
Step-by-Step Instructions
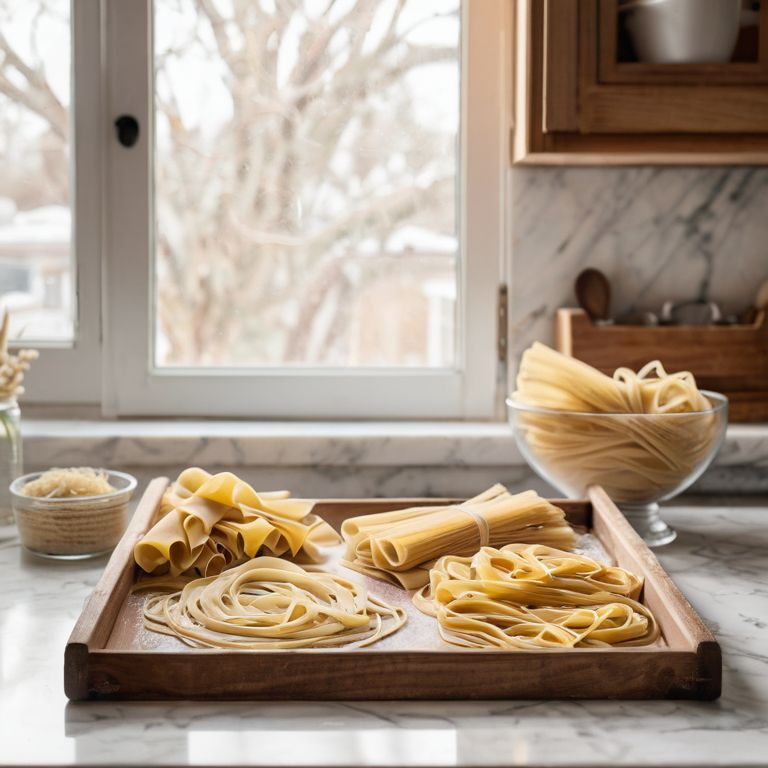
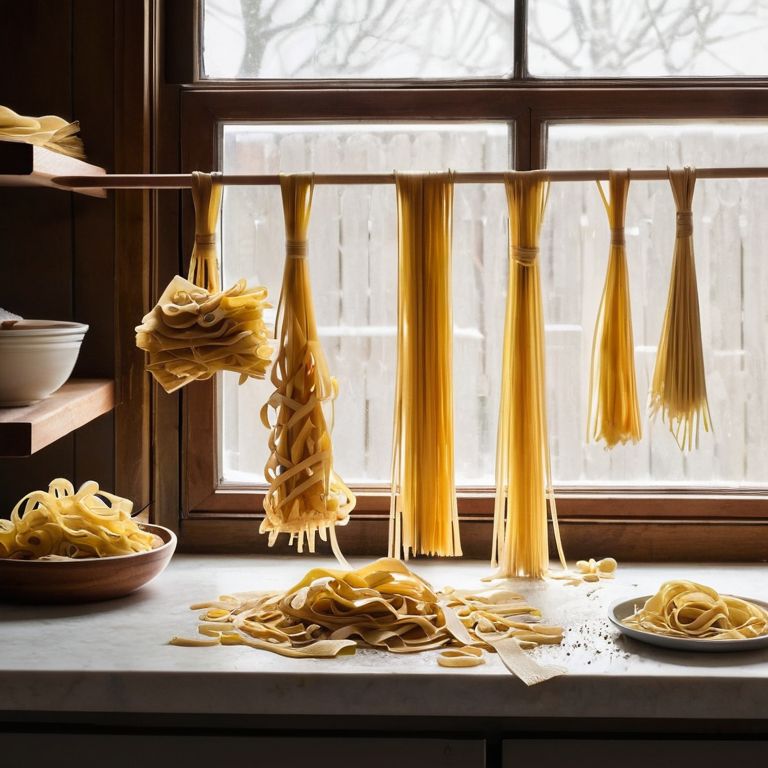
- 1. First, lay out your freshly made pasta on a clean, dry surface, like a kitchen towel or a pasta drying rack. I like to think of this step as the beginning of a beautiful friendship between you and your homemade pasta – you’re giving it the space it needs to become the perfect companion for your favorite sauces.
- 2. Next, gently separate the individual strands of pasta to prevent them from sticking together. This is a crucial step, as you want to make sure each piece of pasta has enough airflow to dry evenly. I usually do this by hand, as it gives me a chance to inspect each piece and make sure everything is perfect.
- 3. Now, allow the pasta to air dry for at least 30 minutes to an hour. This step is all about patience – you want to give the pasta enough time to release any excess moisture, making it easier to store. I like to use this time to tidy up my kitchen, or start prepping for my next project – like a fresh batch of homemade pickles.
- 4. After the initial drying time, you can start to gather and shape the pasta into more manageable portions. I usually divide my pasta into smaller batches, depending on how much I think I’ll need for a single meal. This makes it easier to store and helps prevent the pasta from getting tangled or broken.
- 5. To take your pasta drying game to the next level, try using a dehydrator or a low-temperature oven to speed up the drying process. I’ve found that setting my dehydrator to 135°F (57°C) for a few hours does the trick perfectly. Just be sure to check on the pasta periodically to avoid over-drying – you want it to retain a bit of moisture to stay fresh.
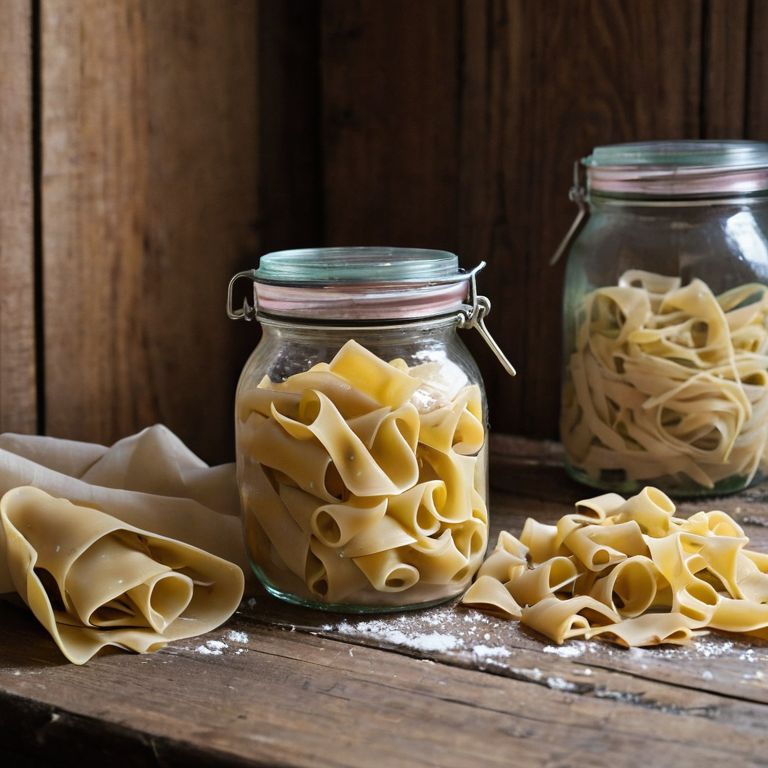
- 6. Once your pasta is completely dry, you can store it in airtight containers to keep it fresh for weeks to come. I like to use glass jars or paper bags, as they allow the pasta to breathe and maintain its texture. Be sure to label each container with the date and type of pasta, so you can keep track of your creations.
- 7. Finally, take a step back and admire your handiwork – you’ve successfully dried and stored your homemade pasta, and you’re one step closer to becoming a pasta-making master. I like to think of this step as the most rewarding part of the process – you get to enjoy the fruits of your labor, and share your creations with friends and family.
Drying Pasta Like a Pro
As I’ve experimented with different pasta drying rack alternatives, I’ve found that a simple wire hanger can work wonders in a pinch. Just shape it into a makeshift rack and you’re good to go. When it comes to storing your freshly dried pasta, homemade pasta storage containers can be as simple as a glass jar with a tight-fitting lid. I like to add a paper packet of silica gel to keep things extra dry.
The effect of humidity on pasta drying is something to consider, especially if you live in a particularly damp climate. To combat this, I recommend drying your pasta in a warm, dry spot – like a sunny windowsill or a low-temperature oven with the door ajar. This will help speed up the drying process and prevent any unwanted moisture from seeping in.
For tips for drying delicate pasta shapes, I always say that a little patience goes a long way. Take your time when handling these more fragile shapes, and consider drying them on a cloth or paper towel to prevent breakage. With a bit of practice, you’ll be a pro at drying even the most delicate pasta shapes in no time.
Pasta Drying Rack Alternatives to Try
Now, I know not everyone has a fancy pasta drying rack, and that’s totally okay. I’ve been there too, getting creative with makeshift solutions. You can use a clean towel or a sheet of parchment paper to lay out your freshly made pasta, making sure to leave some space between each piece to prevent sticking. Alternatively, a wire hanger or a wooden skewer can become a makeshift drying rack – just get inventive and have fun with it!
Tips for Long Term Homemade Pasta Storage
To keep your homemade pasta fresh for months, store it in airtight containers with paper bags or paper towels to absorb moisture. I like to think of it as giving my pasta a cozy little home. For added protection, consider adding a food-grade desiccant packet or a few silica gel packets to the container. This will help maintain a dry environment, perfect for long-term storage.
When storing, keep your containers in a cool, dark place, like a pantry or cupboard. I’ve found that my handmade pantry shelves, crafted from reclaimed wood, provide the perfect spot for my pasta stash. Just remember, the key is to keep it dry and cool – you’ll be enjoying your homemade creations for weeks to come!
My Top 5 Tips for Drying Homemade Pasta like a Pro
- Ditch the colander: instead of using a colander to dry your pasta, try laying it out on a clean towel or sheet to prevent it from getting tangled and to help it dry faster
- Add a fan to the mix: if you’re drying a large batch of pasta, try setting up a fan to gently blow air over it – this will help speed up the drying process and prevent moisture from building up
- Don’t over-dry: it’s easy to get carried away and over-dry your pasta, but this can make it brittle and prone to breaking – aim for a gentle dryness that still retains some flexibility
- Store it in a cool, dark place: once your pasta is dry, store it in an airtight container in a cool, dark place – like a pantry or cupboard – to keep it fresh for weeks to come
- Label and date your stash: as you build up your pasta stash, be sure to label and date each container so you can keep track of what you’ve got and how long it’s been stored – this will help you use up the oldest pasta first and keep your stash fresh and rotated
Homemade Pasta Drying Essentials
Dry your homemade pasta immediately after cutting to prevent it from sticking together, and aim for a drying time of at least 24 hours for optimal results
Get creative with your pasta drying rack – from repurposed clothes drying racks to DIY setups using cardboard and twine, the key is to allow for good airflow and even drying
Proper storage is just as important as drying – store your dried homemade pasta in airtight containers, keep them in a cool, dry place, and enjoy your creations for weeks to come
The Art of Pasta Preservation
Drying homemade pasta is not just about storing it, it’s about preserving a moment in time – the taste, the texture, the love that went into crafting each delicate strand, and being able to relive that moment whenever you want.
Tom Navarro
Drying Homemade Pasta to Perfection: A Rewarding Journey
As we’ve explored the world of drying homemade pasta, I hope you’ve picked up on a few key takeaways: the importance of a clean and dry environment, the role of a good pasta drying rack, and some handy alternatives to try. Whether you’re using a traditional rack or getting creative with a makeshift solution, the goal is the same – to preserve your delicious handmade creations for weeks to come. By following these simple steps and tips, you’ll be well on your way to mastering the art of pasta drying, and enjoying your favorite dishes all year round.
So, the next time you find yourself with a batch of freshly made pasta, don’t be afraid to get a little experimental and try out some new drying techniques. Remember, the process of creating something with your own hands is just as important as the end result, and the sense of accomplishment you’ll feel when you sit down to enjoy a meal made with your very own homemade pasta is truly unbeatable. Happy cooking, and don’t forget to save me some of those delicious pasta dishes!
Frequently Asked Questions
Can I dry homemade pasta in a dehydrator or oven if I don't have a drying rack?
Absolutely, you can use a dehydrator or oven to dry your homemade pasta – I’ve done it myself in a pinch. Just set your dehydrator to its lowest temperature setting or your oven to its lowest heat with the door slightly ajar, and you’re golden. It’s not the most conventional method, but it gets the job done!
How long does it typically take for homemade pasta to dry completely, and how do I know it's ready for storage?
Drying time varies, but typically it’s 24-48 hours. I like to check by breaking a piece in half – if it snaps cleanly, it’s ready. If not, give it a bit more time. Trust your instincts, and remember, it’s all about feel, just like when I’m measuring out ingredients for my famous pickled veggies!
Will drying homemade pasta affect its texture or flavor when I cook it, and are there any special considerations for different types of pasta?
Don’t worry, drying your homemade pasta won’t compromise its texture or flavor – if done right! The key is to dry it slowly and gently. Different types of pasta, like delicate egg noodles or hearty pappardelle, might require slightly different handling, but the end result will still be amazingly fresh and full of character.