
I still remember the first time I attempted to cook the perfect steak. I was a young bush pilot in Alaska, and after a long day of flying, I wanted to treat myself to a nice dinner. But let me tell you, it was a disaster. The steak was overcooked, tough, and tasted more like leather than a tender piece of meat. I soon realized that cooking a perfect steak is not just about throwing it on the grill, but about understanding the fundamentals of heat, timing, and technique. As a flight instructor, I’ve learned that breaking down complex topics into simple, manageable steps is key to success. And that’s exactly what I’ll do in this guide on how to cook the perfect steak.
In this article, I’ll share my no-nonsense approach to cooking the perfect steak. You won’t find any fancy recipes or complicated techniques here. Instead, I’ll walk you through a step-by-step process that’s easy to follow and guarantees a delicious result. You’ll learn how to choose the right cut of meat, prepare it for cooking, and master the art of timing to achieve a perfect medium-rare. By the end of this guide, you’ll be confident in your ability to cook a steak that’s tender, juicy, and full of flavor. So, let’s get started and take your steak-cooking skills to new heights.
Table of Contents
Guide Overview: What You'll Need

Total Time: 45 minutes to 1 hour
Estimated Cost: $15 – $30
Difficulty Level: Intermediate
Tools Required
- Cast Iron Skillet or other oven-safe skillet
- Tongs for flipping steak
- Oven Mitts for handling hot skillet
- Meat Thermometer for checking internal temperature
Supplies & Materials
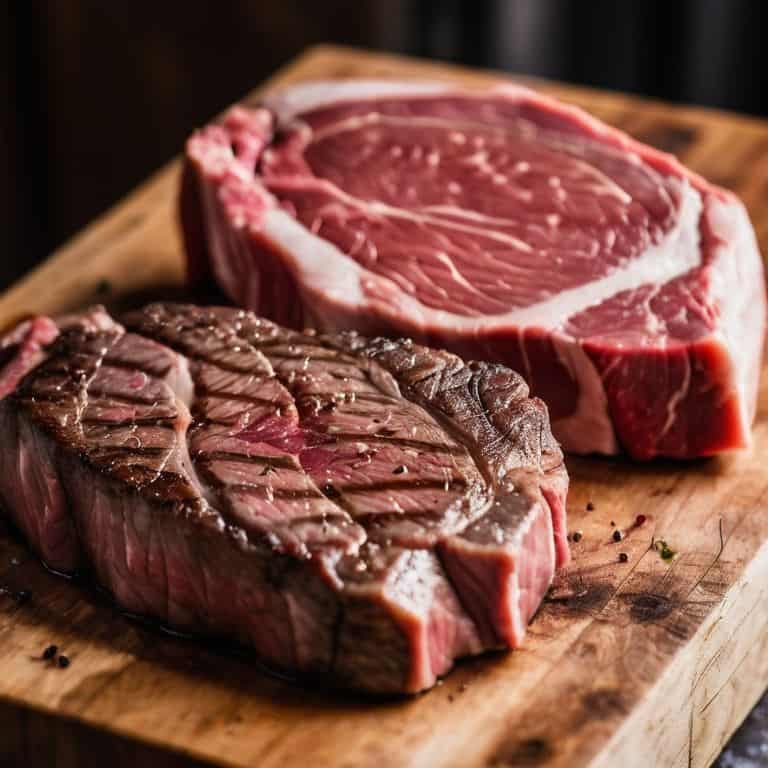
- Steak preferably 1 to 1.5 inches thick, ribeye or strip loin
- Olive Oil for coating steak
- Salt for seasoning
- Pepper for seasoning
- Butter optional, for serving
Step-by-Step Instructions
- 1. First, let’s start with the pre-flight checklist for our steak. This means selecting the right cut of meat for the job. I recommend a nice ribeye or strip loin, as they have a good balance of marbling and tenderness. Take your time to choose a steak that’s at least 1-1.5 inches thick, which will help it cook more evenly.
- 2. Next, we need to prepare our steak for takeoff. This involves bringing it to room temperature, which helps the steak cook more consistently. Remove the steak from the refrigerator and let it sit for about 30-45 minutes before cooking. While we’re waiting, let’s get our seasoning ready – a simple mix of salt, pepper, and any other herbs you like will do the trick.
- 3. Now it’s time to fuel up our cooking method. I’m a big fan of grilling or pan-searing for a perfect steak, as both methods allow for a nice crust to form on the outside. Preheat your grill or skillet to high heat, and make sure it’s clean and dry before adding any oil. For a pan, I like to use a small amount of neutral oil with a high smoke point, such as avocado or grapeseed oil.
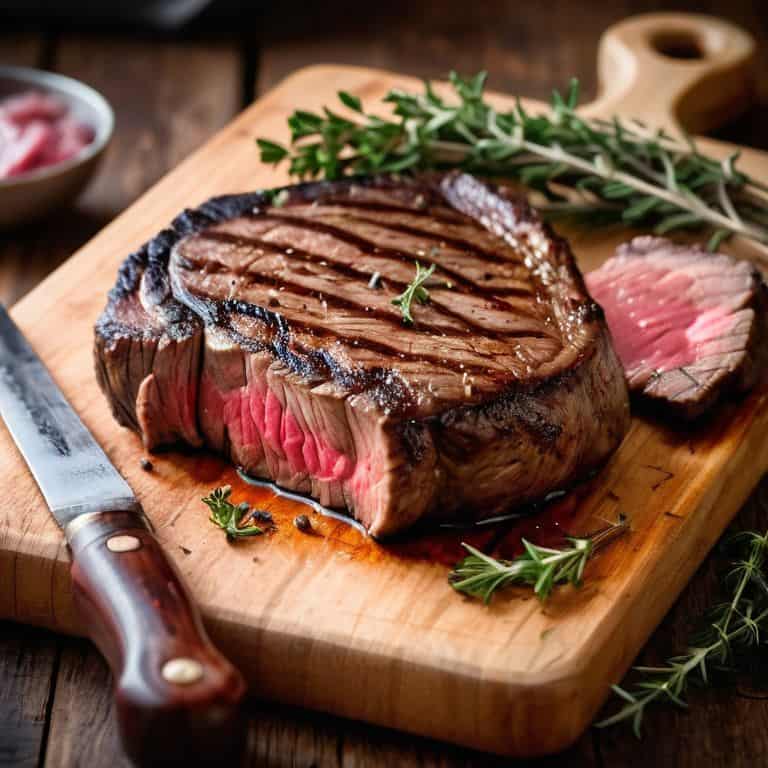
- 4. With our cooking method ready, it’s time to take off – or in this case, add the steak to the grill or pan. If you’re grilling, place the steak at a 45-degree angle to get those nice grill marks. If you’re using a pan, add the steak and let it sear for 2-3 minutes on the first side, depending on the thickness. You want to get a nice crust forming, but not burn the steak.
- 5. After the initial sear, it’s time to level off and finish cooking the steak. If grilling, flip the steak over and cook for an additional 5-7 minutes for medium-rare, or until it reaches your desired level of doneness. If using a pan, flip the steak and reduce the heat to medium-low, cooking for an additional 5-10 minutes, or until it reaches your desired level of doneness. Use a meat thermometer to check the internal temperature – 130-135°F for medium-rare, 140-145°F for medium, and 150-155°F for medium-well.
- 6. Once the steak is cooked to your liking, it’s time to begin descent and let it rest. Remove the steak from the heat and place it on a plate or cutting board, tenting it with foil to keep it warm. Let the steak rest for 5-10 minutes, which allows the juices to redistribute and the steak to retain its tenderness. This is an important step, as it helps the steak stay juicy and flavorful.
- 7. Finally, it’s time to land and serve our perfectly cooked steak. Slice the steak against the grain, using a sharp knife to make clean cuts. Serve the steak with your choice of sides, such as roasted vegetables, mashed potatoes, or a fresh salad. Take a step back and admire your handiwork – you’ve successfully navigated the flight plan for a perfect steak!
Navigating Perfect Steak
As we navigate the world of perfect steak, it’s essential to consider the best steak cuts for grilling. A well-chosen cut can make all the difference in achieving that perfect balance of tenderness and flavor. For beginners, I recommend starting with a classic ribeye or strip loin. These cuts are not only delicious but also relatively forgiving, allowing for a bit of flexibility in steak cooking techniques for beginners.
When it comes to indoor steak cooking, a good steak marinade recipe can be a game-changer. A well-crafted marinade can help tenderize the steak, adding depth and complexity to the flavor profile. I like to keep my marinades simple, using a combination of olive oil, garlic, and herbs to create a rich, savory flavor. By allowing the steak to soak in the marinade for a few hours, you can ensure a truly tender and juicy final product.
To take your steak game to the next level, don’t forget to pay attention to perfect steak serving temperatures. A perfectly cooked steak should be served at a temperature that allows the juices to flow freely, creating a truly indulgent experience. Whether you’re grilling or cooking indoors, a good steak knife is essential for slicing and serving. Be sure to keep your knife sharp, using steak knife sharpening tips to maintain a razor-sharp edge.
Best Cuts for Grilling Mastery
When it comes to grilling, the right cut of steak can make all the difference. I like to think of it as choosing the right aircraft for the mission – you need the right tools to get the job done. For grilling mastery, I recommend opting for cuts like ribeye, sirloin, or flank steak. These cuts are like the trusty Cessna 172 of steaks – reliable, versatile, and always a crowd-pleaser.
Just as a good pre-flight check ensures a smooth flight, selecting the right cut of steak sets you up for success. Look for cuts with a good balance of marbling and tenderness. This will ensure a juicy, flavorful steak that’s sure to impress. Remember, the key to grilling mastery is to keep it simple and focus on the fundamentals – just like navigating through calm skies.
Steak Cooking Techniques Simplified
As we navigate the flight plan for the perfect steak, let’s simplify the cooking techniques. Just like plotting a course through calm skies, we can break down the cooking process into manageable steps. I always tell my students that a smooth landing starts with a solid takeoff, and in this case, that means understanding the basics of heat control and cooking times.
By focusing on these fundamentals, you’ll be able to adjust your approach to suit the specific cut of steak you’re working with, much like adjusting your flight plan for changing weather conditions. Remember, it’s all about finding that sweet spot where the steak is cooked to perfection, just like finding the optimal altitude for a smooth flight. With practice, you’ll be able to navigate the cooking process with ease, and your steaks will be consistently delicious.
Flight Plan for Steak Perfection: 5 Key Tips
- Pre-Heat Your Runway: Ensure your grill or skillet is at the right temperature before taking off with your steak
- Choose Your Aircraft: Select the right cut of steak for your cooking method, just as you would choose the right plane for your flight plan
- Navigate the Weather: Keep an eye on the steak’s internal temperature to avoid turbulence and achieve perfect doneness
- Maintain Altitude: Don’t press down on the steak with your spatula, as this can cause it to lose its altitude and become tough
- Land Smoothly: Let the steak rest for a few minutes after cooking to allow the juices to redistribute, just as a plane needs time to taxi to the gate after landing
Key Takeaways for Cooking the Perfect Steak
Understand your aircraft, or in this case, your steak: knowing the type of steak you’re working with is crucial, just like understanding your plane’s capabilities before takeoff
Plot your flight plan, or cooking technique: whether you’re grilling, pan-searing, or using another method, having a clear plan will help you navigate to a perfectly cooked steak
Monitor your instruments, or in this case, your steak’s temperature: keeping a close eye on the internal temperature of your steak will ensure it lands safely in the zone of perfect doneness, just like a pilot monitoring their gauges for a smooth landing
Flying High in the Kitchen
Just as a steady hand and a clear mind are essential for navigating through turbulence, a calm approach and a deep understanding of the fundamentals are crucial for cooking the perfect steak – it’s all about finding the right altitude and sticking to your flight plan.
Daniel Sato
Landing the Perfect Steak
As we touch down on our journey to cooking the perfect steak, let’s do a quick systems check. We’ve covered the essential steps, from pre-flight preparations to navigating the turbulence of temperatures. We’ve also explored the best cuts for grilling mastery and simplified steak cooking techniques. By following these fundamental principles, you’ll be well on your way to becoming a steak-cooking expert. Remember, practice makes perfect, so don’t be discouraged if it takes a few attempts to get it just right.
Now, as you embark on your own steak-cooking adventures, keep in mind that the key to success lies in attention to detail and a willingness to learn. Just like a pilot must stay focused and adapt to changing conditions, you too can navigate the world of steak cooking with confidence and precision. So go ahead, take to the skies – or rather, the grill – and remember that with every perfectly cooked steak, you’re not just feeding your family and friends, you’re sharing a piece of yourself and the joy of precision cooking.
Frequently Asked Questions
What's the ideal internal temperature for a perfect steak?
Ah, the ideal internal temperature – think of it as your desired altitude. For a perfect steak, you’re aiming for 130-135°F for medium-rare, 140-145°F for medium, and 150-155°F for medium-well. Remember, just like navigating through turbulence, a little patience and precision go a long way in achieving that perfect landing… or in this case, that perfect steak.
How do I prevent my steak from becoming tough or overcooked?
To avoid a tough or overcooked steak, think of it like navigating through turbulence – you need to be gentle and attentive. Don’t overhandle the steak, and use a thermometer to check internal temperatures, just like checking your altimeter to ensure a smooth landing.
Can I achieve a perfect steak using a pan on the stovetop, or is grilling the only way to go?
Absolutely, you can achieve a perfect steak on the stovetop. Think of it like navigating through instrument meteorological conditions – you need to rely on your instruments, in this case, a good pan and thermometer. A hot skillet can mimic the high heat of a grill, and with the right technique, you can get a beautiful sear and a tender interior.