I still remember the first time I attempted to make goat cheese (chèvre) – it was a disaster. I had heard it was a complicated process, requiring precise temperatures and expensive equipment. But as I delved deeper into the world of artisanal cheese-making, I discovered that this couldn’t be further from the truth. In fact, learning how to make goat cheese (chèvre) is surprisingly straightforward, and with a few simple ingredients and some patience, you can create a delicious, tangy cheese that’s perfect for snacking or sharing.
As someone who’s passionate about experimenting with new flavors and techniques, I’m excited to share my approach to making goat cheese (chèvre) with you. In this article, I’ll walk you through the entire process, from selecting the freshest ingredients to troubleshooting common issues that may arise during the cheese-making process. You’ll learn how to create a rich, creamy cheese that’s full of depth and character, and discover the joy of working with your hands to create something truly special. By the end of this guide, you’ll be equipped with the knowledge and confidence to start making your own goat cheese (chèvre) at home, and experimenting with new flavors and recipes to share with friends and family.
Table of Contents
Guide Overview: What You'll Need
Total Time: 2 hours 30 minutes
Estimated Cost: $20 – $40
Difficulty Level: Intermediate
Tools Required
- Large Pot (stainless steel or enameled cast iron)
- Cheesecloth (or butter muslin)
- Colander
- Thermometer (accurate to 1 degree Fahrenheit)
- Cheese Mold (optional)
Supplies & Materials
- 1 Gallon Whole Milk (from goats)
- Cheese Cultures (mesophilic cheese culture)
- Rennet (vegetable or animal)
- Salt
Step-by-Step Instructions
- 1. First, let’s start by heating the milk – we’ll need a half-gallon of fresh goat’s milk, which I like to source from local farms whenever possible. Pour the milk into a large, heavy-bottomed pot and place it over medium heat, stirring occasionally, until it reaches a temperature of 86°F (30°C). This is an important step, as we want to create an environment that’s conducive to the growth of good bacteria.
- 2. While the milk is heating up, let’s prepare our cheese cultures and rennet. I like to use a combination of mesophilic cheese culture and lipase to give my chèvre a nice, tangy flavor. Follow the instructions on the packaging to rehydrate the cultures and lipase, and make sure to handle them gently to avoid damaging the delicate microorganisms.
- 3. Once the milk has reached the desired temperature, it’s time to add the rehydrated cheese cultures. Stir gently to distribute the cultures evenly, and then let the mixture sit for about 45 minutes to allow the bacteria to start doing their magic. You’ll start to notice a slight thickening of the milk, which is a sign that the cultures are working.
- 4. After the culturing process, it’s time to add the rennet – this is what will cause the milk to coagulate and separate into curds and whey. I like to use a vegetable rennet, as it’s a bit more forgiving than animal rennet and produces a milder flavor. Stir the rennet in gently, and then let the mixture sit for another 30-40 minutes, until it has fully coagulated and separated.
- 5. Now it’s time to cut and release the curds – this is where things can get a bit messy, but don’t worry, it’s all part of the fun! Use a sharp knife or cheese cutter to cut the curds into small, uniform pieces, and then let them sit for about 10 minutes to release their whey. This will help to create a smooth, even texture in our finished cheese.
- 6. Next, we’ll need to line a colander with cheesecloth or a clean, thin towel, and place it over a bowl or pot. Gently pour the curds and whey into the cheesecloth, and let the mixture drain for about 30-40 minutes, until most of the whey has been removed and the curds have reached the desired consistency.
- 7. Finally, it’s time to shape and chill our chèvre – I like to use a wooden cheese mold or a simple metal ring to give my cheese a nice, uniform shape. Gently press the curds into the mold, and then chill it in the refrigerator for at least 2 hours to allow the flavors to meld together and the cheese to set. Once it’s chilled, you can remove it from the mold and serve it as is, or get creative with flavors by adding herbs, spices, or other ingredients to create unique and delicious variations.
Unleash Homemade Chvre

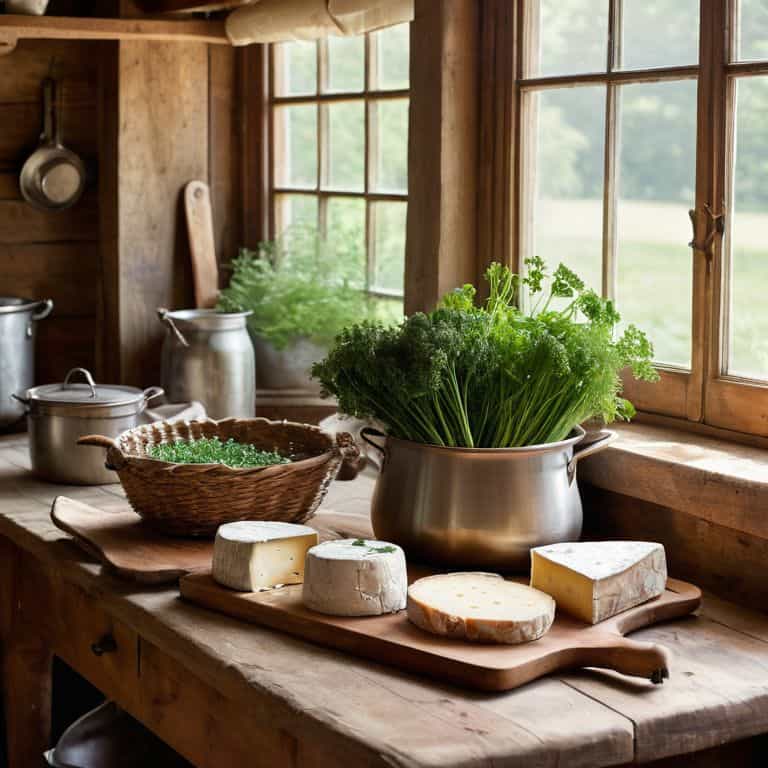
As I always say, the fun really begins once you’ve mastered the basics of cheese making. Now it’s time to get creative with your goat cheese recipes for beginners and experiment with different flavors and textures. I love trying out new combinations, like adding a sprinkle of fresh thyme or a drizzle of honey to my homemade chèvre. The possibilities are endless, and it’s amazing how a simple tweak can completely transform the taste and character of your cheese.
When it comes to selecting the perfect types of goat milk for cheese making, I always recommend opting for high-quality, locally sourced milk. Not only does it support the local community, but it also ensures that your cheese has a unique and authentic flavor profile. Plus, you can’t beat the freshness and richness of milk that’s been produced just a stone’s throw away from your kitchen. As you explore the world of cheese making, you’ll start to develop your own cheese culture basics and preferences, and that’s where the real magic happens.
For an extra-special treat, try using your homemade chèvre to make simple goat cheese spreads that are perfect for crackers, bread, or veggies. I like to mix mine with some chopped herbs and a squeeze of lemon juice for a refreshing and tangy snack. And if you’re feeling adventurous, you can even try your hand at the homemade cheese aging process to create a richer, more complex flavor profile. With a little patience and practice, you’ll be enjoying the creamiest goat cheese textures in no time!
Mastering Cheese Culture Basics
Now that we’ve unleashed the creamy chaos of homemade chèvre, let’s dive deeper into the world of cheese culture basics. I like to think of cheese cultures as the magic that happens when you combine the right ingredients with a little patience. It’s all about creating an environment where those amazing microbes can thrive and turn your milk into a tangy, creamy masterpiece.
For me, mastering cheese culture basics is all about experimentation and feeling your way through the process. I’ve spent countless hours tweaking my recipes, testing different temperatures and ingredient ratios to find that perfect balance of flavors. And you know what? It’s worth it – there’s nothing quite like the thrill of watching your own homemade cheese come to life.
Simple Spreads From Fresh Goat Milk
Now that we’ve unleashed the creamy chaos of homemade chèvre, let’s talk about one of my favorite ways to enjoy it: simple spreads. I love taking my fresh goat milk cheese and blending it with some chopped fresh herbs like parsley or chives, maybe a squeeze of lemon juice, and a pinch of salt. It’s amazing how a few quality ingredients can elevate the flavor and texture of your chèvre. I like to serve it on crackers or toasted bread, perfect for a quick snack or as a starter for a dinner party. The beauty of it is that you can experiment with different combinations to find your perfect spread.
Hands-On Hacks for Homemade Chèvre
- Start with the freshest goat milk possible – I like to get mine from a local farm to ensure it’s never been frozen or ultra-pasteurized
- Experiment with different cheese cultures to find the flavor that works best for you – I’m a big fan of a mild, creamy mesophilic culture
- Don’t over-mix your curds – you want to maintain a delicate balance between tangy and smooth, so gentle folding is key
- Age your chèvre to perfection – even just a few hours in the fridge can make a big difference in the flavor and texture, but feel free to get creative with longer aging times
- Get creative with your flavorings – from chopped fresh herbs to spicy peppers, the possibilities are endless when it comes to infusing your homemade goat cheese with unique flavors and personality
Key Takeaways for Homemade Chèvre
Understand that making goat cheese is an accessible and rewarding process that requires just a few simple ingredients, including fresh goat milk, cheese culture, and rennet
Experiment with different flavor profiles and textures by adding unique ingredients to your cheese, such as herbs, spices, or fruit, to create one-of-a-kind spreads and dips
Remember, the art of cheese-making is all about embracing imperfections and having fun, so don’t be afraid to try new things, make mistakes, and learn as you go – it’s all part of the homemade chèvre journey
The Heart of Homemade Cheese
The magic of making goat cheese lies not in the precision of the recipe, but in the gentle dance between the cream, the culture, and your own curious hands – it’s a journey where every batch tells a story of its own.
Tom Navarro
Unleashing the Power of Homemade Chèvre
As we wrap up this journey into the world of goat cheese, remember that the key to mastering homemade chèvre lies in understanding the basics of cheese culture and being willing to experiment with fresh, seasonal ingredients. From the initial steps of preparing the milk to the final touches of shaping and aging, every moment is an opportunity to connect with the food you’re creating. Don’t be afraid to try new flavors and techniques – the world of cheese-making is vast and waiting for your unique touch.
So, as you finish your first batch of homemade chèvre, take a moment to appreciate the tangible magic of turning simple ingredients into something truly special. Whether you’re sharing it with friends, using it in a new recipe, or simply savoring the taste of your hard work, remember that the joy of making your own food is about more than just the end result – it’s about the journey, the learning, and the love that goes into every step of the process.
Frequently Asked Questions
What's the best type of milk to use for making goat cheese, and can I use store-bought milk or does it need to be fresh from a farm?
For the best flavor, I swear by fresh milk from a local farm, but store-bought will do in a pinch. Look for whole, non-homogenized milk with no additives – it makes a huge difference in the final taste and texture of your chèvre.
How do I know when my cheese has reached the perfect consistency, and what are some common mistakes to avoid when aging or storing homemade chèvre?
For me, it’s all about feel – when the chèvre reaches a spreadable, creamy consistency that’s still firm enough to hold its shape. Avoid over-mixing, which can lead to a tough, crumbly texture. Also, don’t skip the aging process, and make sure to store it in a cool, dry spot to prevent mold – trust your instincts and taste as you go!
Can I flavor my homemade goat cheese with different herbs, spices, or ingredients, and are there any specific combinations that work particularly well with chèvre?
Absolutely, get creative with your chèvre! I love mixing in fresh herbs like chives or thyme, or adding a pinch of red pepper flakes for a spicy kick. You can also try combining garlic and rosemary for a savory flavor, or honey and figs for a sweet twist – the possibilities are endless, and I’m always excited to experiment with new flavors!