
I still remember the first time I attempted to make cheese from scratch – it was a disaster. I had followed a a guide to making cheese that promised perfect results, but ended up with a batch of separation anxiety (yes, that’s a thing, and it’s not pretty). The problem was, I was too focused on the recipe and not enough on the process. I’ve since learned that making cheese is an art that requires patience, experimentation, and a willingness to get your hands dirty.
In this article, I’ll share my honest, no-hype approach to making cheese, and provide you with the practical advice you need to get started. You’ll learn how to create your own cheese recipes, experiment with different flavors and textures, and troubleshoot common problems that can arise during the cheese-making process. My goal is to empower you to take control of your cheese-making journey, and to show you that with a little practice and patience, you can create delicious, artisanal cheeses that will impress even the most discerning palates.
Table of Contents
Guide Overview: What You'll Need
Total Time: 2 hours 30 minutes
Estimated Cost: $20 – $50
Difficulty Level: Intermediate
Tools Required
- Large Pot (stainless steel or enameled cast iron)
- Cheese Cultures (mesophilic or thermophilic)
- Cheese Mold (1/2 gallon or 2 liter capacity)
- Colander (for draining whey)
- Thermometer (accurate to 1 degree Fahrenheit)
Supplies & Materials
- Milk (1 gallon, whole, low-fat or nonfat)
- Cheese Salt (flaky or granulated)
- Rennet (vegetable or animal, depending on preference)
- Butter Muslin (or cheesecloth, for lining the cheese mold)
Step-by-Step Instructions
- 1. First, let’s start by getting our ingredients ready. We’ll need some fresh milk, cheese cultures, and rennet to get this cheese-making party started. I like to use milk from local farms to give my cheese that extra special something. Make sure you’ve got all your equipment sterilized and ready to go, we don’t want any unwanted bacteria crashing the party.
- 2. Next, we need to heat the milk to the perfect temperature. This is where things can get a little tricky, but don’t worry, with a bit of practice, you’ll be a pro in no time. I like to use a thermometer to get the temperature just right, but if you don’t have one, don’t worry, you can still make great cheese. Just remember, the key is to be gentle and patient.
- 3. Now it’s time to add the cheese cultures. This is where the magic happens, and our milk starts to turn into cheese. I like to use a variety of cultures to give my cheese a unique flavor, but you can experiment with different types to find the one that works best for you. Just be sure to follow the instructions on the packet, and don’t be afraid to get a little creative.
- 4. After we’ve added the cultures, it’s time to let the milk sit and incubate. This is the hardest part of the process, as it requires patience and a bit of trust in the process. But don’t worry, with a bit of time, you’ll start to see the milk transform into a beautiful, creamy cheese. Just be sure to keep an eye on it, as the incubation time will vary depending on the type of cheese you’re making.
- 5. Once the milk has incubated, it’s time to add the rennet. This is what will help our cheese to set, and give it that perfect texture. I like to use a vegetable rennet, as it’s a bit more gentle on the cheese, but you can experiment with different types to find the one that works best for you. Just be sure to follow the instructions, and don’t overdo it, as too much rennet can be a bad thing.
- 6. Now it’s time to cut and stir the cheese. This is where we start to see the cheese take shape, and it’s a really exciting part of the process. I like to use a cheese cutter to get the curds just right, but you can also use a knife or even your hands. Just be sure to be gentle, as we don’t want to break up the curds too much.
- 7. After we’ve cut and stirred the cheese, it’s time to shape it into its final form. This is where you can get really creative, and make your cheese into whatever shape you like. I like to use a cheese mold to get a perfect wheel, but you can also shape it by hand. Just be sure to be patient, as this part of the process can take a bit of time and practice to get right.
A Guide to Making Cheese

As I always say, the key to making great cheese is all about experimenting with different flavors. When it comes to cheese cultures for beginners, it’s essential to start with a clean slate and a willingness to try new things. I like to think of my kitchen as a lab, where I can mix and match different ingredients to create something truly unique. For example, I recently tried using a natural cheese rennet substitute in one of my soft cheese recipes for starters, and the result was amazing.
One of the most critical aspects of cheese making is temperature control. If your temperatures are off, your cheese just won’t turn out right. That’s why I always invest in high-quality homemade cheese equipment, like a thermometer and a cheese cave. These tools may seem like a luxury, but trust me, they’re worth it in the long run. With the right equipment and a little practice, you’ll be making delicious cheese like a pro in no time.
Now, I know some of you may be thinking, “But what about the cheese aging process at home?” Don’t worry, I’ve got you covered. Aging cheese is an art that requires patience and attention to detail. With a little practice, you’ll be able to coax out the perfect flavors from your homemade cheese. Just remember to keep it simple, experiment with different recipes, and always use the freshest ingredients possible. Happy cheese making!
Essential Homemade Cheese Equipment for Success
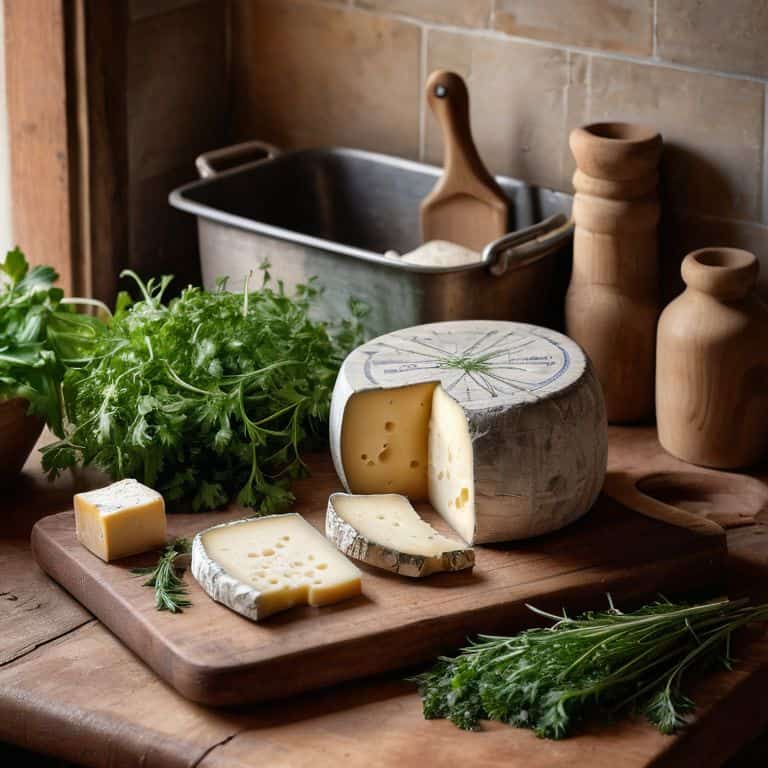
To get started with making cheese, you’ll need a few essential tools. I like to think of them as my trusty sidekicks in the kitchen. A large, heavy-bottomed pot is a must for heating and holding the temperature of your milk. You’ll also need a cheese culturing thermometer to monitor the temperature – I always say, it’s all about feel, but a thermometer never hurts. A colander or strainer is necessary for separating the curds from the whey, and some cheesecloth or butter muslin will help you drain excess liquid.
I’ve found that investing in a few quality tools makes all the difference in the world. You don’t need to break the bank, but having the right equipment will save you time and frustration in the long run. Plus, there’s something satisfying about using your own gear to create something delicious from scratch.
Get Started With Cheese Cultures for Beginners
Now that we’ve got our cheese-making basics down, let’s dive into the fascinating world of cheese cultures. As a beginner, it’s essential to understand that cheese cultures are the backbone of any delicious cheese. They’re the microorganisms that turn milk into a creamy, tangy masterpiece. For me, the magic of cheese cultures was a game-changer – it’s what took my cheese from decent to divine. When I first started, I was intimidated by the idea of working with these tiny helpers, but trust me, it’s easier than you think. Start with a simple mesophilic culture, and you’ll be on your way to crafting cheeses like mozzarella, feta, or goat cheese.
Hands-On Cheese Making: 5 Tips to Get You Started
- Start with the right milk: I always say, the better the milk, the better the cheese – look for high-quality, whole milk from local farms
- Don’t be afraid to experiment with different cheese cultures – they’re the magic that turns milk into a world of flavors
- Temperature control is key: invest in a good thermometer and make sure you’re hitting the right temperatures for your cheese to thrive
- Ageing is everything: be patient and let your cheese develop its own unique character – it’s like watching a good wine get better with time
- Practice makes perfect: don’t be discouraged if your first batch doesn’t turn out exactly as you hoped – just keep trying, and you’ll soon be a cheese-making pro
Key Takeaways for the Aspiring Cheese Maker
Experiment with different cheese cultures to discover unique flavors and textures that reflect your personal taste
Don’t be afraid to get creative and try new recipes – the art of cheese making is all about experimentation and having fun
With the right equipment and a little patience, you can turn simple ingredients into a world of delicious, homemade cheeses that will impress friends and family alike
The Cheese Maker's Creed
The art of making cheese is not just about following a recipe, it’s about embracing the beauty of imperfection and allowing the flavors to unfold with every twist and turn of the curdling process.
Tom Navarro
Unleash Your Inner Cheese Maker
As we’ve explored the world of cheese making together, I hope you’ve gained a sense of confidence in your ability to create something truly special from scratch. From selecting the right cheese cultures for beginners to investing in the essential homemade cheese equipment for success, we’ve covered the key points to get you started on this delicious journey. Remember, the process of making cheese is just as important as the end result, so don’t be afraid to experiment and try new things – it’s all part of the fun!
Now that you have the foundation to start making your own cheese, I want to leave you with a final thought: the art of cheese making is a journey, not a destination. It’s about embracing the imperfections, learning from your mistakes, and sharing your creations with others. So go ahead, get creative, and show the world what you’re capable of – your taste buds (and your friends and family) will thank you!
Frequently Asked Questions
What are the most common mistakes to avoid when making cheese at home?
Don’t overheat your milk, or you’ll end up with a grainy texture. Also, be patient and don’t rush the aging process – it’s all about letting the flavors develop naturally. And hey, don’t worry if it doesn’t turn out perfect at first, that’s all part of the homemade cheese adventure!
How do I know when my cheese is properly aged and ready to eat?
The moment of truth! For me, it’s all about the feel and smell. A properly aged cheese should have a firm, smooth texture and a rich, tangy aroma. Give it a sniff and a squeeze – if it smells amazing and feels slightly springy, it’s ready to devour!
Can I use store-bought milk to make cheese, or does it need to be raw or organic?
Absolutely, you can use store-bought milk to make cheese! While raw or organic milk can add unique flavors, it’s not necessary. I’ve made delicious cheese with regular old 2% from the grocery store. The key is to choose a milk with no added preservatives or ultra-pasteurization, which can inhibit the cheese-making process.