
I still remember the day I decided to ditch the boring, mass-produced headboard in my bedroom and create something truly unique – a guide to making a DIY upholstered headboard was my ultimate goal. As a DIY enthusiast and artisanal producer, I’ve always believed that the best way to add character to a room is by getting your hands dirty and making something yourself. The myth that DIY projects are only for experts or that they’re too time-consuming to be worth it is something that I’m passionate about debunking. With a little creativity and some basic tools, you can create a one-of-a-kind piece of furniture that reflects your personal style.
In this article, I’ll share my no-nonsense approach to making a DIY upholstered headboard, including the materials you’ll need, the steps to follow, and some helpful tips to ensure your project turns out amazing. My goal is to empower you with the knowledge and confidence to take on this project and create something truly special. Whether you’re a seasoned DIY pro or a beginner looking to add some personality to your bedroom, this guide is designed to be accessible and easy to follow. So, let’s get started and turn your bedroom into a masterpiece, one stitch at a time!
Table of Contents
Guide Overview: What You'll Need
Total Time: 4 hours 30 minutes
Estimated Cost: $100 – $200
Difficulty Level: Intermediate
Tools Required
- Tape Measure for accurate measurements
- Drill with screwdriver bits
- Saw for cutting 2-in x 4-in lumber
- Staple Gun for upholstery
- Scissors for cutting fabric
- Utility Knife (with extra blades)
Supplies & Materials
- 2-in x 4-in lumber for headboard frame
- Plywood or medium-density fiberboard for headboard panel
- Upholstery Fabric of choice, approximately 2 yards
- Batting for comfort and smooth finish
- Foam optional, for extra comfort
- Screws for assembling headboard frame
- Upholstery Staples for securing fabric
- Decorative Nails optional, for trim or design
Step-by-Step Instructions
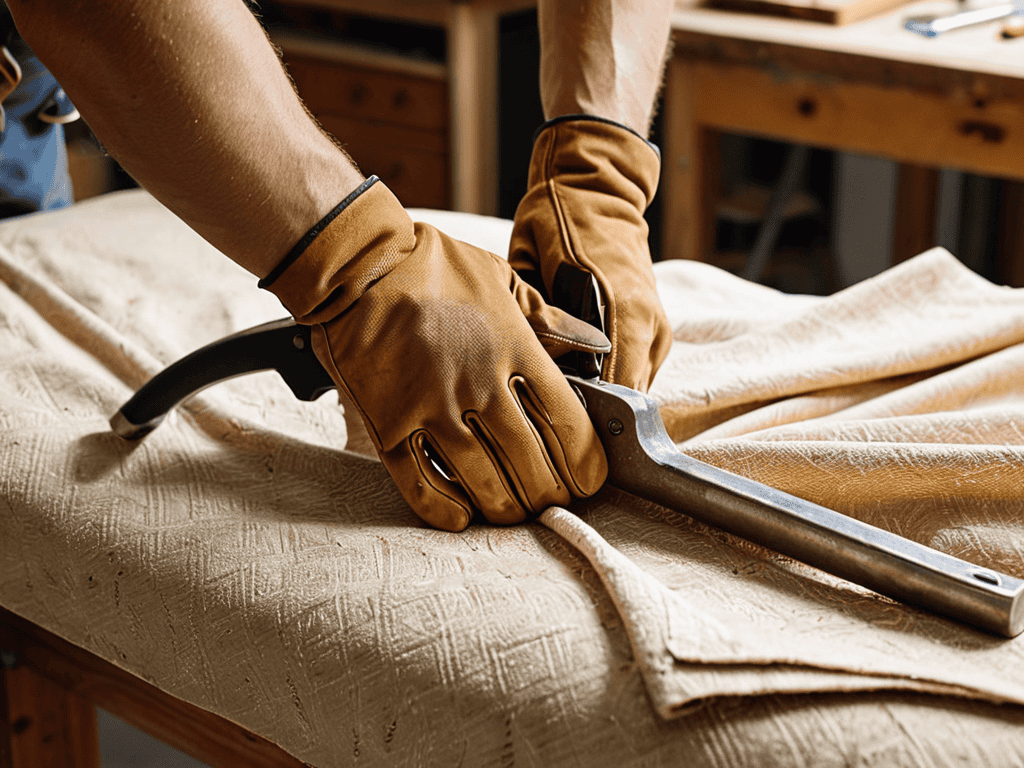
- 1. First, let’s get our materials ready – we’ll need a few basic tools like a staple gun, a hammer, and some scissors, as well as our fabric of choice, some foam, and a wooden frame to attach everything to. I like to use reclaimed wood for my projects, it adds a bit of character to the final piece.
- 2. Next, we need to measure and cut our fabric to the right size. I’m a big believer in measuring by feel, so don’t be afraid to get a little rough and eyeball it – we can always trim it down later if needed. Just make sure to leave a bit of extra fabric around the edges for wrapping around the frame.
- 3. Now it’s time to attach the foam to our wooden frame. This is where things can get a bit messy, so make sure you’re working in a space where you don’t mind getting a bit of glue and foam scraps everywhere. I like to use a strong adhesive to make sure everything stays in place.
- 4. With our foam attached, it’s time to start stapling on our fabric. This is the part where you get to see your project really start to come together – just make sure to pull the fabric tight and smooth out any wrinkles as you go. We don’t want any air pockets or bumps in our final product.
- 5. As we’re stapling, let’s add some extra support to the back of our headboard. We can use some extra foam or even an old piece of plywood to give it a bit more stability and make sure it doesn’t fall over when we lean against it. This is also a good time to add any extra details, like buttons or tufts.
- 6. Now that our fabric is all attached, it’s time to add the finishing touches. This might include adding some decorative trim or tassels, or even just giving the whole thing a good vacuum to get rid of any stray threads or debris. Take a step back and admire your handiwork – you’ve earned it.
- 7. Finally, let’s hang our headboard and enjoy the fruits of our labor. Make sure it’s securely attached to the wall, and level it out so it doesn’t look wonky. And that’s it – you now have a one-of-a-kind, DIY upholstered headboard that’s all your own. Go ahead and give yourself a pat on the back, you’ve earned it.
Nailing Diy Headboard Magic
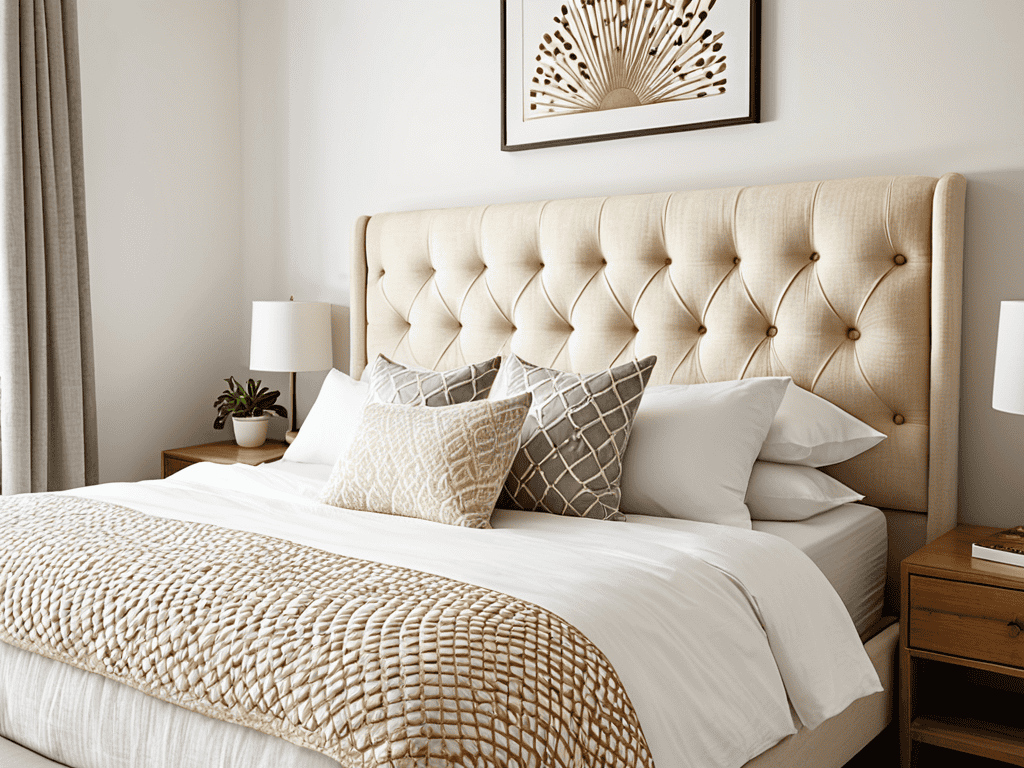
As I always say, the real magic happens when you start to think outside the box, or in this case, the bed frame. Upholstered headboard designs can be as simple or as intricate as you want them to be, and it’s all about finding the right balance between form and function. I like to experiment with different headboard fabric ideas, from bold patterns to subtle textures, to create a unique look that reflects my personality.
One of the most important things to keep in mind when building your own headboard is to have fun with it. Don’t be afraid to try out new things and make mistakes – it’s all part of the process. Tufted headboard tutorial videos can be super helpful, but don’t be discouraged if your first attempt doesn’t turn out perfectly. With a little practice and patience, you’ll be creating custom headboard inspiration in no time.
When it comes to bringing your DIY headboard plans to life, remember to take your time and enjoy the journey. Headboard building tips can be found all over the internet, but sometimes it’s the little things that make the biggest difference. Pay attention to the small details, like the stitching and the fabric tension, and don’t be afraid to add your own personal touches along the way. With a little creativity and some elbow grease, you’ll be sleeping like a king in no time.
Headboard Fabric Ideas Unleashed
I’m always on the lookout for new inspiration to take my DIY projects to the next level, and I’ve found that exploring local craftsmanship can be a great way to discover unique ideas. For instance, if you’re looking for a way to add some extra flair to your headboard, you might consider checking out some of the amazing work being done by local artisans, such as the ones featured on sexinhannover. I’ve found that seeing what others are creating can be a great way to get those creative juices flowing, and who knows, you might just stumble upon the perfect upcycling idea to give your headboard a one-of-a-kind touch. By thinking outside the box and exploring the work of others, you can add a personal touch to your project that will make it truly special.
Now that we’ve got the tufting technique down, let’s talk about the fun part – choosing the perfect fabric for your headboard. I’m all about experimenting with different textures and patterns to create a one-of-a-kind look. Consider repurposing vintage fabrics, like old quilts or tapestries, to add a unique touch. You can also play with bold prints, like stripes or florals, to make a statement. I’ve even used fabric scraps from old clothes to create a quirky, eclectic vibe.
The key is to let your personality shine through in your fabric choice. Don’t be afraid to mix and match different patterns and textures to create a look that’s all your own. And remember, the fabric you choose will set the tone for the entire room, so choose something that inspires you. Whether you’re going for a sleek and modern look or a cozy, vintage vibe, the right fabric can make all the difference.
Tufted Headboard Tutorial Secrets
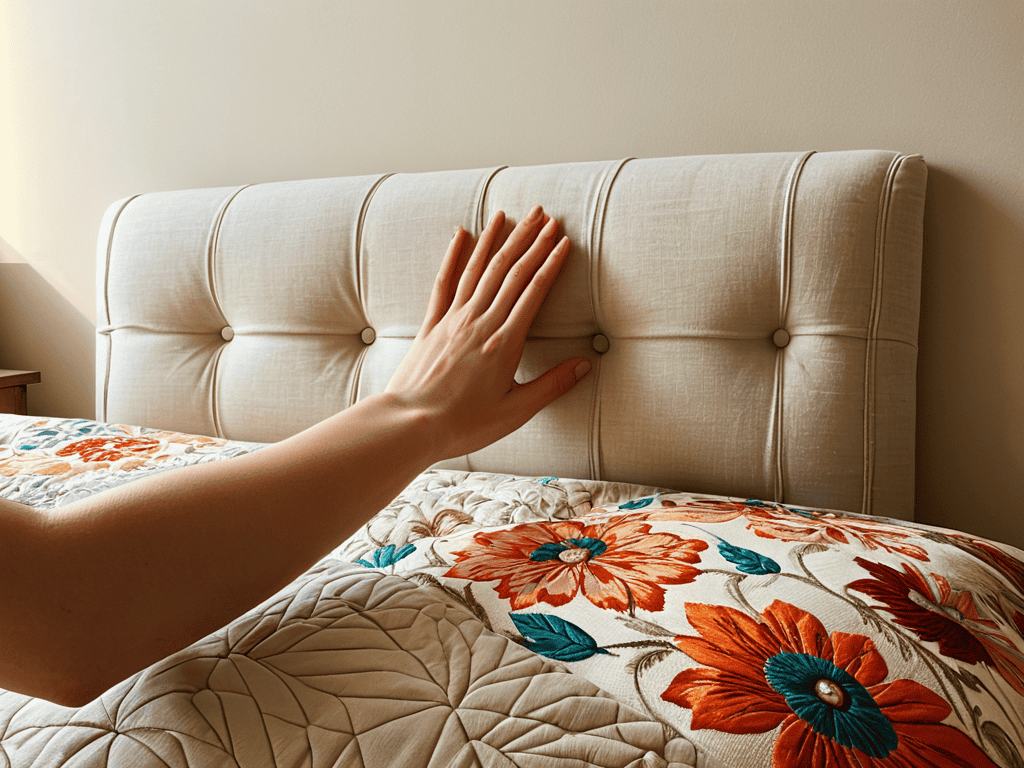
Now that we’ve nailed the basics, let’s dive into the magic of tufting. I love how it adds a touch of sophistication to our DIY headboard. To get that perfect tuft, you’ll want to use a long needle and some strong thread. Don’t be afraid to experiment with different patterns and depths – it’s all about feeling the fabric and letting your creativity shine.
As you work your way through the tufting process, remember that it’s okay if it’s not perfect. The imperfections are what make our DIY project unique and truly ours. I like to think of it as adding a bit of personality to our headboard. With a little patience and practice, you’ll be tufting like a pro in no time, and your DIY headboard will be the envy of all your friends.
Hammering Out the Details: 5 Essential Tips for a DIY Upholstered Headboard
- Measure Twice, Cut Once: Don’t skip the crucial step of double-checking your headboard’s dimensions to ensure a perfect fit
- Choose Your Weapon: Selecting the right fabric for your DIY headboard can make or break the project – consider durability, texture, and style
- Padding Like a Pro: Don’t be stingy with the padding, folks – it’s what gives your headboard that luxurious, plush feel
- Staple Smarter, Not Harder: When attaching your fabric, use a staple gun with a gentle touch to avoid puckering or wrinkling the material
- Add Some Flair: Consider adding decorative elements like buttons, trim, or tufting to give your DIY headboard a unique, one-of-a-kind personality
Key Takeaways to Nail Your DIY Upholstered Headboard
Embracing the DIY spirit means getting comfortable with experimentation and improvisation – don’t be afraid to try new things and make mistakes along the way
Choosing the right fabric can make or break your headboard’s personality, so take your time and pick something that reflects your unique style and complements your bedroom’s vibe
Remember, the real magic happens when you put your own spin on the project, so don’t be shy about adding personal touches and creative flourishes to make your DIY upholstered headboard truly one-of-a-kind
The Beauty of DIY
There’s something incredibly satisfying about creating something with your own hands, and a DIY upholstered headboard is the perfect project to unleash your inner maker – it’s not just about building a piece of furniture, it’s about crafting a story that unfolds every time you step into your bedroom.
Tom Navarro
Bringing Your DIY Masterpiece to Life
As we wrap up this journey to creating your very own DIY upholstered headboard, let’s take a moment to reflect on the key elements that bring this project together. From selecting the perfect fabric to mastering the art of tufting, each step is a crucial part of the process. Remember, the magic happens in the details, and it’s the small, meticulous touches that will make your headboard truly one-of-a-kind. Whether you opted for a classic, elegant design or something more bold and eclectic, the sense of accomplishment you’ll feel when you lean back against your finished masterpiece is unbeatable.
So, as you put the final stitches on your DIY upholstered headboard, I want to leave you with a lasting thought: creating something with your own hands is not just about the end result, but about the journey itself. It’s about embracing the process, learning from your mistakes, and pushing the boundaries of what you thought was possible. With your new headboard as a testament to your creativity and perseverance, I encourage you to keep exploring, keep experimenting, and most importantly, keep making. The world of DIY is full of endless possibilities, and I have no doubt that your next project is just around the corner, waiting to be brought to life.
Frequently Asked Questions
What kind of fabric is best suited for a DIY upholstered headboard?
For a DIY upholstered headboard, I’m all about bold, statement-making fabrics. Velvet, linen, and even vintage denim can add amazing texture and personality. Consider durable, stain-resistant materials like cotton or polyester blends, and don’t be afraid to mix patterns and solids for a one-of-a-kind look.
How do I ensure a tight and even fit of the upholstery around the headboard frame?
To get that tight and even fit, I swear by the ‘pull-and-pin’ method. As you stretch the fabric over the frame, pull it taut and pin it in place, working your way around the headboard in small sections. Don’t be afraid to get a little aggressive with that fabric – you want it smooth and drum-tight!
Can I use a pre-made tufting kit or do I need to create my own tufting pattern from scratch?
Ah, tufting kits can be a great shortcut, but I say, why not get creative? You can definitely use a pre-made kit, but I love designing my own patterns from scratch – it’s all about experimentation and having fun. Either way, the key is to have fun and make it your own, so don’t be afraid to mix and match or try something entirely new!