I still remember the day I realized that how to label your pantry items wasn’t just about slapping some stickers on jars, but about creating a system that would change the way I cooked forever. As a kitchen designer, I’ve seen my fair share of chaotic pantries, and I used to think that labeling was just a mundane task. But, let me tell you, it’s so much more than that. It’s about bringing order to the chaos and making your cooking routine a breeze. When I started labeling my own pantry items, I was amazed at how much easier it was to find what I needed, and how much more inspired I felt to try new recipes.
In this article, I’ll share my no-nonsense approach to labeling your pantry items, and provide you with practical tips and tricks to get you started. You’ll learn how to create a functional and beautiful pantry that reflects your personal style, and how to maintain it with minimal effort. From choosing the right labels to organizing your staples, I’ll cover it all. My goal is to help you create a pantry that’s not just a storage space, but a culinary hub that inspires you to cook with confidence and joy. So, let’s get started on this journey to pantry perfection, and discover how labeling your pantry items can be a game-changer for your cooking routine.
Table of Contents
Guide Overview: What You'll Need
Total Time: 1 hour 15 minutes
Estimated Cost: $10 – $20
Difficulty Level: Easy
Tools Required
- Label Maker (with extra ink ribbon)
- Scissors (for cutting labels to size)
- Pencil (for marking items before labeling)
Supplies & Materials
- Labels (various sizes)
- Label Maker Ink Ribbon (for replacement)
- Marker (for labeling items without a label maker)
Step-by-Step Instructions
- 1. First, take everything out of your pantry and sort items into categories, like grains, canned goods, baking supplies, and snacks. This will give you a sense of what you have and help you decide how to group similar items together. As you’re sorting, think about the kitchen work triangle and how you can apply its principles to your pantry layout.
- 2. Next, purge any expired or unused items from your pantry. Check expiration dates, and get rid of anything that’s no longer good. This is also a great opportunity to wipe down shelves and give your pantry a good cleaning. I like to use a gentle cleanser and a microfiber cloth to make the job easier.
- 3. Now it’s time to assign a home for each category of items. Think about the items you use most frequently and place them in easy-to-reach locations. Less frequently used items can be stored on higher or lower shelves. Consider using baskets or bins to corral small items like spices or snacks.
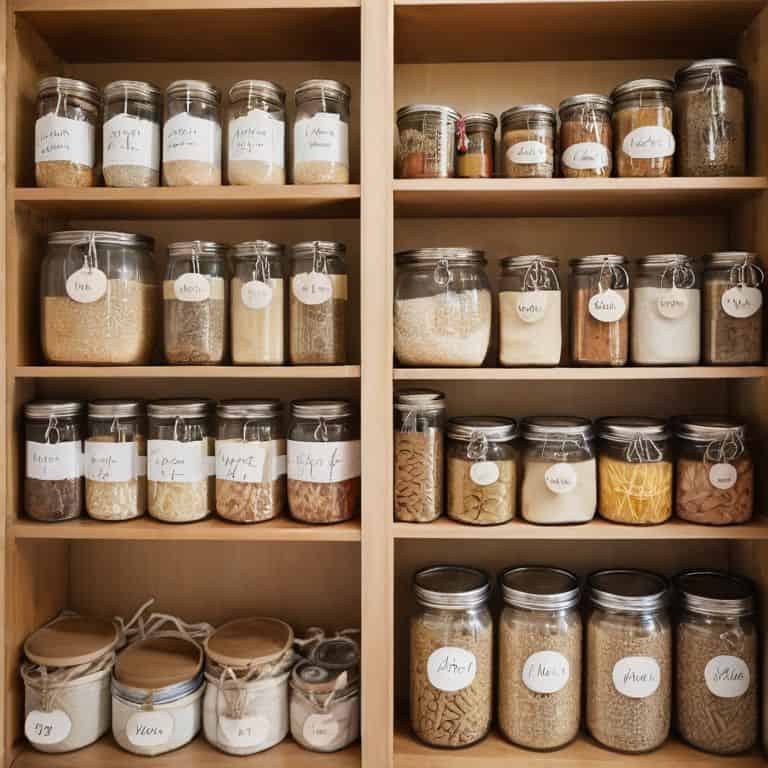
- 4. Once you have a sense of where everything will go, it’s time to create your labels. You can use a label maker or write labels by hand – whatever works best for you. Make sure your labels are clear and easy to read, and consider using a consistent font or color scheme to give your pantry a cohesive look.
- 5. With your labels in hand, start applying them to your shelves and containers. I like to use a level to make sure my labels are straight, and I always double-check that the label is securely attached. You can also use labels to indicate the contents of baskets or bins, making it easy to find what you need.
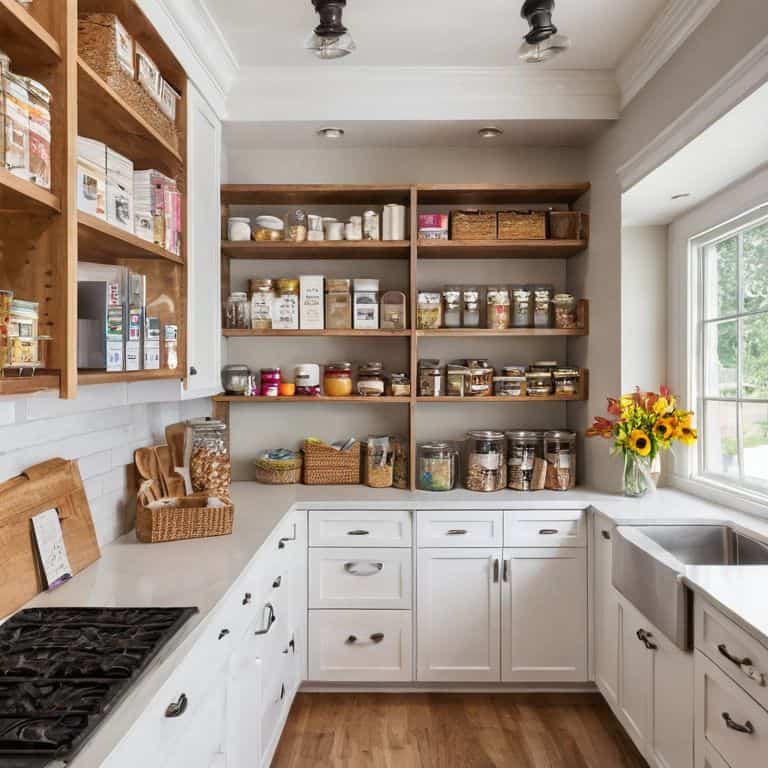
- 6. As you’re putting everything back in your pantry, take a step back and evaluate your workflow. Think about how you move through your kitchen and how you can use your pantry to support that flow. Consider the golden zone – the area between your waist and shoulder height – and try to store your most frequently used items in this zone.
- 7. Finally, maintain your newly organized pantry by setting aside time each week to tidy up and make sure everything is still in its assigned home. This will help you stay on track and keep your pantry looking its best. I like to set a reminder on my phone to do a quick pantry cleanup every Sunday morning.
Pantry Harmony Found
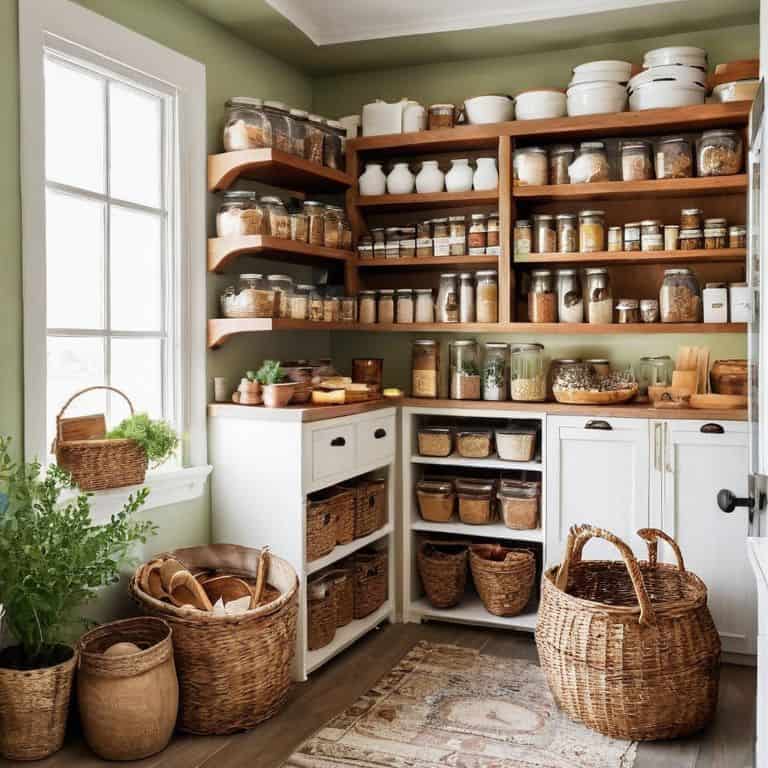
As I always say, a well-organized pantry is the backbone of a functional kitchen. Now that you’ve labeled your staples, it’s time to think about maximizing pantry space. This is where the fun begins – experimenting with different storage solutions to find what works best for you. I love scouring architectural salvage yards for unique containers and baskets to add a touch of personality to my clients’ pantries.
To take your pantry to the next level, consider investing in a labeling system for kitchen that includes customizable signs for each section. This will not only make it easier to find what you need but also add a touch of elegance to your space. When choosing a label maker, look for one that’s easy to use and produces clear, readable text – some of the best label makers for organization even offer customizable fonts and designs.
By implementing these tips, you’ll be well on your way to achieving diy pantry labels that are both functional and beautiful. Remember, the key to a harmonious pantry is finding a balance between form and function. With a little creativity and the right tools, you can create a space that inspires you to cook and entertain with ease. Whether you’re a busy home cook or an avid host, a well-designed pantry is the perfect starting point for any culinary adventure.
Diy Labels for Kitchen Bliss
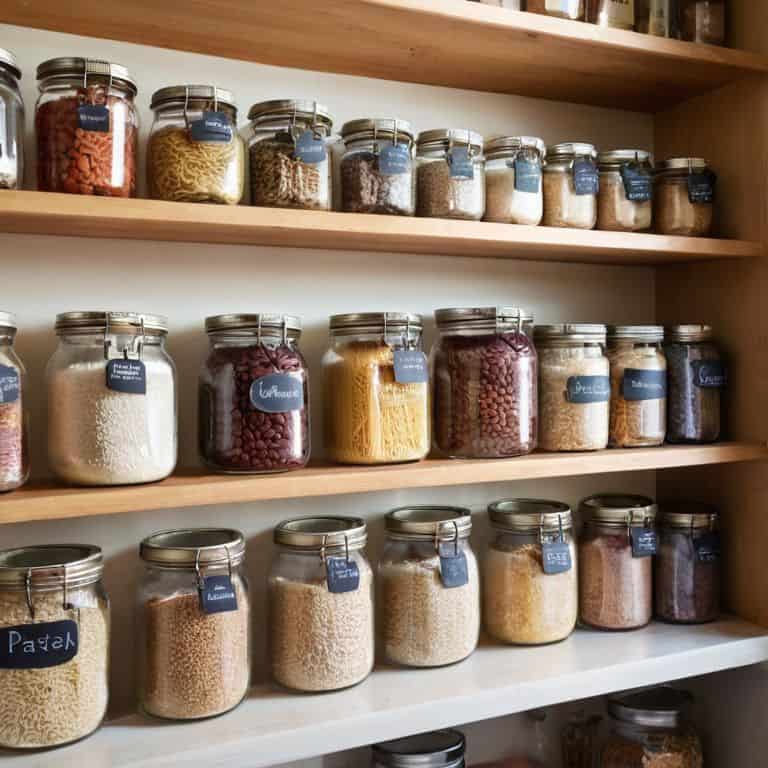
To take your pantry organization to the next level, consider creating DIY labels that add a personal touch. I adore using a combination of chalkboard labels and handwritten notes to give my kitchen a warm, inviting feel. You can also repurpose old jars and containers with cute, hand-painted labels or stickers. Not only will this add a decorative element, but it will also make it easier to identify what’s inside.
For a more polished look, try using a label maker or printing out your own labels on cardstock or stickers. You can customize the font, color, and design to match your kitchen’s unique style. I like to use a mix of uppercase and lowercase letters to create visual interest. Whatever method you choose, remember to have fun and make it your own – after all, it’s the little details that make a kitchen truly special.
Maximizing Space With Custom Signs
To take your pantry organization to the next level, consider creating custom signs that not only add a touch of personality but also help maximize space. I love using chalkboard labels or wooden signs to denote different zones within my pantry, such as a “Baking Station” or “Spice Corner”. This visual cue helps me quickly find what I need, and it’s also a beautiful way to add some elegance to the space.
By investing in custom signs, you can also make the most of narrow shelves or awkward corners. For example, a small sign that says “Oils and Vinegars” can be placed above a tiny shelf, making it easy to identify what’s stored there. It’s all about creating a system that works for you and your cooking style, and custom signs can be a game-changer in achieving pantry harmony.
Pantry Perfection: 5 Essential Labeling Tips
- Start with a Purge: Before labeling, take everything out of your pantry and get rid of expired or unused items to ensure you’re only labeling what you need
- Choose a Labeling System that Works for You: Consider using a label maker, chalkboard labels, or even a elegant calligraphy set to add a personal touch to your pantry labels
- Be Specific: Instead of just labeling a container as ‘Grains’, try being more specific with labels like ‘Quinoa’, ‘Brown Rice’, or ‘Whole Wheat Pasta’ to make meal planning easier
- Use a Consistent Font and Color Scheme: Pick a font and color scheme that matches your kitchen aesthetic and stick to it throughout your pantry labels to create a visually pleasing and cohesive look
- Make it a Habit: Set a reminder to regularly check and update your pantry labels to ensure they stay accurate and helpful, and to maintain your pantry’s newfound sense of organization and harmony
Key Takeaways for a Harmonious Pantry
By implementing a thoughtful labeling system, you’ll save time and reduce stress in the kitchen, making cooking a more enjoyable experience
Customizing your pantry with DIY labels and signs can add a touch of personality to your space while maintaining organization and functionality
A well-organized pantry is not just about aesthetics; it’s about creating a workflow that inspires creativity and efficiency, making you a happier and more confident home cook
The Labeling Philosophy
A beautifully labeled pantry is not just about aesthetics; it’s about cultivating a sense of reverence for the ingredients that nourish us, and the rituals that bring us joy – it’s the first step to cooking with intention, and living with purpose.
Clara Wu
Bringing It All Together: A Harmonious Pantry
As we’ve explored the world of pantry labeling, I hope you’ve seen how this simple act can transform your kitchen into a haven of efficiency. From the initial steps of purging and categorizing to the creative expression of DIY labels and custom signs, every detail counts in creating a space that sparks joy. By implementing these strategies, you’ll not only maximize your storage but also cultivate a sense of pride and satisfaction every time you step into your kitchen. Remember, the goal is to create a system that is both beautiful and functional, reflecting your personal style and cooking habits.
As you embark on this journey of pantry transformation, I want to leave you with a final thought: the art of labeling is not just about organization, it’s about intention. It’s about taking a moment to appreciate the beauty in the everyday, to slow down and truly connect with the space where you nurture yourself and others. So, go ahead, take the first step, and watch how a well-designed pantry can become the heart of your home, inspiring countless meals, memories, and moments of joy to come.
Frequently Asked Questions
What are the most essential items to label in my pantry for maximum efficiency?
For me, the top essentials to label are staples like flour, sugar, and pasta, as well as spices and oils. I also love labeling my snack stations, like a dedicated coffee or tea area, to keep everything tidy and easy to find. Trust me, it’s a total game-changer for your cooking routine!
How can I ensure my labels are easy to read and understand, even in a crowded pantry?
To keep your labels legible, even in a crowded pantry, opt for a clean font and contrasting colors. I adore using a simple white or metallic marker on a dark background – it’s both stylish and easy to read. Consider adding a small icon or graphic to each label for a visual boost, making it a breeze to identify staples at a glance.
Are there any specific labeling systems or tools that you recommend for a small or oddly-shaped pantry?
For small or oddly-shaped pantries, I swear by adhesive labels and a label maker – they’re total lifesavers! You can also use chalkboard or whiteboard stickers for a more rustic touch. And, if you’re feeling crafty, try using washi tape to add a pop of color and create a custom labeling system that fits your unique space.