I still remember the first time I tried my hand at a guide to pickling – it was a game-changer for my kitchen, and I’ve been hooked ever since. The myth that pickling is some sort of arcane science, reserved for the experts, is just that – a myth. I’m here to tell you that with a few simple tools and a willingness to get your hands dirty, you can create tangy, crunchy goodness that’ll elevate any dish. My journey with pickling started in my small backyard, where I experimented with different recipes and techniques, and now I’m excited to share my knowledge with you.
In this article, I’ll walk you through the basics of pickling, from preparing your ingredients to troubleshooting common issues. You’ll learn how to create your own unique flavor profiles using fresh, seasonal ingredients, and how to avoid common pitfalls that can leave your pickles tasting bland or, worse, inedible. My goal is to empower you with the knowledge and confidence to start pickling like a pro, so you can enjoy the satisfaction of creating your own delicious, homemade treats. Whether you’re a seasoned foodie or just starting out, this guide is designed to be a practical, no-nonsense resource that will help you unlock the full potential of a guide to pickling.
Table of Contents
Guide Overview: What You'll Need

Total Time: 2 hours 30 minutes
Estimated Cost: $20 – $40
Difficulty Level: Easy
Tools Required
- Large Pot (at least 3-quart capacity)
- Colander (for draining)
- Glass Jars (with lids and bands)
- Cutting Board
- Knife (for chopping vegetables)
- Measuring Cups (dry and liquid)
- Measuring Spoons
Supplies & Materials
- Cucumbers (slicing or pickling variety)
- Vinegar (white, apple cider, or white wine)
- Water
- Salt
- Sugar (optional)
- Pickling Spice (optional)
- Fresh Dill (optional)
Step-by-Step Instructions
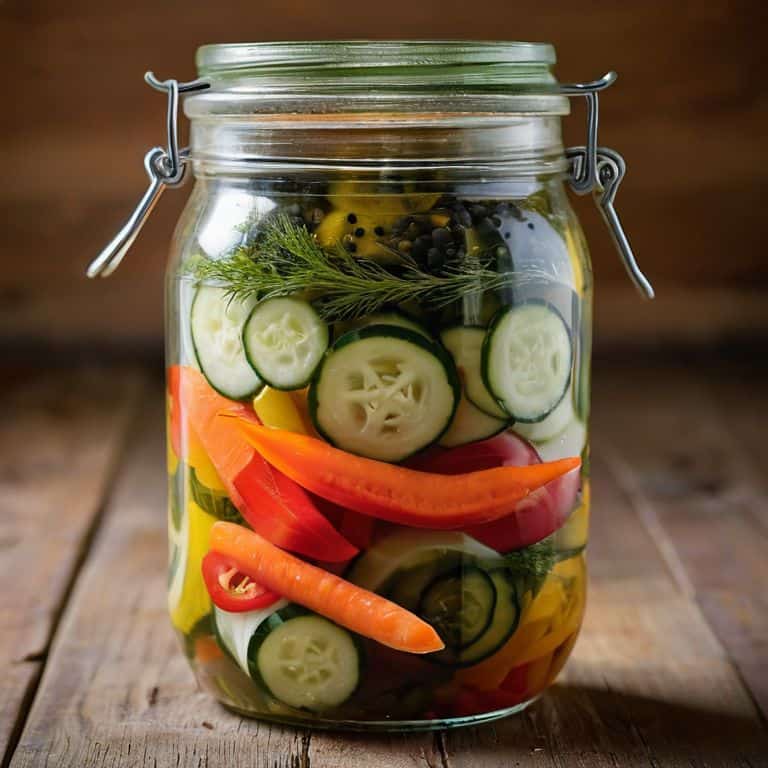
- 1. First, let’s start with the basics: gather your ingredients and equipment. You’ll need some fresh veggies, a large pot, a strainer, and some jars with lids. I like to use a variety of veggies, but my favorite is always the humble cucumber. There’s something about the way they transform into a tangy, crunchy snack that just gets me excited.
- 2. Next, you’ll want to create your brine. This is the magic mixture that’s going to give your pickles that perfect balance of sour and salty. I like to use a combination of water, vinegar, salt, and some spices to give it a bit of kick. Don’t be afraid to experiment and add your own favorite flavors to the mix.
- 3. Now it’s time to prep your veggies. Slice them up into thin rounds or spears, depending on your preference. I like to think that the more uneven the slices, the more character they’ll have. You can also add some extra flavorings like garlic, dill, or mustard seeds to the mix.
- 4. In a large pot, bring your brine to a boil. I like to use a big, old-fashioned pot that’s been passed down through my family. There’s something about the way it distributes the heat that just can’t be beat. Once it’s boiling, reduce the heat and let it simmer for a few minutes to allow all the flavors to meld together.
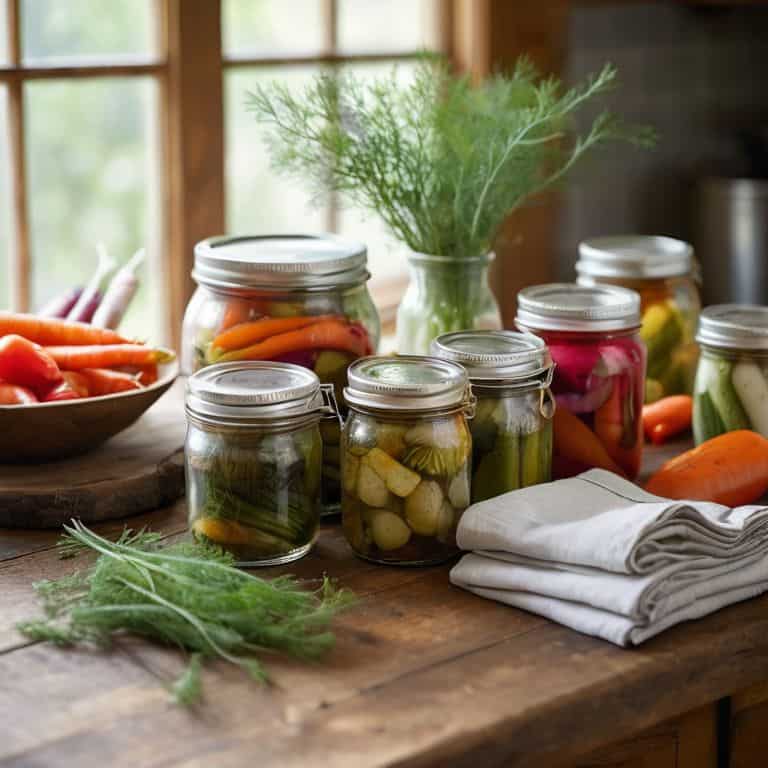
- 5. While your brine is simmering, pack your jars. I like to use a combination of large and small jars to accommodate all the different shapes and sizes of my veggies. Make sure to leave a bit of space at the top of each jar, as the pickles will expand a bit as they cool.
- 6. Once your brine has cooled slightly, it’s time to add the pickles. Carefully place the veggies into the jars, making sure they’re fully submerged in the brine. You can use a bit of weight to keep them under the surface, like a stone or a plate.
- 7. Finally, seal your jars and let the pickles do their thing. I like to let them sit in the fridge for at least a few hours before serving, to allow all the flavors to meld together. The longer they sit, the tangier they’ll become. And that’s it – you’re now the proud owner of a batch of delicious, homemade pickles.
A Guide to Pickling
When it comes to pickling, the type of salt you use can make a big difference. I always recommend using pickling salt instead of regular salt, as it’s finer and dissolves more easily, ensuring that your pickles are evenly seasoned. Now, let’s talk about the lacto fermentation process – it’s a game-changer for creating tangy, crunchy pickles. This process involves allowing natural bacteria to ferment the vegetables, resulting in a unique flavor and texture.
One of the most common mistakes to avoid when pickling is using the wrong size or shape of pickling jar. You want to make sure that your jars are the right size for the amount of pickles you’re making, and that they’re shaped in a way that allows for easy access and storage. I like to use a variety of pickling jar sizes and shapes to keep things interesting and to ensure that I can always find the right one for the job. Whether you’re making a big batch of dill pickles or a small batch of spicy pickles, having the right jar can make all the difference.
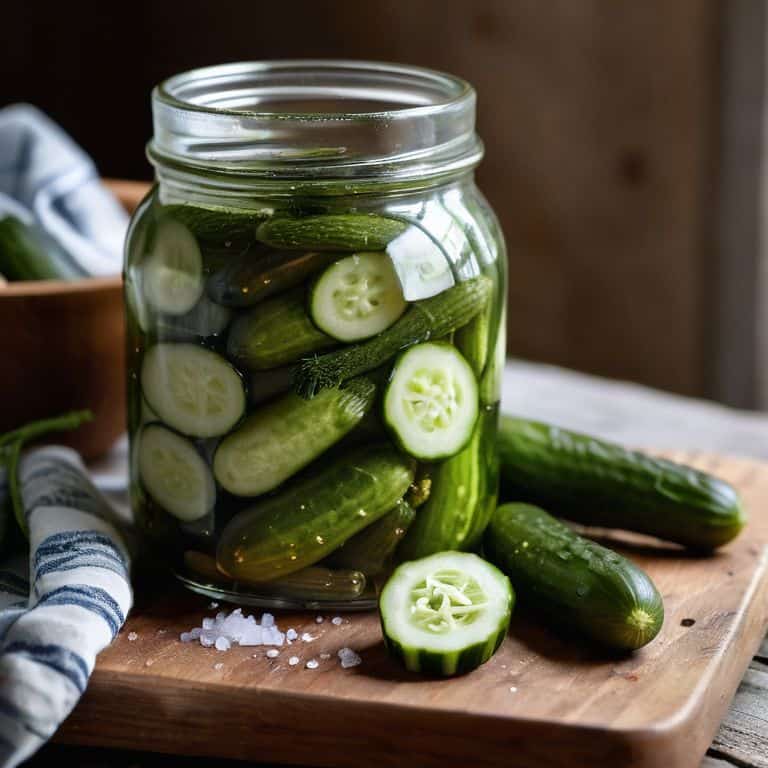
For a quick and easy pickling liquid recipe, try mixing together some vinegar, water, and spices. You can also add in some sugar or other sweeteners to balance out the flavor. When it comes to pickling different types of cucumbers, I say experiment and find your favorite. Some people swear by using only certain types of cucumbers, but I think that’s limiting – why not try pickling some slicing cucumbers or even some English cucumbers and see what you think?
Lacto Fermentation Made Easy
Lacto fermentation is where the magic happens, folks. It’s a natural process that occurs when beneficial bacteria, like Lactobacillus, feed on the sugars in your veggies, creating lactic acid and giving your pickles that signature tang. To make it easy, I like to think of it as a simple equation: veggies + salt + time = deliciously sour pickles. I’ve found that using a ceramic crock or a glass jar with a weight is key to keeping everything under the brine, where the magic happens. Just be patient, and let the microbes do their thing – before you know it, you’ll be snacking on crunchy, probiotic-rich goodness.
Pickling Salt vs Regular
When it comes to pickling, the type of salt you use can make a big difference. I’m often asked about the benefits of pickling salt versus regular salt. For me, it’s all about the flavor and texture. Pickling salt is finer and dissolves more easily, which helps to create a smoother brine. Regular salt, on the other hand, can leave behind a slightly gritty texture. That being said, if you only have regular salt on hand, it’s not the end of the world – it’ll still get the job done.
I like to think of pickling salt as an investment in my pickling game. It’s a small detail that can elevate the entire process, and it’s worth having on hand if you’re serious about making delicious pickles. Plus, it’s usually inexpensive and can be found at most spice stores or online.
Pickling Like a Pro: 5 Tips to Get You Started
- Ditch the Recipe: Don’t be afraid to experiment with different spice blends and ingredients to create unique pickle flavors
- Salt Matters: Use a flaky, pickling salt to bring out the best in your veggies – trust me, it makes a difference
- Keep it Clean: Sanitize those jars and utensils to avoid contaminating your pickles and ending up with a batch that’s more funk than flavor
- Watch the Temperature: Aim for a cool, dark spot to ferment your pickles – a consistent temp will help those good bacteria do their magic
- Don’t Over-Think It: Remember, pickling is all about trial and error – if things don’t turn out as planned, just call it a ‘rustic’ batch and enjoy the ride
Pickling Like a Pro: 3 Key Takeaways
Always remember, the key to amazing pickles is using fresh, seasonal ingredients and experimenting with different flavor combinations to find your perfect sour
Don’t be afraid to get creative with your pickling liquids – I like to think that any vegetable can be pickled and any fruit can be infused, so don’t be shy to try out new and unusual ingredients
Most importantly, have fun and don’t worry if things don’t turn out perfectly – the process of pickling is just as important as the end result, and it’s all about enjoying the journey and sharing your creations with others
The Art of Pickling
Pickling isn’t just about preserving food, it’s about unleashing a flavor revolution in your kitchen – one jar at a time.
Tom Navarro
Savoring the Fruits of Your Labor
As we wrap up this journey into the world of pickling, remember that the key to mastering this art lies in experimentation and patience. We’ve covered the basics of lacto fermentation, discussed the differences between pickling salt and regular salt, and explored the simplicity of turning any vegetable into a tangy, crunchy delight. The most important thing to take away is that pickling is not just about preserving food, it’s about creating flavors that add a new dimension to your meals. Whether you’re a seasoned pro or a beginner, the world of pickling is vast and waiting for you to explore it.
So, as you stand in your kitchen, surrounded by jars of your handmade pickles, remember that you’re not just a consumer, you’re a creator. You’re part of a tradition that values local, seasonal ingredients and the joy of making something with your own hands. Don’t be afraid to try new things, to push the boundaries of what you thought was possible with pickling. The sour taste of your success is just the beginning, and I’m excited to see what amazing flavors you’ll create next.
Frequently Asked Questions
What's the best way to sterilize my jars and equipment before starting the pickling process?
Sterilizing is a breeze! I just toss my jars and utensils in a big pot of boiling water for 10-15 minutes. You can also use a dishwasher on the sterilize setting. For any equipment that can’t get wet, like my wooden spoon, I give it a good wipe down with some hot vinegar. Easy peasy, and you’re ready to get pickling!
Can I use any type of vinegar for pickling, or are there specific varieties that work best?
Vinegar is where the magic happens, my friend! While you can experiment with different types, I swear by apple cider vinegar or white wine vinegar for their subtle flavors. Avoid balsamic, it’s too sweet and overpowering. Trust me, you want that tangy kick to shine through, not get lost in a sugary haze.
How do I know when my pickles have reached the perfect level of sourness and are safe to eat?
Taste them, my friend! That’s the best way to know. I like to check after a week or so – when they’ve got a nice tang, but still some crunch. If you’re unsure, give ’em a sniff and a nibble. You’ll know they’re ready when they’ve got that perfect balance of sour and sweet. Trust your instincts, and don’t be afraid to experiment!