I still remember the Sunday mornings I spent as a kid, watching my mom whip up a batch of fluffy buttermilk pancakes that would make our entire house smell like a warm hug. To this day, I’m on a mission to master the art of how to make fluffy buttermilk pancakes that are just as delicious as hers. The truth is, I’ve tried countless recipes and techniques, and I’ve come to realize that it’s not about adding a million extra ingredients or following some fancy-schmancy method – it’s really about keeping things simple and focusing on the good stuff.
In this article, I’ll share my honest, no-frills advice on how to make fluffy buttermilk pancakes that will become a staple in your kitchen. I’ll walk you through my tried-and-true process, from the importance of using fresh buttermilk to the secret to not overmixing the batter. My goal is to empower you with the knowledge and confidence to create pancakes that are not only delicious but also consistently fluffy and tender. By the end of this guide, you’ll be equipped with the skills to make mouthwatering buttermilk pancakes that will impress your family and friends, and leave them begging for more.
Table of Contents
- Guide Overview: What You'll Need
- Step-by-Step Instructions
- Fluffy Buttermilk Pancakes
- Flipping to Perfection: 5 Essential Tips for Fluffy Buttermilk Pancakes
- My Top 3 Tips for Fluffy Buttermilk Pancakes
- The Secret to Fluffy Pancakes
- The Fluffy Finish: Bringing It All Together
- Frequently Asked Questions
Guide Overview: What You'll Need

Total Time: 30 minutes to 1 hour
Estimated Cost: $10 – $20
Difficulty Level: Easy
Tools Required
- Large Bowl for mixing batter
- Whisk for combining ingredients
- Measuring Cups for dry and liquid ingredients
- Electric Mixer optional for faster mixing
- Non-stick Skillet or Griddle for cooking pancakes
- Spatula for flipping pancakes
Supplies & Materials
- All-purpose Flour 2 cups
- Granulated Sugar 2 tablespoons
- Baking Powder 2 teaspoons
- Salt 1/4 teaspoon
- Large Eggs 2 eggs
- Buttermilk 1 cup
- Unsalted Butter 4 tablespoons, melted
- Butter or Oil for greasing the skillet or griddle
- Fresh Fruit or Syrup optional for serving
Step-by-Step Instructions
- 1. First, let’s start with the foundation of our fluffy buttermilk pancakes: the dry ingredients. In a large bowl, whisk together 1 1/2 cups of all-purpose flour, 3 1/2 teaspoons of baking powder, 1 teaspoon of salt, and 1 tablespoon of granulated sugar. I like to use a whisk to ensure everything is well combined and aerated, which is crucial for a tender pancake.
- 2. Next, in a separate bowl, we need to mix our wet ingredients. In a large measuring cup or bowl, whisk together 1 cup of fresh buttermilk, 1 large egg, and 2 tablespoons of melted unsalted butter. The key to incredibly fluffy pancakes is using fresh buttermilk, so don’t skip this step. If you don’t have buttermilk, you can make a substitute by mixing 1 cup of milk with 1 tablespoon of white vinegar or lemon juice, but trust me, it’s worth the trip to the store for the real deal.
- 3. Now, it’s time to combine our wet and dry ingredients. Pour the wet ingredients into the dry ingredients and stir until just combined. The batter should still be slightly lumpy. I always say, the less you mix, the fluffier the pancakes, so don’t overdo it. Stop mixing as soon as you see the ingredients come together in a shaggy mass.
- 4. Let the batter rest for 10-15 minutes to allow the flour to absorb the liquid ingredients. This step is crucial for developing the gluten in the flour, which will give our pancakes structure and texture. Use this time to heat up your non-stick skillet or griddle over medium heat. I like to use a cast-iron skillet because it retains heat beautifully, but any non-stick surface will do.
- 5. Once your skillet or griddle is hot, drop the batter by 1/4 cupfuls onto the surface. You should see bubbles forming on the surface of the pancakes and the edges starting to dry after about 2-3 minutes. This is when you know it’s time to flip them. Use a spatula to carefully flip the pancakes and cook for another 1-2 minutes, until they’re golden brown.
- 6. Remove the pancakes from the heat and place them on a wire rack to cool slightly. Repeat the process with the remaining batter, until all the pancakes are cooked. I like to keep my pancakes warm in a low oven (about 200°F) while I cook the rest of the batch, so everything is ready to serve at the same time.
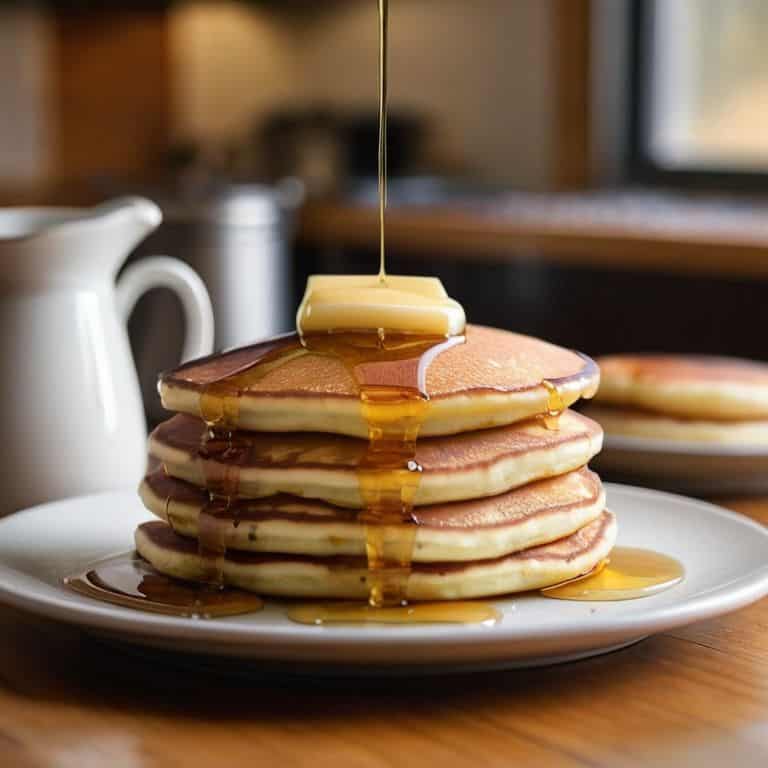
- 7. Finally, it’s time to serve our fluffy buttermilk pancakes. I like to top mine with a pat of unsalted butter, a drizzle of pure maple syrup, and a sprinkle of fresh fruit. The key to a truly decadent pancake experience is using high-quality toppings, so don’t be afraid to get creative and indulge in your favorite flavors. Enjoy your delicious, fluffy buttermilk pancakes!
Fluffy Buttermilk Pancakes
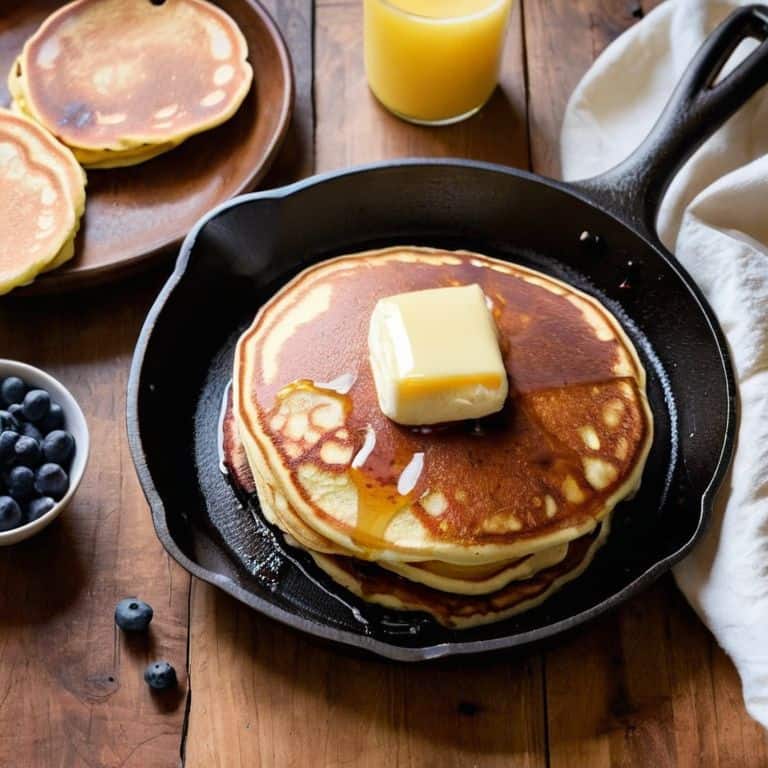
When it comes to making the perfect buttermilk pancake, I swear by using a high-quality non-stick pan. It makes all the difference in getting that beautiful golden brown color and preventing the pancakes from sticking. I’ve tried various pans over the years, but my go-to is still a classic cast-iron skillet. There’s something about the way it distributes heat that just can’t be beat.
One of the most crucial steps in my buttermilk pancake recipe from scratch is letting the batter rest. This allows the flour to absorb the liquid ingredients and the leavening agents to activate, resulting in a lighter and fluffier texture. I like to think of it as giving the batter a little time to “relax” before cooking. It’s amazing how much of a difference this simple step can make in the final product.
For added flavor, I love experimenting with different pancake mix-ins, such as fresh berries or chocolate chips. It’s a great way to mix things up and create a unique twist on the classic recipe. When it comes to the dry ingredients, I always make sure to use baking powder instead of baking soda, as it provides a more consistent rise and a tender crumb. With these tips and tricks, you’ll be well on your way to creating the fluffiest, most delicious buttermilk pancakes imaginable.
Pancake Perfection Non Stick Pans Matter
When it comes to cooking the perfect fluffy buttermilk pancakes, the pan you use is just as important as the ingredients. I swear by my trusty non-stick pans – they’re a game-changer. The last thing you want is for your beautiful pancakes to stick and fall apart, which is why a good non-stick pan is essential. I’ve tried using regular pans with butter or oil, but it’s just not the same.
Investing in a good non-stick pan will make all the difference in achieving pancake perfection. It allows for a smooth, even cook and makes flipping a breeze. Plus, cleanup is a cinch! Trust me, it’s worth the investment – your pancakes (and your sanity) will thank you.
Sunday Morning Magic Resting Batter
Resting the batter is where the magic really happens. I like to think of it as giving the ingredients a chance to get acquainted – the flour absorbs the liquid, the baking powder starts to activate, and the flavors meld together. Letting the batter rest for at least 30 minutes allows the gluten to relax, resulting in a tender and fluffy pancake. I often prepare the batter the night before, refrigerate it, and let it come to room temperature in the morning. This extra step makes a world of difference in the texture and rise of the pancakes. Trust me, it’s worth the wait!
Flipping to Perfection: 5 Essential Tips for Fluffy Buttermilk Pancakes
- Use room temperature ingredients, especially the eggs and buttermilk, to ensure they mix smoothly and evenly into the batter
- Don’t overmix the batter – stop mixing as soon as the wet and dry ingredients come together, it’s okay if there are a few lumps
- Let the batter rest for at least 30 minutes to allow the flour to absorb the liquid and the baking powder to activate, giving your pancakes a light and airy texture
- Choose the right pan – a non-stick skillet or griddle is essential for preventing the pancakes from sticking and making them easier to flip
- Resist the temptation to overcrowd the pan – cook the pancakes one by one, or in small batches, to ensure they have enough room to cook evenly and develop a beautiful golden brown color
My Top 3 Tips for Fluffy Buttermilk Pancakes
Use fresh buttermilk and don’t overmix the batter – it makes all the difference in achieving that fluffy, tender texture
Let your batter rest for at least 30 minutes to allow the flour to absorb the liquid ingredients and the baking powder to activate, resulting in a lighter pancake
Invest in a good non-stick pan, as it will help prevent your pancakes from sticking and make them easier to flip, ensuring a beautiful golden-brown color and a delicious crust
The Secret to Fluffy Pancakes
The fluffiest buttermilk pancakes aren’t just about the ingredients, but about the love and patience you put into letting that batter rest – it’s the difference between a dense, disappointing pancake and a towering stack of golden, fluffy goodness!
Sophie Carter
The Fluffy Finish: Bringing It All Together

As we’ve explored the world of fluffy buttermilk pancakes, it’s clear that a few key elements make all the difference: using fresh buttermilk, not overmixing the batter, and letting it rest to allow the magic to happen. We’ve also touched on the importance of having the right tools, like a reliable non-stick pan, to ensure that your pancakes release effortlessly and cook to a perfect golden brown. By combining these simple yet crucial steps, you’ll be well on your way to creating a Sunday morning tradition that your family and friends will cherish.
So, the next time you’re in the kitchen, whipping up a batch of your new favorite pancakes, remember that the joy of cooking lies not just in the end result, but in the process itself. The measuring, the mixing, the waiting – it’s all part of the experience. And when you take that first bite of a fluffy, golden pancake, freshly made with love and care, you’ll know that every minute was worth it. Happy cooking, and I look forward to sharing more of my favorite recipes with you soon!
Frequently Asked Questions
What happens if I don't have buttermilk and need to make a substitute?
No buttermilk? No problem! I’ve been there too. You can make a substitute by mixing 1 cup of milk with 1 tablespoon of white vinegar or lemon juice. Let it sit for 5-10 minutes, and it’ll curdle just like buttermilk. Trust me, it’s a game-changer – I’ve used it in a pinch and it works beautifully!
How long can I store leftover pancake batter in the fridge and still expect fluffy results?
Honestly, I’ve found that leftover pancake batter can be stored in the fridge for up to 24 hours and still yield amazing results. Just give it a good stir before using, and you’re golden! Any longer, and the leavening agents start to lose their magic. Trust me, I’ve tested it out – 24 hours is your sweet spot for fluffy, delicious pancakes.
Can I use a cast-iron skillet instead of a non-stick pan for cooking fluffy buttermilk pancakes?
Absolutely, you can use a cast-iron skillet for fluffy buttermilk pancakes! Just make sure it’s properly seasoned and preheated with a teensy bit of butter or oil. This will help prevent sticking and give your pancakes a lovely golden crust. I’ve done it many times, and it’s a game-changer – just be gentle when flipping, okay?