
I still remember the first time I mastered how to get crispy chicken skin – it was like a revelation in the kitchen. I had spent years trying to perfect the technique, but every recipe I followed seemed to yield the same disappointing results: soggy, flabby skin that was more suited to a sad salad than a satisfying Sunday roast. But then, something clicked. I realized that the key to achieving that perfect crunch wasn’t about following a complicated recipe or using some fancy gadget, but rather about understanding the simple science behind crispy chicken skin.
In this article, I’ll share my honest, no-hype advice on how to get crispy chicken skin every time. I’ll walk you through the easy-to-follow steps that have become second nature to me, from preparation to cooking. You’ll learn how to choose the right chicken, prepare it for cooking, and cook it to perfection. My goal is to empower you with the knowledge and confidence to create delicious, crispy chicken skin that will impress your family and friends. So, let’s get started and make some amazing food together!
Table of Contents
Guide Overview: What You'll Need

Total Time: 1 hour 15 minutes
Estimated Cost: $10 – $20
Difficulty Level: Intermediate
Tools Required
- Oven preheated to 425 degrees Fahrenheit
- Baking Sheet lined with aluminum foil or parchment paper
- Wire Rack to elevate the chicken
Supplies & Materials
- Chicken Pieces such as legs, thighs, or wings
- Kosher Salt for drying the skin
- Baking Powder to help crisp the skin
- Olive Oil for brushing the chicken
- Spices and Seasonings optional, such as paprika, garlic powder, or black pepper
Step-by-Step Instructions
- 1. First, let’s start with the basics: to get crispy chicken skin, you need to make sure your chicken is completely dry. I like to take my chicken out of the fridge and let it sit at room temperature for about 30 minutes before I start prepping it. This helps the skin to dry out a bit, which is essential for getting that perfect crunch.
- 2. Next, I prep my chicken by giving it a good ol’ fashioned rubdown with some salt, pepper, and any other seasonings I’m in the mood for. I’m a big believer in the idea that a dish is only as good as its best ingredient, so I like to use high-quality spices and herbs to give my chicken some real depth of flavor. Don’t be shy – give that chicken a good coating, making sure to get some under the skin as well.
- 3. Now it’s time to get our chicken ready for the oven. I like to use a hot oven to get the skin crispy, so preheat your oven to 425°F (220°C). While that’s heating up, I take my chicken and place it on a wire rack set over a baking sheet lined with foil. This helps the air to circulate under the chicken, which is crucial for getting the skin to crisp up.
- 4. With my oven preheated and my chicken all set, it’s time to get cooking. I roast my chicken in the oven for about 20 minutes per pound, or until it reaches an internal temperature of 165°F (74°C). But here’s the thing: I don’t just throw it in the oven and forget about it. Oh no, I like to babysit my chicken, basting it with melted butter or oil every 20 minutes or so to keep the skin nice and moist.
- 5. As my chicken cooks, I like to keep an eye on it to make sure the skin is getting nice and golden brown. If it starts to get too dark, I’ll cover it with some foil to prevent it from burning. But if it’s looking a little pale, I might give it a few minutes under the broiler to give it a bit of extra color.
- 6. Once my chicken is cooked through, I take it out of the oven and let it rest for 10-15 minutes before carving. This is an important step, as it allows the juices to redistribute and the skin to set. And let me tell you, there’s nothing quite like the smell of roasted chicken wafting through the air – it’s like a big ol’ hug for your nose.
- 7. Finally, it’s time to carve my chicken and serve it up. I like to slice it thinly and serve it with some of my favorite sides, like mashed potatoes or roasted veggies. And when I take that first bite, I’m always on the lookout for that perfect combination of crunchy skin and juicy meat. It’s a match made in heaven, folks!
How to Get Crispy Chicken Skin
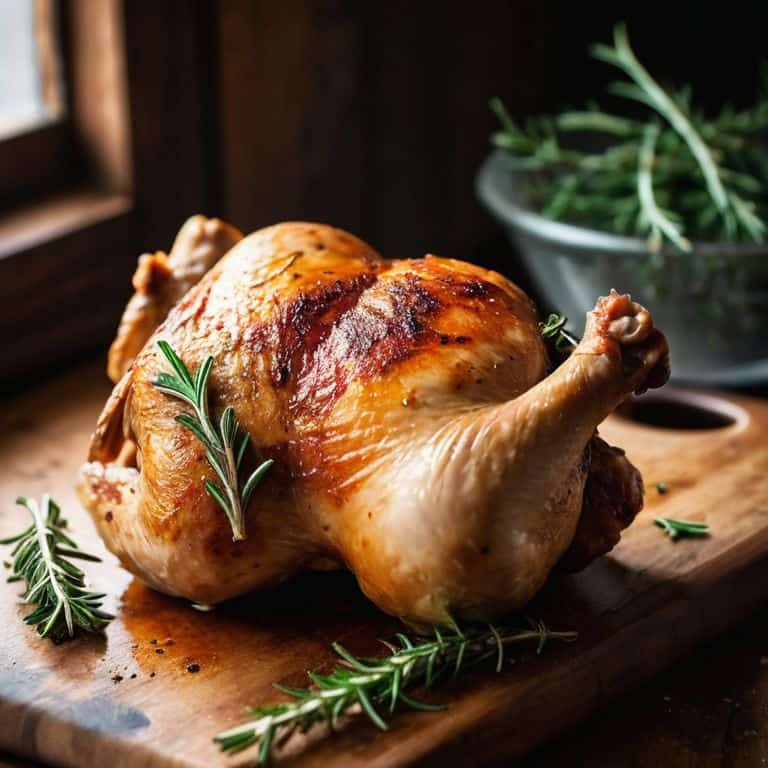
To take your chicken skin to the next level, it’s all about mastering the art of rendering. This involves cooking the skin slowly to melt the fat underneath, creating a crispy texture that’s simply irresistible. When using the oven, try making crispy chicken thighs by patting them dry with paper towels before cooking to remove excess moisture. This simple step can make a huge difference in achieving that perfect crunch.
Another great way to get crispy chicken skin is by using an air fryer. This handy kitchen gadget uses little to no oil, making it a healthier alternative to deep-frying. Simply season your chicken skin with your favorite spices and cook it in the air fryer until golden brown and crispy. For an extra kick, try making Korean style fried chicken skin by marinating it in a mixture of soy sauce, garlic, and sugar before cooking.
By following these chicken skin crisping hacks, you’ll be well on your way to creating deliciously crispy chicken skin that’s sure to impress. Remember to always season your baked chicken skin with a blend of herbs and spices to add extra flavor. Whether you’re making crispy chicken thighs in the oven or using an air fryer, the key is to experiment and find the method that works best for you.
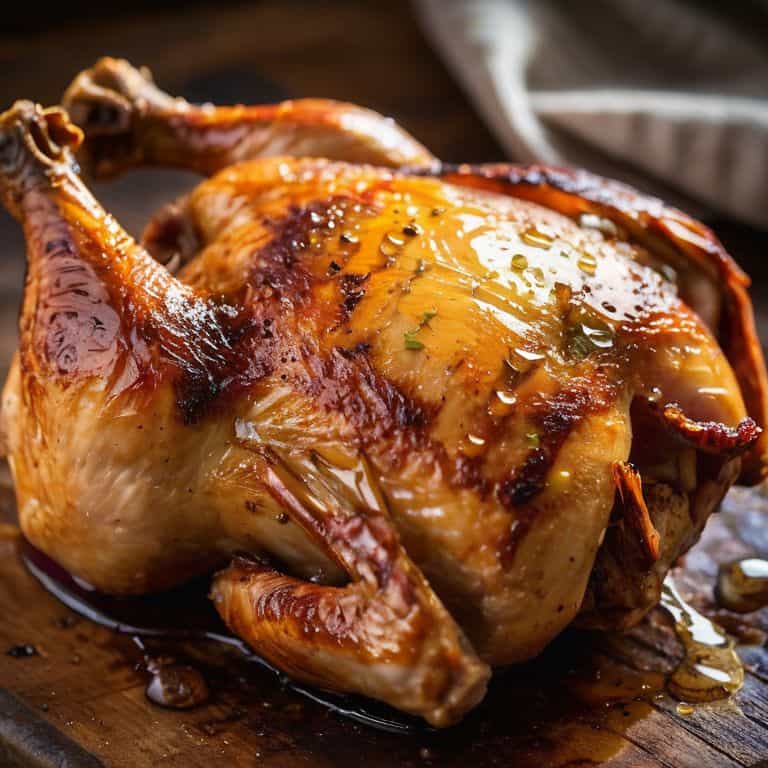
Chicken Skin Rendering Techniques Made Easy
To achieve that perfect crunch, it’s all about rendering the fat underneath the skin. I like to think of it as waking up the flavors and textures. My go-to technique is to pat the skin dry with a paper towel before cooking, which helps the seasonings stick and allows the skin to crisp up evenly. Then, I cook the chicken over medium-high heat to get a nice sear, followed by a lower heat to finish cooking it through. This two-step process ensures the skin is golden and crispy, while the meat stays juicy.
By mastering this simple rendering technique, you’ll be amazed at how easily you can achieve crispy chicken skin every time. Whether you’re roasting, grilling, or pan-frying, this method is a game-changer. Trust me, the extra step is worth it – your taste buds will thank you!
Crispy Chicken Thighs in Oven My Secret Recipe
To achieve perfectly crispy chicken thighs in the oven, I swear by a simple yet effective technique. It starts with drying the skin thoroughly with paper towels, then seasoning with a mixture of salt, pepper, and your favorite spices. Next, I bake them in a hot oven at 425°F (220°C) for about 25-30 minutes, or until the skin is golden brown and crispy.
The key to my secret recipe is to finish the chicken thighs under the broiler for an additional 2-3 minutes, keeping a close eye to prevent burning. This step adds an unbeatable crunch to the skin, making it irresistible. Trust me, the result is well worth the extra minute of attention – your taste buds will thank you!
My Top 5 Secrets to Achieving Irresistibly Crispy Chicken Skin
- Pat dry, pat dry, pat dry – I can’t stress enough how crucial it is to remove excess moisture from the chicken skin before cooking
- Bring out the big guns: a mixture of kosher salt, brown sugar, and smoked paprika will give your chicken skin a depth of flavor and a satisfying crunch
- Don’t be afraid to get a little aggressive – scoring the chicken skin in a crosshatch pattern allows fat to render out and creates a crisper texture
- A hot oven is your best friend – baking the chicken at high heat (around 425°F) will help to crisp up the skin in no time
- Acidity is key – a squeeze of fresh lemon juice or a splash of vinegar will help to break down the collagen in the skin, resulting in a crunchier, more tender final product
My Top 3 Tips for Crispy Chicken Skin
Pat dry, pat dry, pat dry – it’s all about removing excess moisture to get that perfect crunch
Don’t be afraid to get a little aggressive with your seasoning – a generous sprinkle of salt and your favorite spices can make all the difference
Low and slow is the way to go – rendering the fat out of that chicken skin at a lower temperature will give you the crispiest results, every time
The Secret to Irresistible Crunch
Crispy chicken skin isn’t just about the technique – it’s about understanding the magic that happens when you combine the right ingredients, a little patience, and a whole lot of love.
Sophie Carter
Wrapping Up the Crunch
We’ve covered the essential steps to achieve irresistibly crispy chicken skin, from proper rendering techniques to my secret recipe for oven-roasted thighs. To recap, the key to success lies in patience and attention to detail, ensuring that each step is executed with care. Whether you’re using the chicken skin rendering techniques or my secret recipe, remember that practice makes perfect, and it’s essential to experiment until you find the method that works best for you. By following these guidelines and staying committed to your goals, you’ll be enjoying crunchy, mouth-watering chicken skin in no time.
As you continue on your culinary journey, don’t be afraid to get creative and try new things – after all, that’s what cooking is all about! Remember, the art of cooking is a journey, not a destination, and it’s the little details like crispy chicken skin that can elevate a dish from ordinary to extraordinary. So go ahead, take the skills you’ve learned, and run with them – your taste buds (and your family and friends) will thank you. Happy cooking, and I look forward to sharing more delicious recipes with you in the future!
Frequently Asked Questions
What's the best way to dry chicken skin before cooking to ensure it gets crispy?
To get that perfect crisp, I swear by patting dry the chicken skin with paper towels, then letting it air dry in the fridge for at least 30 minutes. This step is crucial – it helps the skin contract and tighten, making it extra crispy when cooked. Trust me, it’s worth the wait!
Can I achieve crispy chicken skin on the stovetop or grill, or is the oven the only way?
Absolutely, you can get crispy chicken skin on the stovetop or grill! I’ve had amazing results with a hot skillet on the stovetop, and grilling can add a smoky flavor. The key is high heat and not overcrowding the pan. Give it a try and see what works best for you!
How do I prevent crispy chicken skin from becoming soggy when serving or storing leftovers?
To keep crispy chicken skin from getting soggy, I swear by a few tricks: store leftovers in a single layer, not stacked, and reheat in the oven or air fryer to crisp it back up. You can also try refrigerating or freezing it separately from the meat to maintain that perfect crunch.