
I still remember the first time I tried to make no-knead bread – it was a total disaster. I had heard that learning how to make no-knead bread was a breeze, but my first loaf was a dense, flat brick. It wasn’t until I ditched the fancy recipes and started experimenting with simple, tried-and-true techniques that I finally achieved that perfect, chewy crust and soft interior. The common myth that no-knead bread requires a lot of complicated steps and special equipment just isn’t true – and I’m excited to share my simplified approach with you.
In this article, I’ll walk you through my favorite recipe for no-knead bread, one that’s been perfected over years of trial and error. I’ll share my top tips for getting the best results, from the importance of using high-quality ingredients to the secret to achieving that perfect crust. My goal is to provide you with honest, hype-free advice that will have you baking delicious no-knead bread in no time. Whether you’re a seasoned baker or a total beginner, I’m confident that my approach will make learning how to make no-knead bread a fun and rewarding experience.
Table of Contents
Recipe Details
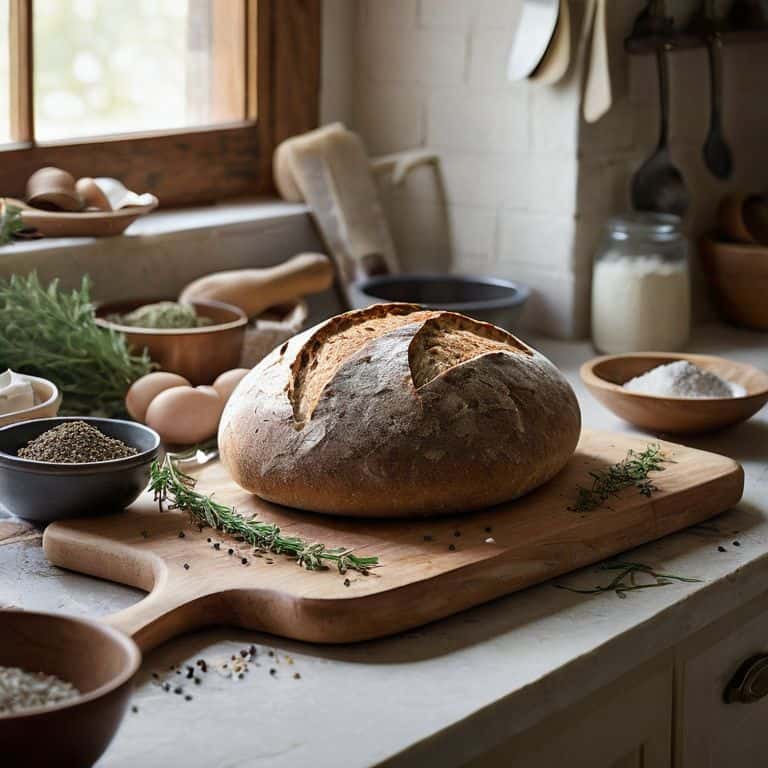
Ingredients
- 1 1/2 cups all-purpose flour (unbleached, unbromated)
- 1/4 teaspoon salt (preferably sea salt or kosher salt)
- 1/4 teaspoon sugar (optional, but helps yeast activity)
- 1/2 teaspoon active dry yeast (not instant yeast)
- 1 1/2 cups water (at room temperature)
Tools & Supplies
- Large mixing bowl
- Wooden spoon or spatula
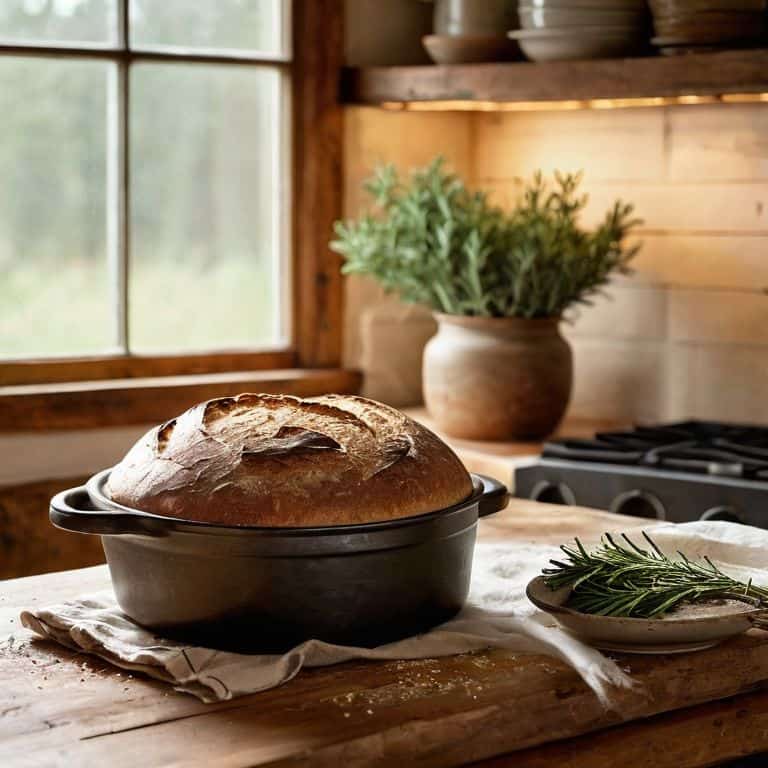
- Dutch oven or heavy-bottomed pot with lid
- Bench scraper or pastry scraper
- Clean work surface for shaping dough
Recipe Instructions
Step 1
First, let’s start with the basics: in a large mixing bowl, combine 1 1/2 cups of warm water, 2 teaspoons of active dry yeast, and 1 tablespoon of sugar. I like to use a digital thermometer to ensure the water is at the perfect temperature, between 100°F and 110°F, for the yeast to activate. This step is crucial, as it sets the foundation for your no-knead bread’s rise.
Step 2
Next, add 3 1/2 cups of all-purpose flour to the bowl, along with 1 teaspoon of salt. I’m very particular about my flour, and I always opt for unbleached, all-purpose flour for its consistent texture and flavor. Now, take a wooden spoon or a dough whisk, and gently mix the ingredients until they form a shaggy dough. Don’t overmix at this stage; we just want to combine the ingredients.
Step 3
Cover the bowl with plastic wrap or a damp towel, and let the mixture rest in a warm, draft-free place for about 12-14 hours. This long fermentation process is what gives no-knead bread its unique flavor and texture. I like to let it rest overnight, so I can wake up to a beautifully fermented dough. During this time, the yeast will start to break down the sugars, producing a mixture that’s both bubbly and aromatic.
Step 4
After the fermentation process, the dough should have doubled in size and have a few large bubbles on its surface. It’s now time to shape the dough into a round or oblong loaf. I like to use a lightly floured surface to prevent the dough from sticking, and then gently coax it into shape using my hands. Be gentle, as you don’t want to overwork the dough and lose all the beautiful air pockets that have formed.
Step 5
Place the shaped dough onto a piece of parchment paper or a lightly floured baking peel, if you have one. Cover it with plastic wrap or a clean towel, and let it rest for another 2-3 hours, or until it has doubled in size again. This final rise is crucial, as it will give your no-knead bread its light, airy texture. During this time, preheat your oven to 450°F (230°C), with a Dutch oven or a heavy-bottomed pot inside. Yes, you read that right – we’re going to bake the bread in a pot!
Step 6
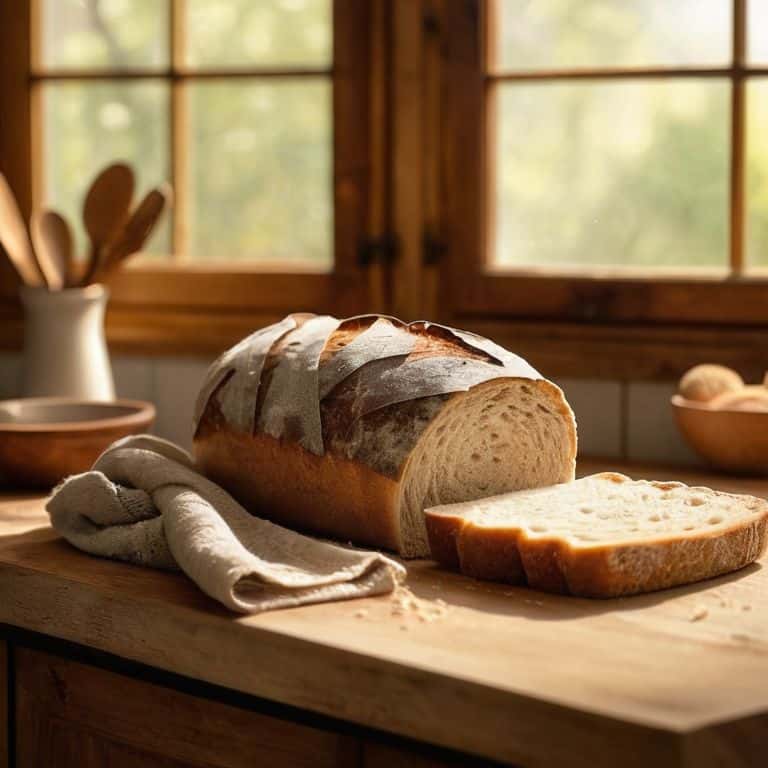
Once the dough has finished its final rise, carefully place the parchment paper or baking peel into the preheated pot. Cover the pot with a lid, and bake for 30 minutes. Then, remove the lid, and continue baking for an additional 15-20 minutes, or until the bread is golden brown and sounds hollow when tapped on the bottom. Remove it from the oven, and let it cool on a wire rack for at least 1 hour before slicing. The waiting game is the hardest part, but trust me, it’s worth it!
How to Make No Knead Bread
As I delve into the world of no-knead bread, I’m reminded of the easy artisan bread recipes that have become a staple in my kitchen. One of the things I love about this recipe is its versatility – it’s the perfect canvas for experimenting with different flavors and ingredients. For instance, you can try adding some dried herbs or spices to the dough for an extra boost of flavor.
When it comes to achieving that perfect crusty bread texture, I swear by using a dutch oven for baking. There’s something about the way the steam gets trapped inside, creating a crispy crust that’s just irresistible. Of course, you can also try baking it in a regular oven, but trust me, the dutch oven makes all the difference. If you’re feeling adventurous, you can even try creating a simple sourdough starter recipe to add an extra layer of complexity to your bread.
As a beginner, it’s essential to remember that making no-knead bread is all about experimentation and patience. Don’t be discouraged if your first loaf doesn’t turn out exactly as you hoped – it’s all part of the process. With a little practice, you’ll be whipping up beginner friendly bread recipes like a pro, and your kitchen will be filled with the most incredible aromas. So go ahead, get creative, and happy baking!
Dutch Oven Secrets for Crusty Texture
To achieve that perfect crust, I swear by baking my no-knead bread in a Dutch oven. There’s something magical about the way the steam gets trapped, creating a crunchy exterior that gives way to a soft, airy interior. I’ve found that preheating the pot is key – get it nice and hot before adding your dough, and you’ll be rewarded with a beautiful, crackly crust.
For an extra boost of flavor, try dusting the pot with a pinch of cornmeal or semolina before adding the bread. This will not only help the loaf release more easily, but also impart a subtle nutty flavor that complements the bread perfectly. Trust me, it’s a game-changer!
Easy Artisan Bread Recipes Uncovered
I just love how no-knead bread has opened the door to a world of easy artisan bread recipes. It’s amazing how a simple change in technique can lead to such a wide range of possibilities. From crusty baguettes to hearty ciabatta, the options are endless. I’ve experimented with all sorts of flavors and ingredients, and I’m excited to share some of my favorites with you.
One of my go-to variations is a rosemary and olive oil bread that’s perfect for sopping up soups or sauces. I also love adding some dried herbs and spices to create a unique flavor profile. The best part? These recipes are just as easy to make as the original no-knead bread, with minimal hands-on time and maximum deliciousness.
My Top 5 Secrets to Perfectly Delicious No-Knead Bread, Every Time
- Use a high-quality, unbleached all-purpose flour that’s rich in protein for a more complex flavor and better texture
- Let your dough rest for at least 24 hours to allow the yeast to ferment and develop that signature tang
- Don’t overmix your dough – stop as soon as the ingredients come together in a shaggy mass, then let time do the rest
- Preheat your Dutch oven to scorching hot temperatures before adding the dough, and use a piece of parchment paper to prevent sticking
- Resist the temptation to slice into your freshly baked loaf for at least an hour, allowing the interior to set and the crust to cool and crisp up
My Top 3 Takeaways for Perfect No-Knead Bread
To achieve a perfectly chewy crumb, don’t overmix the dough – a shaggy mass is exactly what you’re aiming for, trust me!
A hot Dutch oven is your best friend for that crispy, artisanal crust – just be sure to preheat it for at least 30 minutes before baking
Be patient and let time do the work: the longer you let the dough rest, the more complex the flavors will be, and the better your bread will turn out
The Heart of Homemade Bread
The beauty of no-knead bread lies not in its simplicity, but in its ability to connect us to the heart of homemade – where every crusty loaf and chewy crumb tells a story of love, patience, and the joy of sharing a warm, freshly baked slice with the people you love.
Sophie Carter
The Crust of the Matter: A Delicious Conclusion
As we’ve explored the world of no-knead bread together, I hope you’ve seen just how accessible and rewarding this process can be. From the initial mix to the final bake, every step is a sensory delight, filled with the aroma of flour and the satisfaction of watching your dough transform. We’ve uncovered the secrets of easy artisan bread recipes, and even delved into the Dutch oven secrets that can elevate your crust game to new heights. Whether you’re a seasoned baker or just starting out, I’m confident that you now have the tools and the inspiration to create your own perfectly chewy, crispy-crusted loaves.
So as you go forth and bake, remember that the true magic happens not just in the recipe, but in the act of sharing your creations with others. There’s something special about breaking bread with loved ones, and I hope that my no-knead bread recipe becomes a staple in your kitchen, a symbol of warmth and comfort that brings people together. Happy baking, and don’t forget to savor every bite!
Frequently Asked Questions
What happens if I don't have a Dutch oven, can I still achieve a crispy crust on my no-knead bread?
No Dutch oven? No problem! You can still get a crispy crust on your no-knead bread. Try using a regular oven with a preheated stone or baking steel, or even a cast-iron skillet. Just preheat it to 450°F (230°C) and bake for 25-30 minutes. The key is high heat and a hot surface – your bread will still turn out beautifully crusty!
How do I know when my no-knead bread is fully proofed and ready to bake?
The proofing stage – my favorite part! To check if your no-knead bread is fully proofed, gently poke it with your finger. If the indentation remains, it’s ready to bake. You can also look for a visible rise and a slightly puffy texture. Trust me, with a little practice, you’ll develop a sixth sense for when it’s just right!
Can I customize my no-knead bread recipe with different flavors, such as garlic or rosemary, and if so, how?
Absolutely, get creative with those flavors. I love adding minced garlic or chopped rosemary to my no-knead dough for a twist. Simply mix in your chosen flavor after the initial rise, and proceed with the recipe. Taste as you go, and don’t be afraid to experiment – that’s the beauty of homemade bread!