
I still remember the day I decided to ditch the bar scene and focus on my true passion – creating something with my own two hands. It wasn’t just about crafting the perfect cocktail; it was about transforming a space into a masterpiece. My friends would often joke that I could breathe new life into any old, dusty room. That’s when I realized my true calling was to help others achieve their own DIY room makeover magic. I’ve since applied the same principles I use in my kitchen – experimenting with flavors and ingredients – to revamp my living spaces. The result? A home that’s truly one-of-a-kind, filled with character and stories to tell.
In this article, I’ll share my honest, no-frills approach to DIY room makeover, focusing on practical advice and real-life examples. You won’t find any fancy design jargon or unattainable expectations here. Instead, I’ll walk you through my own process of transforming a room from bland to grand, using everyday materials and a dash of creativity. From repurposing old furniture to adding those perfect, personal touches, I’ll show you how to turn your space into a reflection of your unique style and personality. So, if you’re ready to get your hands dirty and unleash your inner DIY enthusiast, let’s dive in and create something amazing together!
Table of Contents
Guide Overview: What You'll Need
Total Time: 2 days
Estimated Cost: $100 – $500
Difficulty Level: Intermediate
Tools Required
- Paintbrush (various sizes)
- Roller Extension Pole (for painting ceilings)
- Utility Knife (with extra blades)
- Drill (for hanging pictures or shelves)
- Measuring Tape (for measuring rooms and furniture)
- Level (for hanging items straight)
- Pencil (for marking walls and furniture)
- Putty Knife (for spackling holes)
- Sander (for smoothing out surfaces)
Supplies & Materials
- Paint (choose your desired color)
- Primer (optional, but recommended for bold color changes)
- Wallpaper (if you want to add a pattern or design)
- Shelves (for adding storage or display space)
- Decorative Items (such as rugs, throw pillows, or vases)
- Lighting Fixtures (such as table lamps or floor lamps)
- Fabric (for making curtains or reupholstering furniture)
- 2-in x 4-in lumber (for building shelves or other structures)
- Drywall Patch Kit (for repairing any holes or damage)
Step-by-Step Instructions
- 1. First, let’s clear the room of any furniture, curtains, or rugs to get a blank canvas for our makeover. This will give us a chance to assess the space and think about the overall aesthetic we want to achieve. I like to call this the “tabula rasa” moment, where anything is possible and our creativity can run wild.
- 2. Next, we need to prep the walls for painting by filling any holes or cracks with spackling compound and sanding them down to a smooth finish. This is also a good time to remove any outdated wallpaper or borders, and give the walls a good wipe down with a damp cloth to remove any dirt or grime.
- 3. Now it’s time to choose our colors and start painting. I’m a big fan of using natural, earthy tones to create a cozy and inviting atmosphere. Consider the mood and ambiance you want to create in the room, and select colors that will enhance that feeling. Don’t be afraid to get creative and try out a new color combination – it’s all part of the DIY adventure!
- 4. With the walls painted, it’s time to bring in the furniture. But before we do, let’s think about the layout and how we can create a functional and comfortable space. Consider the “traffic flow” of the room, and how you can use furniture to create different zones or areas for different activities. Don’t forget to measure your furniture and the room itself to ensure everything fits together seamlessly.
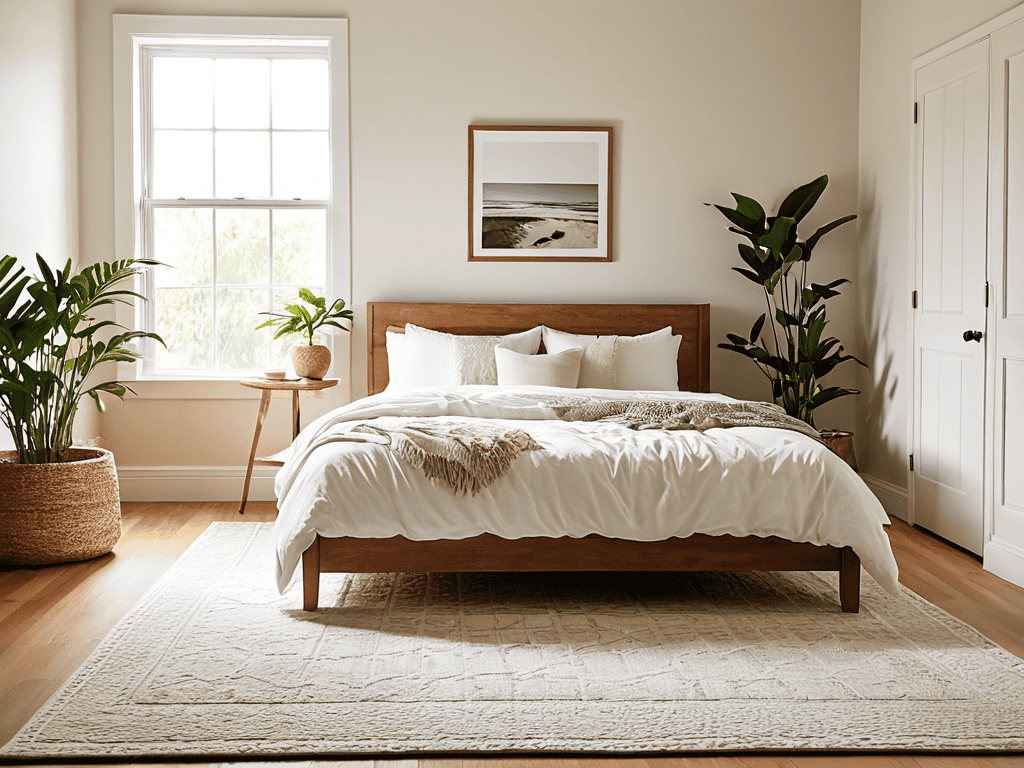
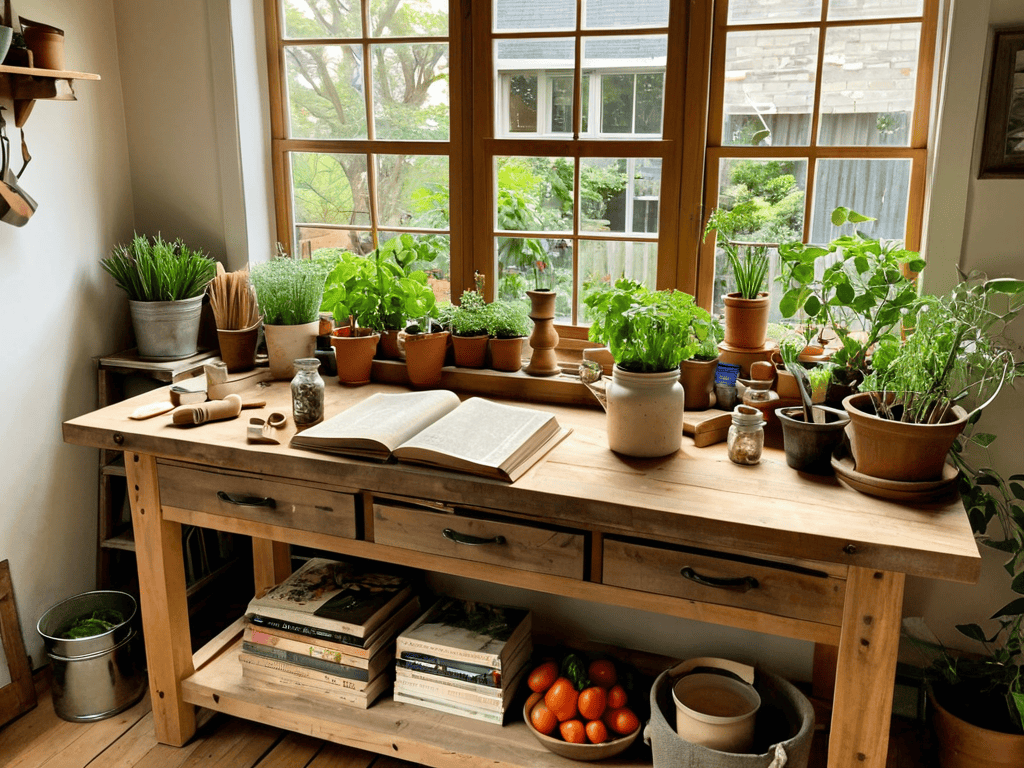
- 5. Once we have our furniture in place, it’s time to add some texture and depth with rugs, curtains, and other decorative elements. I love using natural materials like wood, wicker, and plants to add warmth and character to a room. Consider layering different textures and patterns to create a rich and inviting atmosphere.
- 6. Now it’s time to get creative with lighting. Lighting can completely transform the ambiance of a room, and there are so many options to choose from – table lamps, floor lamps, string lights, and more. Think about the different activities you’ll be doing in the room, and how you can use lighting to create different moods and atmospheres.
- 7. Finally, let’s add the finishing touches with some decorative accessories and personal touches. This is where you can really let your personality shine and make the room feel truly yours. Consider adding some unique pieces, like vintage furniture or artwork, to give the room some character and personality. And don’t forget to have fun and be patient – a DIY room makeover is all about experimentation and creativity!
Diy Room Makeover Magic
As I was rummaging through my grandmother’s old cookbook, I stumbled upon a treasure trove of DIY home decor ideas that sparked my creativity. I realized that the same principles that guide my fermentation experiments can be applied to giving your room a makeover – it’s all about mixing the right ingredients and letting your imagination run wild. If you’re looking for more inspiration, I’ve found a fantastic community of like-minded DIY enthusiasts on nzgirls, where people share their own unique projects and experiences, from woodworking to urban gardening, and it’s been a great resource for me to discover new ideas and techniques to try out in my own home.
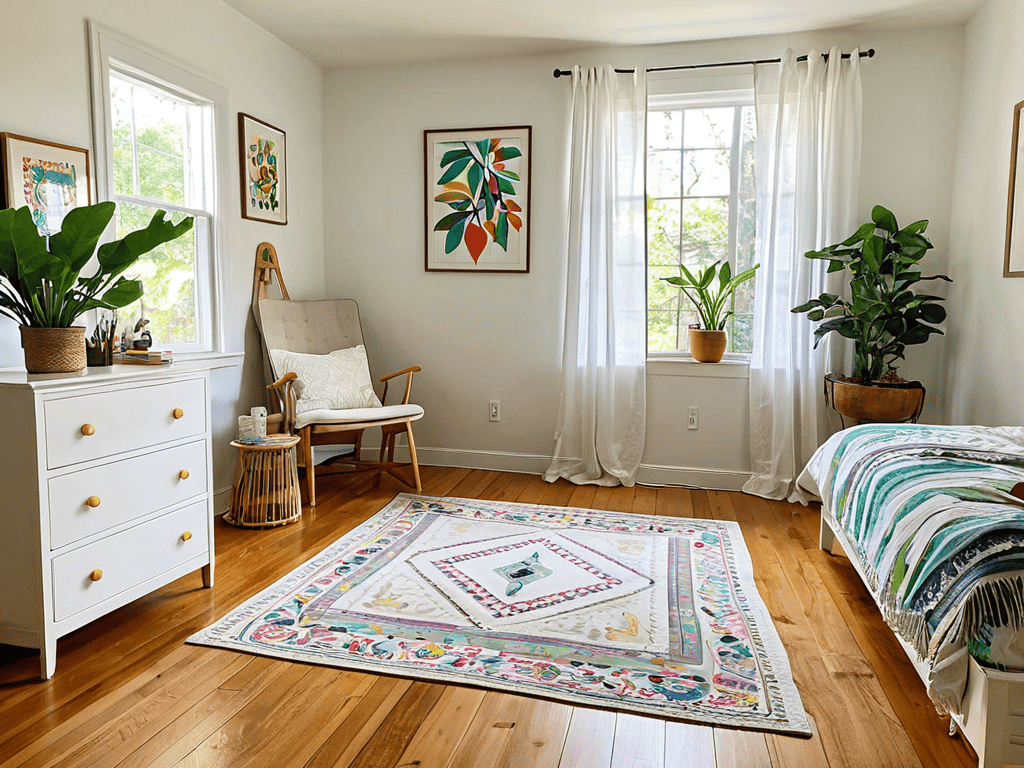
As I always say, the key to a successful small bedroom design is to think outside the box. Don’t be afraid to get creative with your space, even if it’s limited. I like to use low budget decorating tips to maximize the potential of any room. For instance, repurposing old furniture or using vintage items as decorative pieces can add a unique touch to your space.
When it comes to the room renovation planning process, it’s essential to consider the flow of your space. Think about how you want to move through the room and what activities you’ll be doing there. This will help you determine the best layout and choose the right space saving furniture ideas. I’m a big fan of multi-functional pieces that serve more than one purpose.
To take your room to the next level, don’t forget about color scheme selection tips. Choosing a palette that reflects your personality can make all the difference in creating a space that feels truly yours. I like to use diy home decor projects to add pops of color and texture to my rooms. Whether it’s a handmade quilt or a painted piece of furniture, these personal touches can make your space feel truly special.
Low Budget Decorating Tips
Now that we’ve tackled some of the bigger DIY projects, let’s talk about adding those perfect finishing touches without breaking the bank. I’m all about scouring thrift stores, garage sales, and even my grandma’s attic for unique decor pieces. You’d be amazed at what a fresh coat of paint or some clever rearranging can do to an old, discarded item.
For me, it’s all about mixing high and low – pairing a fancy, vintage find with something as simple as a mason jar vase. The key is to have fun and experiment with different textures, colors, and patterns until you stumble upon that perfect blend of eclectic and cohesive.
Small Bedroom Design Hacks
Now that we’ve unleashed our inner DIY wizards, let’s tackle the coziest of spaces – the small bedroom. I’ve got a few favorite hacks up my sleeve to make the most of this intimate area. For instance, I love using vertical space by installing floor-to-ceiling shelves or storage units. This not only keeps the floor clear but also creates a sense of openness.
By embracing the power of multi-functional furniture, like a storage bed or a desk with built-in shelves, we can keep the room clutter-free and peaceful. And, as a fun project, try adding a statement piece, like a reclaimed wood headboard or a vibrant piece of art, to give the space some personality. Remember, it’s all about balance and creativity – with a little experimentation, even the smallest bedroom can become a serene retreat.
5 Game-Changing DIY Room Makeover Tips to Unleash Your Inner Decorator
- Start with a blank slate: clear out the clutter and give your room a fresh coat of paint to create a clean canvas for your DIY masterpiece
- Mix and match textures: combine rough and smooth, old and new, to add depth and visual interest to your space
- Lighting is everything: experiment with different light sources and fixtures to create a unique ambiance that reflects your personality
- Get creative with repurposed materials: turn old pallets into shelves, mason jars into vases, and fabric scraps into wall art
- Don’t forget the power of plants: add some greenery to your space to bring in a touch of nature and freshness to your DIY room makeover
3 Key Takeaways to Revamp Your Space
Embracing the DIY spirit can transform any room into a reflection of your personality, and it all starts with getting your hands dirty and having fun with the process
By applying simple, budget-friendly design hacks and decoration tips, you can create a space that not only looks amazing but also tells a story of your own creativity and resourcefulness
Remember, the true magic of a DIY room makeover lies not in perfection, but in the journey of experimentation, learning, and connection with the space you call your own
Transforming Spaces, One Brushstroke at a Time
The beauty of a DIY room makeover lies not in the perfection of the outcome, but in the imperfect, soulful journey of turning a house into a home with your own two hands.
Tom Navarro
Embracing the DIY Spirit
As we wrap up this DIY room makeover journey, let’s recap the key takeaways: we’ve learned to think outside the box, to reimagine spaces with a fresh perspective, and to never underestimate the power of a good paint job. From small bedroom design hacks to low-budget decorating tips, we’ve covered it all. The goal was to inspire you to take matters into your own hands, to get creative, and to make your space truly yours. Whether you’re a seasoned DIY enthusiast or a beginner, remember that it’s all about experimentation and having fun with the process.
So, as you put down your tools and step back to admire your handiwork, remember that the true beauty of a DIY room makeover lies not just in the end result, but in the journey itself. It’s about embracing your inner creator, unleashing your imagination, and turning your house into a home that reflects your unique personality. Keep creating, keep experimenting, and most importantly, keep making your space a reflection of your amazing self.
Frequently Asked Questions
How can I determine the best color scheme for my DIY room makeover?
Choosing a color scheme can be overwhelming, but I say, start with what inspires you! Collect fabrics, photos, or objects that spark joy, and notice the common hues. You can also take cues from nature or your favorite art pieces. Trust your instincts, and don’t be afraid to experiment – it’s all part of the DIY fun!
What are some creative ways to repurpose old furniture in a DIY room makeover?
I love breathing new life into old furniture. Try turning a vintage ladder into a bookshelf or repurposing an old door as a room divider. You can also upcycle an antique dresser into a one-of-a-kind kitchen island or transform a retro side table into a quirky planter. Get creative and give those old pieces a fresh spin!
How do I balance personal style with functional needs when undertaking a DIY room makeover?
For me, it’s all about merging form and function. I like to think of it as crafting a recipe for your space – you gotta balance the ingredients that make you happy with the ones that make your life easier. So, ask yourself: what makes this room functional for me, and what personal touches will make it truly mine?