
I still remember the day I discovered the magic of microgreens – it was like a whole new world of flavors opened up for me. I was experimenting with a guide to growing microgreens on your windowsill, and let me tell you, it was a game-changer. The common myth that you need a lot of space or a green thumb to grow your own microgreens is just that – a myth. With a little creativity and the right techniques, you can be harvesting fresh, crazy delicious microgreens in no time.
In this article, I’ll share my honest, no-hype advice on how to get started with growing microgreens on your windowsill. You’ll learn the basics of microgreen care, from choosing the right seeds to creating the perfect growing conditions. I’ll also share some of my favorite tips and tricks for getting the most out of your microgreen harvest, so you can enjoy the fruits of your labor and take your cooking to the next level. Whether you’re a seasoned gardener or a beginner, this guide will give you the confidence to start growing your own microgreens and experiencing the joy of fresh, homegrown flavors.
Table of Contents
Guide Overview: What You'll Need
Total Time: 1 week
Estimated Cost: $10 – $30
Difficulty Level: Easy
Tools Required
- Small tray or container at least 1 inch deep
- Spray bottle for watering
- Measuring cups or spoons for measuring seeds and water
Supplies & Materials
- Microgreen seeds choose your desired variety
- Potting soil a high-quality seed starting mix
- Water for watering and maintaining humidity
Step-by-Step Instructions
- 1. First, let’s get started by preparing the soil for our microgreens. I like to use a mix specifically designed for seed starting, as it’s usually finer and easier to work with. Fill your container of choice – I’m a fan of old jam jars or wooden planters – with about an inch or two of this soil. Don’t pack it down too much, we want it to be nice and loose for our seeds.
- 2. Next, we need to choose which microgreens we want to grow. I’m a big fan of pea shoots and radish greens, but you can experiment with all sorts of varieties. Some are spicier, some are sweeter, and they all add a unique flavor to whatever dish you’re making. For a beginner, I recommend starting with something like salad mix or kale – they’re easy to grow and do well in a windowsill setting.
- 3. Now it’s time to sow our seeds. Take a pinch of your chosen seeds and scatter them evenly across the surface of the soil. Don’t worry too much about getting them perfectly spaced – microgreens are all about embracing a little chaos. Cover the seeds with a thin layer of soil, just enough to keep them from drying out.
- 4. Watering is crucial, especially in the first few days. I like to use a watering can with a long spout to get right to the roots without washing away the seeds. Keep the soil consistently moist, but not soaking wet – you don’t want your seeds to rot before they even have a chance to sprout.
- 5. Find a spot on your windowsill that gets plenty of natural light, and make sure it’s not too drafty. Most microgreens prefer warmer temperatures, between 65-75 degrees Fahrenheit, so keep that in mind when choosing your spot. I’ve found that a south-facing window is usually the way to go, but if that’s not an option, don’t worry – just get creative with some grow lights.
- 6. As your microgreens start to grow, you’ll need to keep an eye on them to make sure they’re not getting too leggy. If they start to stretch towards the light, it’s probably time to give them a little more direct sunlight or add some supplemental lighting. Keep the soil moist, but start to let it dry out slightly between waterings – this will encourage your microgreens to develop a deeper root system.
- 7. Finally, it’s time to harvest your microgreens. This is usually within 1-3 weeks, depending on the variety and growing conditions. Use a pair of scissors to snip off the greens just above the soil line, and voila – you’ve got yourself a delicious addition to any salad, sandwich, or sauté. I like to harvest mine in the morning, when the leaves are at their crispest, and use them throughout the day to add a burst of fresh flavor to whatever I’m cooking up.
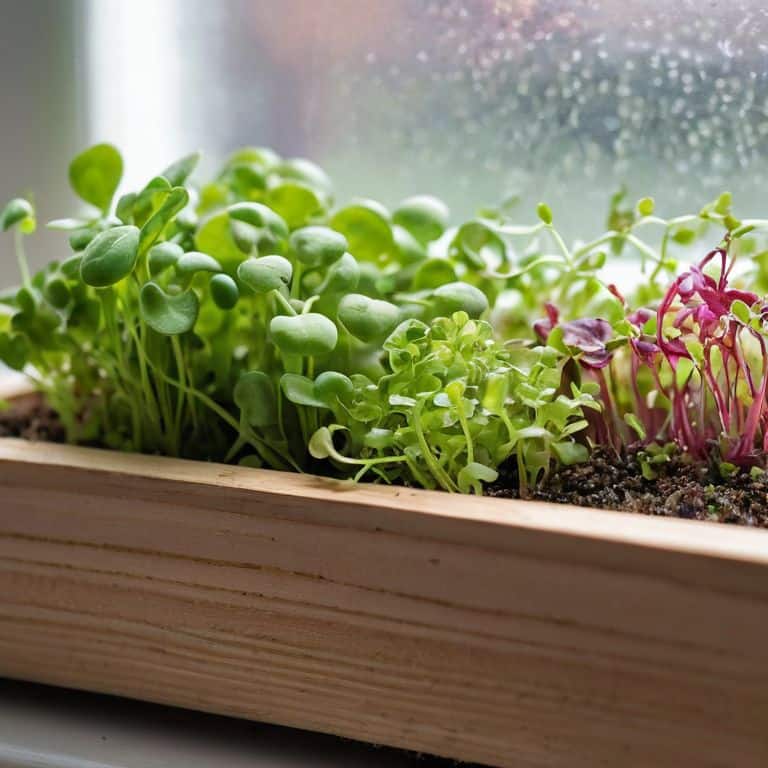
A Guide to Growing Microgreens on Your Windowsill
As I delve deeper into the world of indoor microgreen gardening, I’ve come to realize the importance of microgreen seed selection. Choosing the right seeds can make all the difference in the flavor and texture of your microgreens. I like to experiment with different varieties, from peppery radish greens to nutty alfalfa. When setting up your windowsill garden, make sure to select seeds that thrive in indoor conditions and can tolerate the amount of light your window receives.
One of the most crucial aspects of growing microgreens is the microgreen soil composition. You want a mix that’s specifically designed for indoor growing and retains moisture well. I like to add a bit of compost to give my microgreens an extra boost. When it comes to setting up your windowsill garden, consider using a self-watering planter or a grow tray with a built-in water reservoir. This will help maintain the optimal moisture levels for your microgreens.
As you wait for your microgreens to mature, keep an eye out for common microgreen pests like aphids and spider mites. Regularly inspect your plants, and use organic pest control methods whenever possible. When it’s time to harvest, make sure to do so at the optimal microgreen harvesting time, usually when the leaves are 1-3 inches tall. This will ensure you get the best flavor and texture out of your microgreens.
Microgreen Seed Selection Secrets
When it comes to selecting the perfect microgreen seeds, I get really excited. You see, the type of seed you choose can completely transform the flavor and texture of your harvest. I love experimenting with different varieties, from peppery radish greens to nutty alfalfa. For a windowsill setup, I recommend starting with some easy-to-grow options like kale, arugula, or mustard greens. These will give you a delicious base to work with, and you can always add more exotic varieties to the mix later.
My personal favorite trick is to mix and match seeds to create unique flavor profiles. Try combining earthy beet greens with zesty cilantro for a taste sensation that’s out of this world! The key is to have fun and not be afraid to try new things. Remember, the beauty of growing microgreens lies in their versatility, so don’t be shy to experiment and find your perfect blend.
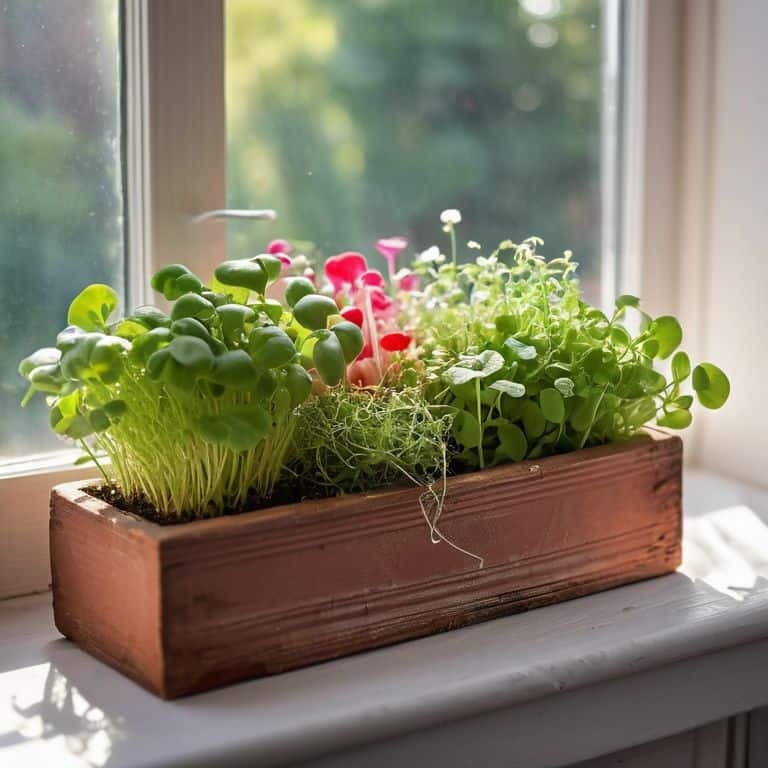
Unlocking Indoor Microgreen Magic
Unlocking Indoor Microgreen Magic
The real fun begins when you start experimenting with different microgreen varieties. I love watching a batch of radish greens burst forth on my windowsill, their spicy flavor adding a kick to any dish. And let’s not forget the peas – their tender shoots are like nature’s own snack food. By playing with various combinations, you’ll discover the unique charms of each type and how they can elevate your meals.
As you tend to your mini indoor garden, remember that it’s all about embracing the process. Don’t stress if things don’t turn out perfectly – it’s the journey, not the destination, that makes growing microgreens so rewarding. With every passing day, you’ll become more attuned to the rhythms of your plants, and before you know it, you’ll be hooked on the magic of indoor microgreen cultivation.
5 Essential Tips for a Thriving Windowsill Microgreen Garden
- Give Your Microgreens a Sunny Disposition: Ensure your windowsill receives plenty of indirect sunlight, as direct sunlight can be too intense and may cause your microgreens to bolt
- Water You Waiting For: Keep the soil consistently moist, but not waterlogged, by watering your microgreens when the top inch of soil feels dry to the touch
- The Seed Starting Symphony: Sow your microgreen seeds densely, but not too densely, to create a lush carpet of greens – aim for about 1-2 seeds per square inch
- Harvest Time is Prime Time: Use scissors to snip off your microgreens when they reach 1-3 inches in height, usually within 7-21 days of sowing, and enjoy them in salads, sandwiches, or as a garnish
- Get Your Green On: Experiment with different microgreen varieties to find your favorites, from spicy radish greens to nutty alfalfa, and don’t be afraid to mix and match for a colorful and flavorful harvest
Harvesting the Essentials
Always choose a windowsill with plenty of indirect sunlight to give your microgreens the best chance to thrive and pack a punch of flavor
Select a variety of microgreen seeds that suit your taste preferences, from spicy radish to nutty alfalfa, and don’t be afraid to experiment with new combinations
Keep your microgreens consistently watered, but not waterlogged, and be prepared to harvest them within 1-3 weeks, when they’re at their peak flavor and nutritional potency
Sowing the Seeds of Flavor
Growing microgreens on your windowsill is like unleashing a flavor bomb in your kitchen – it’s a simple yet powerful way to add a burst of freshness and nutrition to any dish, and the best part is, you get to be the farmer, the chef, and the artist all at once!
Tom Navarro
Harvesting the Fruits of Your Labor

That’s it – you now have a solid foundation for growing your own microgreens on your windowsill! To recap, we’ve covered the essential steps to get you started, from selecting the right seeds to providing the perfect conditions for indoor microgreen magic. We’ve also dived into the world of microgreen seed selection secrets, helping you choose the best varieties for your taste and nutritional needs. By following these simple steps and tips, you’ll be enjoying fresh, peppery radish greens or nutty alfalfa in no time. Remember, the key to success lies in keeping it simple, being patient, and having fun with the process.
As you embark on this microgreen journey, I encourage you to think beyond just the harvest – consider the flavor explosion you’re about to unleash in your kitchen! Imagine being able to add a burst of freshness to your favorite dishes, from salads to sandwiches, all thanks to your very own windowsill microgreen garden. The sense of accomplishment and connection to your food is unparalleled. So don’t be afraid to experiment, try new things, and get creative with your microgreens – your taste buds (and your health) will thank you. Happy growing, and I’ll see you in the next post, where we’ll dive into the wonderful world of fermented delights!
Frequently Asked Questions
How often should I water my microgreens to ensure they don't dry out or get too soggy?
Watering microgreens is all about feel – I like to check on them daily, giving the soil a gentle poke with my finger. If it’s dry to the touch, it’s time for a drink! Aim for a consistent moisture level, like a damp sponge. Overwatering can be a killer, so start with a light touch and adjust as needed – your microgreens will thank you!
Can I grow microgreens on my windowsill year-round, or are there specific seasons that are better for certain varieties?
Absolutely, you can grow microgreens on your windowsill year-round! While some varieties thrive in cooler temperatures, others love the warmth. I’ve had success with pea shoots and radish greens in the winter, and basil and cilantro in the summer. Just adjust your seed selection and care according to the season, and you’ll be harvesting fresh microgreens 365 days a year!
What are some common mistakes to avoid when growing microgreens on a windowsill, and how can I troubleshoot issues like weak or leggy growth?
Don’t worry, friend! Weak or leggy microgreens usually mean they’re not getting enough light or are too far apart. Check your windowsill’s sunlight and sow those seeds a bit closer together. Also, avoid overwatering – it’s a common mistake. Just keep the soil consistently moist and you’ll be harvesting robust microgreens in no time!