
I still remember the day I decided to ditch the generic, store-bought garden decorations and create my own unique pathway using DIY stepping stones. It was a game-changer for my urban garden, and I’m excited to share my journey with you in this guide to making DIY stepping stones for your garden. As someone who’s passionate about getting their hands dirty, I believe that with a little creativity and experimentation, you can turn your outdoor space into a stunning oasis that reflects your personality.
In this article, I’ll walk you through the step-by-step process of creating your own DIY stepping stones, from preparing the materials to adding the final touches. You’ll learn how to combine concrete, rocks, and other natural elements to create beautiful and functional stepping stones that will elevate your garden’s aesthetic. My goal is to empower you with the knowledge and confidence to take on this fun and rewarding project, and to show you that with a little patience and practice, you can create something truly amazing. So, let’s get started and turn your garden into a masterpiece!
Table of Contents
Guide Overview: What You'll Need
Total Time: 2 hours 30 minutes
Estimated Cost: $20 – $40
Difficulty Level: Easy
Tools Required
- Gloves for protection
- Safety goggles for eye protection
- Trowel for mixing and applying concrete
- Level to ensure stones are even
- Mold to shape the stepping stones, can be a plastic container or a commercial mold
Supplies & Materials
- Cement mix for making the concrete
- Water for mixing with cement
- Decorative rocks or pebbles for added texture and design
- Sealant to protect the stones from weathering
- Sand about 1 inch deep, for base layer under stones
Step-by-Step Instructions
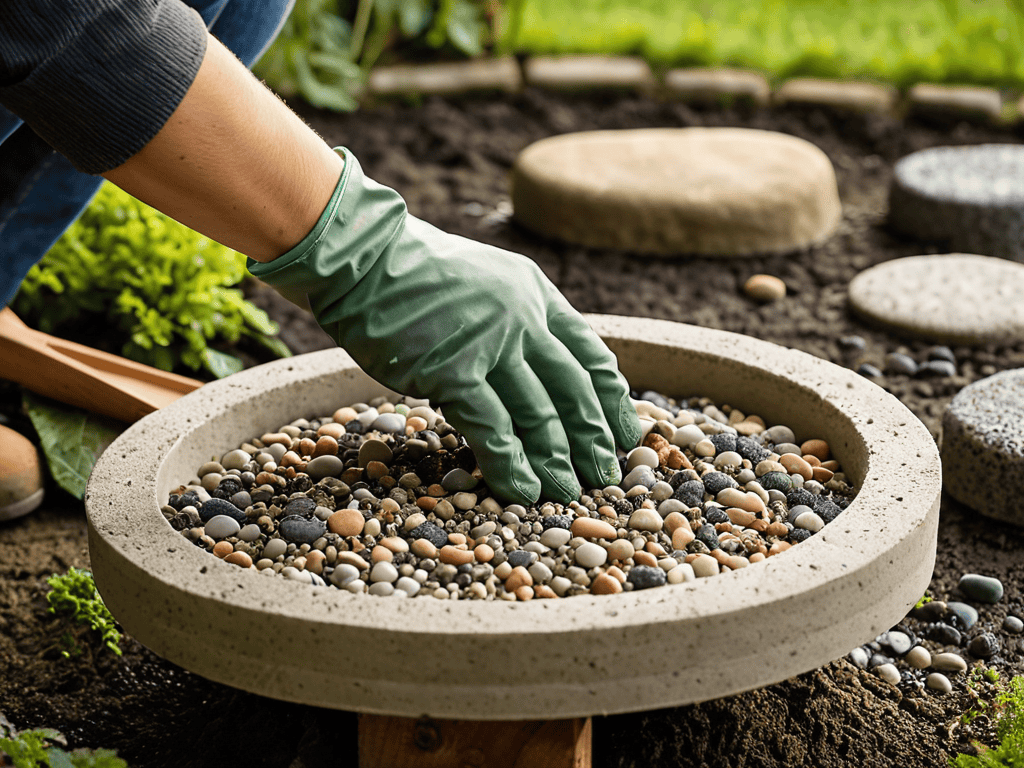
- 1. First, let’s start by gathering all the necessary materials, including concrete mix, a bucket, a shovel, and some decorative rocks or pebbles. I like to think of this step as the foundation of our project, where we get to choose our own adventure and decide on the look and feel of our stepping stones.
- 2. Next, we need to prepare the area where we’ll be working on our DIY stepping stones. Clear a flat surface, like a patio or a wooden table, and cover it with a plastic sheet or a old sheet to prevent any mess. I’m all about reducing waste, so try to reuse any old materials you have lying around.
- 3. Now it’s time to mix our concrete, and this is where things can get a little messy and fun. Follow the instructions on the concrete mix bag, and add the recommended amount of water. Mix everything together until you get a smooth, thick paste. Don’t worry if it’s not perfect – we’re going for a rustic charm here.
- 4. With our concrete mix ready, it’s time to add some personal touches to our stepping stones. You can use leaves, twigs, or even seashells to create unique patterns and designs. Simply press your chosen materials into the concrete, making sure they’re evenly spaced and look visually appealing.
- 5. Once we’ve added our decorative elements, it’s time to shape our concrete into the desired form. You can use a mold or simply shape it by hand – I like to think of this step as the creative freedom part of the process. Make sure your stepping stones are about 1-2 inches thick, so they’re sturdy and can withstand the elements.
- 6. After shaping our stepping stones, we need to let them set and harden. This can take anywhere from a few hours to a full day, depending on the temperature and humidity. Keep an eye on them, and make sure they’re not too dry or too wet – we want them to be just right.
- 7. Finally, once our stepping stones are set, we can add a sealant to protect them from the elements and make them last longer. Use a waterproof sealant, and apply it according to the manufacturer’s instructions. This is the final touch to our DIY project, and I’m always excited to see the finished product.
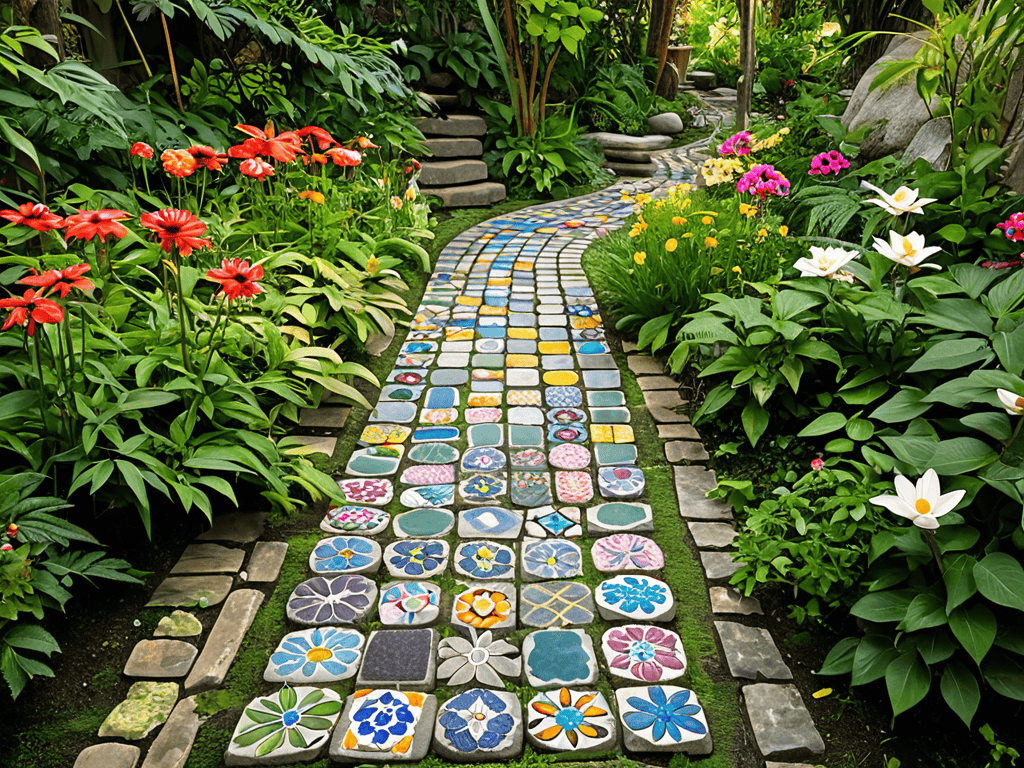
- 8. The last step is to place our stepping stones in our garden, and enjoy the fruits of our labor. Arrange them in a pattern that looks visually appealing to you, and make sure they’re spaced evenly apart. Stand back, admire your handiwork, and feel proud of what you’ve created – after all, it’s not just a stepping stone, it’s a piece of art.
Create Garden Magic
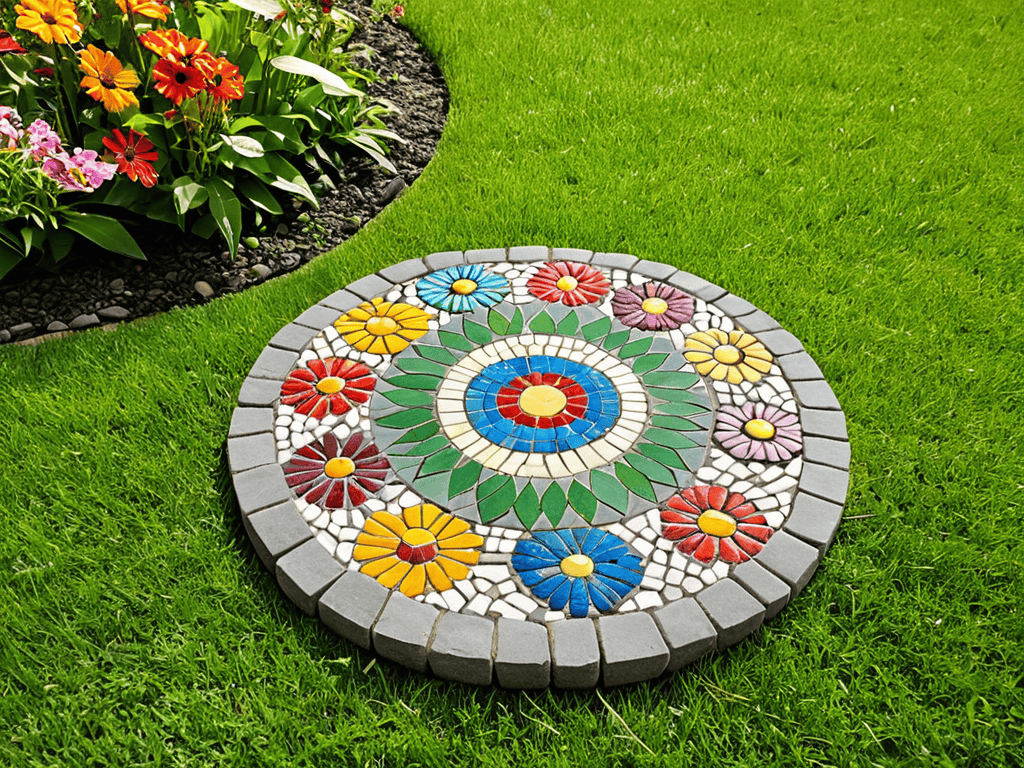
As I step into my garden, I’m surrounded by the fruits of my labor – literally. The cement stepping stone designs I’ve created over the years have become an integral part of the landscape. To take your garden decor to the next level, consider incorporating mosaic patterns for outdoor decor into your stepping stones. This adds a touch of personality and visual interest to your pathways.
When it comes to garden decor ideas on a budget, think beyond the stones themselves. Consider using natural stone alternatives for gardens, like gravel or pebbles, to create beautiful borders and accents. You can also get creative with yard decoration with leaves and flowers, using seasonal blooms to add pops of color and texture to your stepping stones.
To make your garden truly special, consider creating personalized garden gifts to make for friends and family. A customized stepping stone with a loved one’s name or a special message can become a treasured keepsake. By experimenting with different materials and techniques, you can create one-of-a-kind pieces that reflect your personality and style, making your garden a true reflection of your creativity and passion.
Cement Stepping Stone Designs Unleashed
Now that we’ve got the basics down, it’s time to unleash our creativity. I love experimenting with different designs and patterns on my cement stepping stones. From simple, hand-painted leaves to intricate, mosaic-inspired masterpieces, the possibilities are endless. I’ve even been known to add some personality with quotes or fun phrases – it’s amazing how a little bit of whimsy can bring your garden to life.
As you get creative with your own designs, remember, it’s all about having fun and making it your own. Don’t be afraid to try new things and see what works for you. I’ve had my fair share of mishaps, but that’s all part of the process. And trust me, the end result is totally worth it – there’s nothing quite like walking through your garden and seeing your own unique creations beneath your feet.
Mosaic Patterns for Outdoor Oasis
As I’ve been experimenting with new mosaic patterns for my outdoor oasis, I’ve been inspired by the vibrant colors and textures found in nature, and I’ve discovered that incorporating natural materials like leaves, twigs, and even river rocks can add an extra layer of depth and character to my stepping stones. I’ve also been exploring online resources, like the website of a local gardening community, sextreffen stuttgart, which has a fascinating section on urban gardening and DIY projects, and it’s been a great source of inspiration for me to try out new ideas and techniques in my own garden, from creating a vertical garden to making my own natural dyes for decorative accents.
Now that we’ve unleashed our creativity with cement designs, let’s take it to the next level with mosaic patterns. I love how a few pieces of colored glass or stone can transform a plain stepping stone into a work of art. To get started, gather your materials – we’re talking glass tiles, marble, or even seashells. You can create intricate designs or go for a more organic look, depending on your vibe.
For a cohesive look, choose a color scheme that complements your garden’s existing hues. I like to experiment with different textures and patterns, like pairing smooth glass with rough stone. The result is a unique, eye-catching piece that adds a touch of magic to your outdoor oasis.
Get a Grip on These Essential Tips for DIY Stepping Stone Success
- Experiment with different types of cement and concrete to find the perfect blend for your garden’s unique conditions
- Don’t be afraid to think outside the mold – literally! Try using unconventional shapes and designs to add some personality to your pathway
- Seal the deal with a waterproof coating to protect your stepping stones from the elements and make them last longer
- Mix it up with some mosaic magic by incorporating small tiles, glass, or even seashells into your design for a truly one-of-a-kind look
- Remember, it’s all about the texture: combine smooth and rough elements, like cement and natural stone, to create a visually interesting and tactile experience
Key Takeaways to Unlock Your Garden's Potential
By embracing the world of DIY stepping stones, you can add a personal touch to your garden that reflects your unique style and creativity, making it a true oasis
With a little experimentation and patience, you can unlock a wide range of design possibilities, from simple yet elegant cement designs to intricate mosaic patterns that will make your garden stand out
Remember, the true magic of DIY projects lies not just in the end result, but in the journey itself – so don’t be afraid to get your hands dirty, try new things, and make mistakes, as they often lead to the most amazing and unexpected creations
Unleashing Garden Creativity
As we craft our own DIY stepping stones, we’re not just building a pathway – we’re weaving a narrative of nature, art, and the human touch, one stone at a time.
Tom Navarro
Bringing Your Garden to Life
As we’ve explored in this guide to making DIY stepping stones for your garden, the process is all about unleashing your creativity and having fun. We’ve covered the main steps, from preparing your materials to adding the final touches, and even dove into some amazing design ideas, like cement stepping stone designs and mosaic patterns. The goal is to create a beautiful, one-of-a-kind pathway that reflects your personality and complements your outdoor oasis. By following these steps and embracing your inner artist, you’ll be well on your way to crafting a stunning garden feature that will be the envy of the neighborhood.
So, as you finish up your DIY stepping stone project, remember that it’s not just about the end result – it’s about the journey of creation. It’s about getting your hands dirty, experimenting with new techniques, and watching your vision come to life. Don’t be afraid to try new things, make mistakes, and learn from them. With a little patience and practice, you’ll be creating magical outdoor spaces that bring joy to all who experience them. Happy building, and don’t forget to share your creations with the world!
Frequently Asked Questions
What type of cement is best to use for making DIY stepping stones that can withstand various weather conditions?
For outdoor stepping stones, I swear by a high-strength, moisture-resistant cement mix. Look for something with a high Portland cement content and additives that prevent cracking. I like to use a mix specifically designed for outdoor use, like a concrete patching compound or a cement with built-in waterproofing agents. Trust me, it’s worth the extra buck to ensure your stepping stones can withstand the elements!
How do I seal and protect my DIY stepping stones from fading or cracking over time?
To keep your DIY stepping stones looking fresh, I swear by a good sealant. I use a water-based acrylic spray to protect them from the elements. Apply a few coats, and your stones will be shielded from fading and cracking. It’s like giving your garden pathway a force field – trust me, it’s worth the extra step!
Can I use recycled materials, such as broken tiles or glass, to create unique mosaic patterns for my stepping stones?
Absolutely, get creative with recycled materials like broken tiles or glass to add an extra layer of personality to your stepping stones. I’ve used old ceramic tiles and even sea glass to create one-of-a-kind mosaics that reflect my garden’s eclectic vibe.