I still remember the first time I tried to make sauerkraut at home – it was a disaster. I had heard that it was a complicated process, requiring special equipment and a lot of patience. But I was determined to learn how to make sauerkraut at home, and after months of trial and error, I finally got it right. The key to success lies in simplicity, not complexity. So, if you’re looking to learn how to make sauerkraut at home, you’re in the right place.
In this article, I’ll share my honest, no-hype advice on making delicious sauerkraut from scratch. You’ll learn the basic steps, from shredding the cabbage to monitoring the fermentation process. I’ll also share some tips and tricks I’ve picked up along the way, from using the right ingredients to avoiding common mistakes. By the end of this guide, you’ll be equipped with the knowledge and confidence to start making your own sauerkraut at home, and discovering the tangy flavor that’s been missing from your meals.
Table of Contents
Guide Overview: What You'll Need

Total Time: 5 days to several weeks
Estimated Cost: $10 – $20
Difficulty Level: Easy
Tools Required
- Mandoline or Food Processor (for shredding cabbage)
- Large Bowl (for mixing and massaging cabbage)
- Crock or Container (with a wide mouth, approximately 1 gallon capacity)
- Weight (such as a plate or a stone, to keep cabbage submerged)
- Cheesecloth or Clean Cotton Cloth (to cover the container)
Supplies & Materials
- Cabbage (approximately 5 pounds, any variety)
- Salt (approximately 1 tablespoon per 5 pounds of cabbage)
- Water (optional, for creating brine)
Step-by-Step Instructions
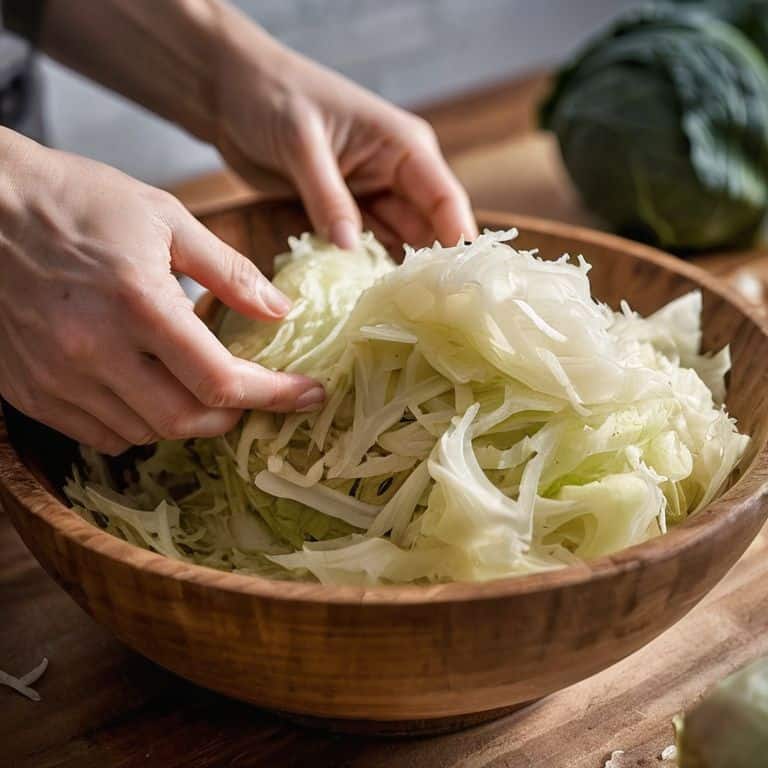
- 1. First, let’s start by preparing our cabbage for the sauerkraut-making process. We’ll need to shred or chop it into thin strips, which will help to release the juices and create that perfect balance of crunch and tang. I like to use a mix of green and red cabbage for a pop of color, but feel free to experiment with different varieties to find your favorite.
- 2. Next, we’ll need to create a brine solution to help preserve our sauerkraut and give it that distinctive flavor. To do this, we’ll mix 1 tablespoon of salt with 1 cup of water, stirring until the salt is fully dissolved. Don’t worry too much about the exact measurements – I like to think of this step as more of an art than a science.
- 3. Now it’s time to massage the cabbage, which is probably my favorite part of the whole process. We’ll add the shredded cabbage to a large bowl, sprinkle it with a pinch of salt and caraway seeds (if using), and then get in there with our hands to really work the ingredients. This helps to release the juices and start the fermentation process, so don’t be afraid to get a little rough.
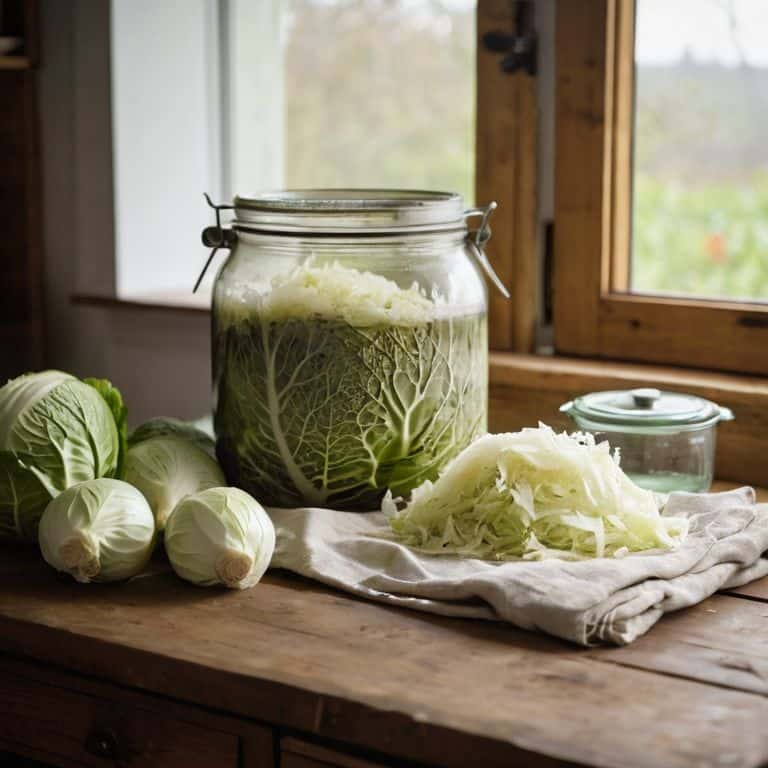
- 4. After we’ve massaged the cabbage, we’ll pack it into a jar or container, making sure to press out as much of the air as possible. This is where the magic happens, and our sauerkraut starts to take shape. I like to use a large glass jar with a wide mouth, which makes it easy to pack the cabbage down and add any additional ingredients.
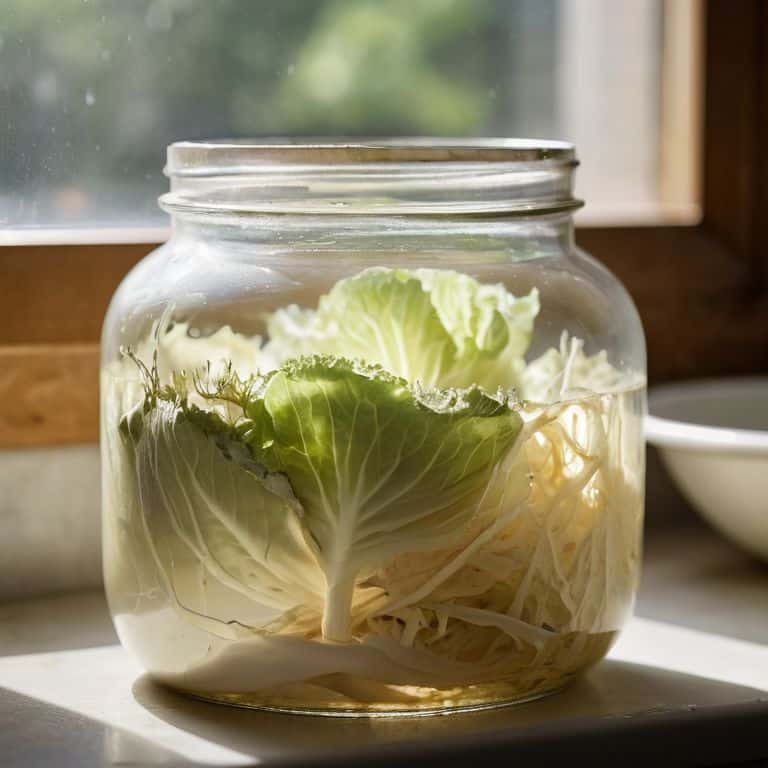
- 5. With our cabbage packed into the jar, it’s time to add the weights and wait. We’ll cover the jar with a lid or plate, and then add a weight (such as a stone or a brine-filled bag) to keep everything submerged under the liquid. Now, all we have to do is wait for the fermentation process to work its magic, which can take anywhere from a few days to several weeks.
- 6. As we wait for our sauerkraut to ferment, we’ll need to check on it regularly to make sure everything is progressing as it should. We’ll look for signs of fermentation, such as bubbles, foam, or a tangy aroma, and make sure that the cabbage is still submerged under the liquid. If anything starts to look or smell off, we can always adjust the environment by adding more weight or moving the jar to a cooler location.
- 7. Finally, after several weeks of patience and anticipation, our sauerkraut is ready to eat. We’ll transfer it to the fridge to slow down the fermentation process, and then enjoy it as a crunchy, tangy addition to our favorite dishes. I like to think of sauerkraut as a blank canvas, just waiting for us to get creative with it – so don’t be afraid to experiment with different recipes and ingredients to find your new favorite ways to use it.
Make Sauerkraut at Home
As I always say, the key to a great sauerkraut is in the lacto fermentation process explained. It’s all about creating an environment where those amazing microbes can thrive and turn your humble cabbage into a tangy, probiotic-rich superfood. I like to think of it as a little science experiment in my kitchen, where I get to be the mad scientist, measuring out ingredients by feel and watching my creation come to life.
One of the things that drew me to sauerkraut making was the ease of it all. I mean, it’s basically just cabbage, salt, and time. But, of course, there are some tricks to getting it just right. For beginners, I always recommend starting with an easy sauerkraut recipe for beginners and then experimenting from there. You can try using different types of cabbage, adding in some caraway seeds or juniper berries for extra flavor, or even using a crock pot to make the process a little more hands-off.
When it comes to storing your finished sauerkraut, the key is to keep it cool and dark. I like to pack mine into mason jars and stick them in the fridge, where they’ll keep for months. And don’t even get me started on the sauerkraut health benefits and nutrition – this stuff is like a superfood, packed with vitamins, minerals, and probiotics. Plus, it’s just so versatile – you can use it as a side dish, add it to soups or stews, or even use it as a topping for tacos or hot dogs. The possibilities are endless, and I love experimenting with new sauerkraut recipe variations and ideas to keep things interesting.
Crock Pot Tips and Variations
Now that we’ve got the basics of lacto fermentation covered, let’s talk about taking your sauerkraut game to the next level with some crock pot tips and variations. I love using my crock pot to ferment sauerkraut – it’s like having a personal fermentation butler, keeping everything at the perfect temperature.
You can experiment with different ingredients to create unique flavor profiles. Try adding some caraway seeds or grated ginger to give your sauerkraut a bit of zing. The possibilities are endless, and that’s what makes fermentation so exciting.
Easy Lacto Fermentation for Beginners
Easy Lacto Fermentation for Beginners
Lacto fermentation is the magic behind sauerkraut, and it’s ridiculously simple. I mean, we’re talking leave-it-on-the-counter-for-a-week simple. The key is creating an environment where those good bacteria can thrive. For sauerkraut, that means shredding the cabbage, adding some salt, and letting nature do its thing. Don’t worry if it gets a little messy or if you’re not sure if it’s “done” – that’s all part of the fun.
Just remember, the most important ingredient is time. Let that cabbage sit, and those lacto bacteria will start breaking it down, creating that tangy flavor we all love. Trust me, the wait is worth it. And don’t be afraid to experiment – try adding some caraway seeds or garlic to give your sauerkraut a unique twist. The world of lacto fermentation is all about trial and error, and I’m excited for you to dive in and get your hands dirty!
Sauerkraut Secrets: 5 Tips to Get You Fermenting Like a Pro
- Start with the right cabbage: I always look for firm, dense heads of cabbage that will hold up well to the fermentation process
- Shred, don’t chop: Using a mandoline or food processor to shred your cabbage will help create the perfect texture for sauerkraut
- Don’t be shy with the salt: Salt is what helps bring out the natural flavors of the cabbage and creates an environment that’s perfect for lacto-fermentation
- Keep it clean, but not too clean: You want to make sure your equipment and workspace are clean, but don’t worry if things get a little messy – it’s all part of the fermentation process
- Be patient: Sauerkraut is one of those things that gets better with time, so don’t be tempted to rush the fermentation process – let it do its thing and you’ll be rewarded with delicious, tangy sauerkraut
Homemade Sauerkraut Essentials
Embracing the art of lacto-fermentation allows you to unlock the full flavor potential of your homemade sauerkraut, with a tangy taste that’s both refreshing and addictively delicious
Experimenting with different ingredients and spices can elevate your sauerkraut game, from adding a pinch of caraway seeds for a traditional flavor to incorporating chili flakes for an extra kick
Whether you’re using a crock pot or a simple jar, the key to perfect sauerkraut lies in patience and trust in the fermentation process, so don’t be afraid to get creative and let nature do its magic
The Sauerkraut Philosophy
Making sauerkraut at home isn’t just about following a recipe, it’s about embracing the beauty of imperfection and letting nature’s magic unfold in your kitchen, one deliciously tangy batch at a time.
Tom Navarro
Embracing the Fermentation Journey
As we’ve explored the world of homemade sauerkraut, I hope you’ve gained the confidence to get creative with your own recipes and experiment with new flavors. From the initial shredding of the cabbage to the final tangy product, making sauerkraut at home is a journey that’s as much about the process as it is about the end result. Remember, the key to successful lacto-fermentation lies in patience and attention to detail, so don’t be discouraged if your first batch doesn’t turn out exactly as you hoped. With practice, you’ll develop a sense of touch for when the sauerkraut is just right, and that’s when the magic happens.
As you continue on this fermentation journey, I encourage you to think outside the box and explore the countless possibilities that exist beyond traditional sauerkraut recipes. Whether you’re infusing your creations with unique spices or experimenting with different types of produce, the world of homemade fermentation is full of surprises waiting to be discovered. So go ahead, get your hands dirty, and watch as the simple act of making sauerkraut at home becomes a catalyst for a deeper connection to your food, your community, and the joy of creation itself.
Frequently Asked Questions
What's the ideal temperature for fermenting sauerkraut at home?
For me, the sweet spot for fermenting sauerkraut is between 64°F to 75°F. Any cooler and it’s a slow dance, any warmer and it’s a wild party – neither of which you want for perfect kraut. My fermentation station is always around 70°F, and it yields that beautiful, tangy flavor I’m obsessed with.
Can I use a food processor to shred the cabbage, or is it better to do it by hand?
Go ahead and use that food processor to shred your cabbage – it’ll save you some elbow grease! Just be careful not to over-process, or you’ll end up with mush. A few pulses should do the trick. I like to leave a bit of texture, so it’s still got some crunch. Hand-shredding is great too, but hey, who doesn’t love a shortcut?
How do I know when my sauerkraut is properly fermented and ready to eat?
The moment of truth! You’ll know your sauerkraut is ready when it’s tangy, slightly sour, and has a nice crunch. Taste it after a few days – if it’s still too cabbage-y, give it more time. I like to check on mine every day or two, squeezing a bit between my fingers to feel the texture and smell the funk.