I still remember the day I decided to ditch the store-bought vanilla extract and learn how to make homemade vanilla extract. It was a game-changer for my baking and cooking, and I’m excited to share my journey with you. For years, I thought making vanilla extract from scratch was some kind of mystical process, reserved for professional chefs and pastry chefs. But the truth is, it’s incredibly simple and rewarding. By making your own vanilla extract, you can avoid the artificial additives and preservatives found in commercial products and enjoy a more authentic, rich flavor.
In this article, I’ll walk you through the straightforward process of creating your own homemade vanilla extract. You’ll learn how to select the best vanilla beans, combine them with the right spirit, and wait for the magic to happen. I’ll share my own tips and tricks for getting the most out of your vanilla beans and infusing your extract with the deepest, most complex flavors. By the end of this guide, you’ll be equipped with the knowledge and confidence to start making your own vanilla extract and taking your baked goods and desserts to the next level. So, let’s get started and unlock the full potential of this incredible ingredient!
Table of Contents
Guide Overview: What You'll Need
Total Time: 2 weeks to 6 months
Estimated Cost: $10 – $30
Difficulty Level: Easy
Tools Required
- Glass Jar (with tight-fitting lid)
- Measuring Cups
- Measuring Spoons
Supplies & Materials
- Vanilla Beans 2 to 4 beans per 8 ounces of vodka
- Vodka at least 35 percent alcohol content
- Cheesecloth or Coffee Filter (for straining)
Step-by-Step Instructions
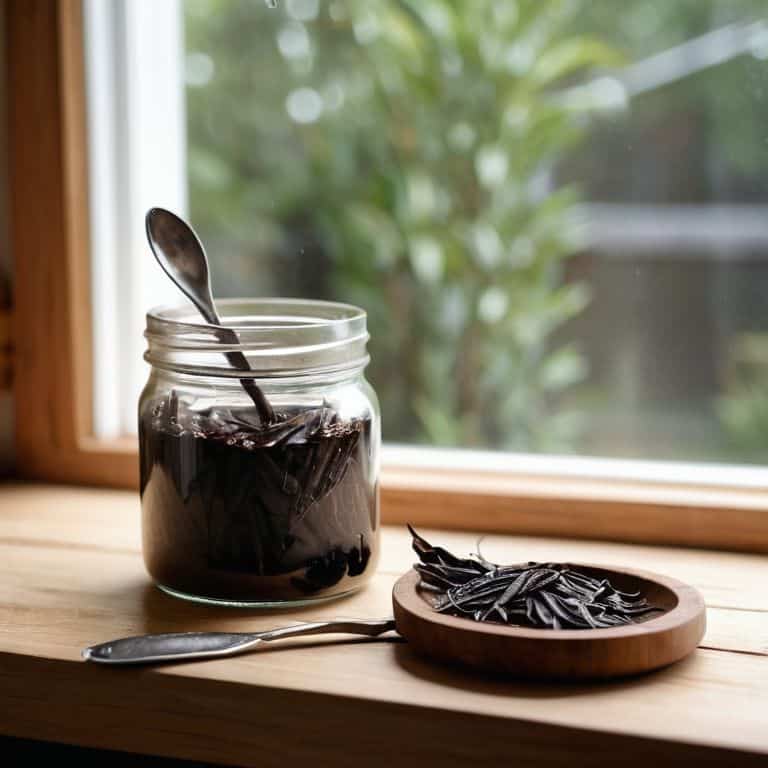
- 1. First, let’s start by gathering our ingredients and tools – we’ll need some high-quality vanilla beans, a clean glass jar with a lid, and a neutral-tasting spirit like vodka or rum. I like to use reusable glass jars to reduce waste and add a personal touch to my homemade extract. When selecting your vanilla beans, look for ones that are plump, dark, and have a sweet aroma – these will give your extract the best flavor.
- 2. Next, we’ll need to split our vanilla beans lengthwise to release their precious seeds and oils. This is where the magic happens, and our extract starts to take shape. To do this, simply place the bean on a flat surface and use a sharp knife to slice it open, starting from the top and working your way down. Be careful not to cut yourself, and try to keep the edges smooth for the best results.
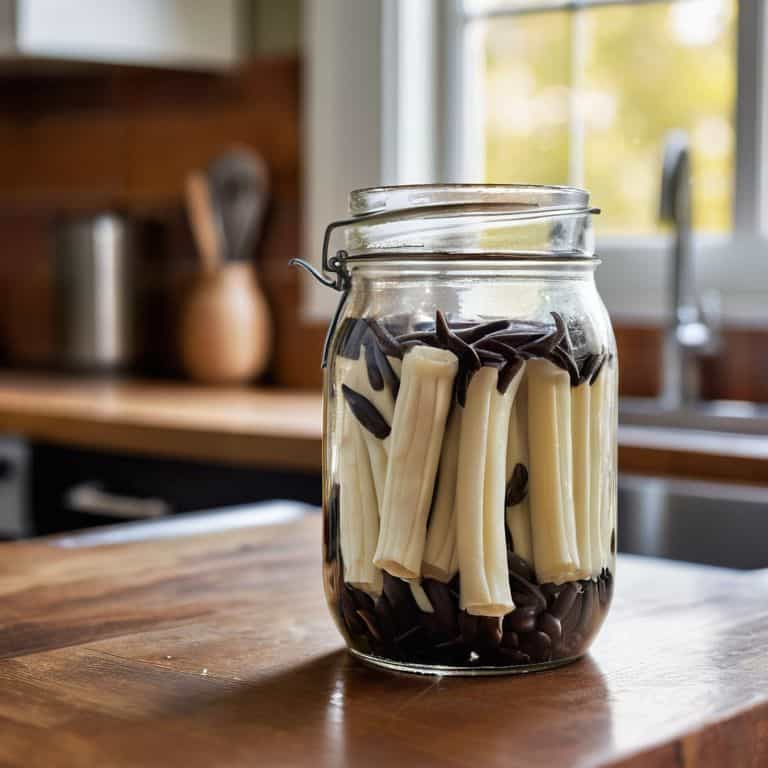
- 3. Now that our beans are split, it’s time to add them to our glass jar. I like to use a gentle touch when handling the beans, as they can be delicate. Simply place the split beans in the jar, leaving about an inch of space at the top. You can trim the beans to fit if needed, but be sure to save any scraps for future projects.
- 4. With our beans in place, it’s time to add the spirit. I recommend using a high-quality vodka or rum, as these will help to bring out the flavors of our vanilla beans. Pour the spirit over the beans, making sure they’re completely covered. If you’re using a smaller jar, you may need to adjust the amount of spirit accordingly.
- 5. Next, we’ll need to seal our jar and give it a good shake. This helps to distribute the flavors and gets the extraction process started. Make sure the lid is tight, then shake the jar vigorously for about 30 seconds. You should start to see the spirit take on a rich, dark color – this is a great sign that our extract is on its way.
- 6. Now, the hardest part: waiting. Our extract will need to steep in a cool, dark place for at least 4-6 weeks, shaking the jar every few days to help the process along. This is where patience comes in, but trust me, it’s worth it. As the extract steeps, you’ll start to notice the flavors melding together and the aroma becoming more intense.
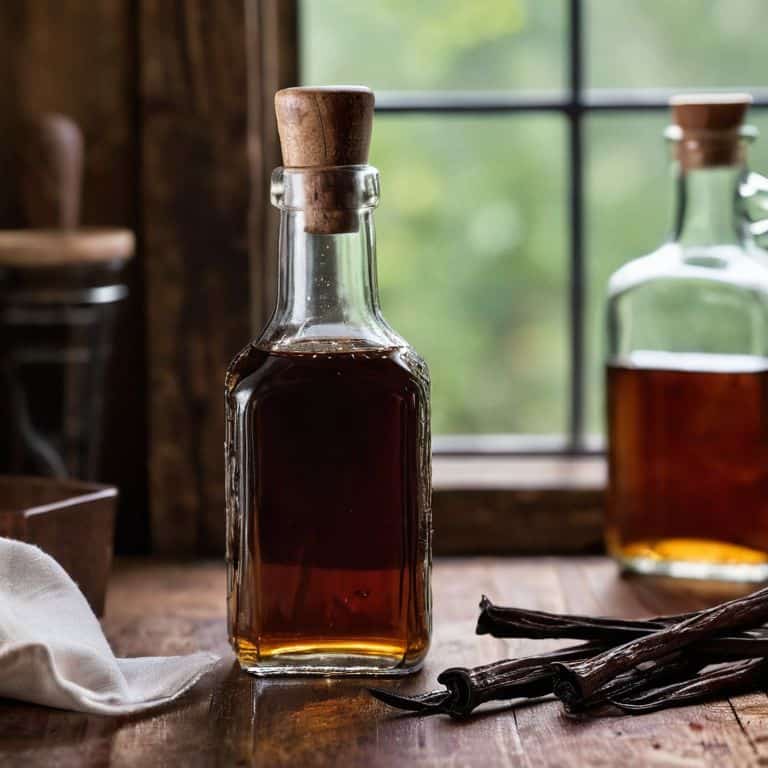
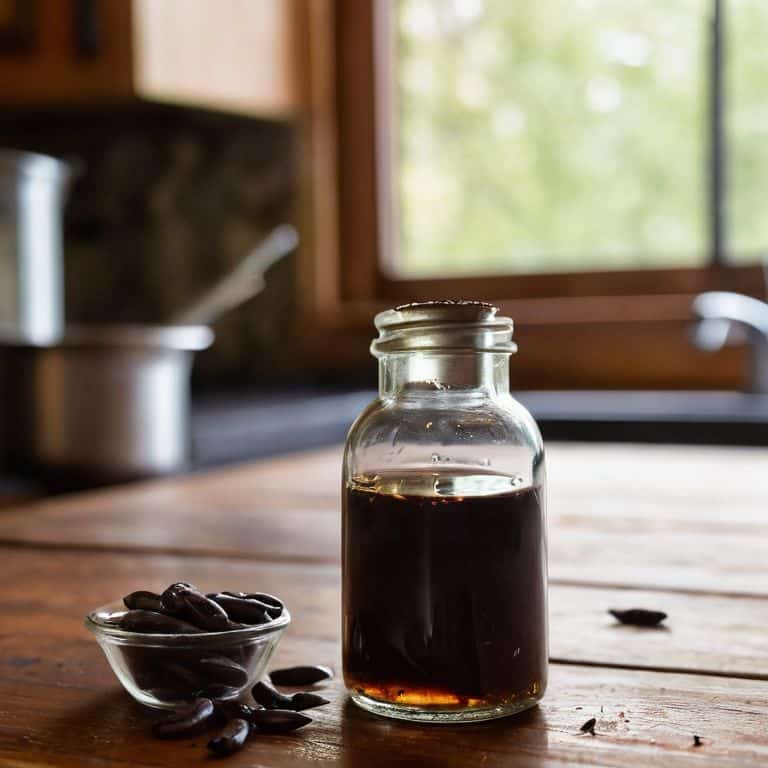
- 7. After our extract has steeped, it’s time to strain and bottle it. I like to use a coffee filter or a piece of cheesecloth to remove the solids, then transfer the extract to a smaller bottle. You can use this extract in all sorts of recipes, from baked goods to ice cream and even cocktails. The possibilities are endless, and I love experimenting with new flavors and combinations.
- 8. Finally, let’s talk about storage and maintenance. Our homemade vanilla extract will keep indefinitely if stored in a cool, dark place, but it’s best used within 6-12 months for optimal flavor. You can also top off the extract with more spirit as needed, or add new vanilla beans to keep the flavors fresh and exciting. With a little practice and patience, you’ll be making your own homemade vanilla extract like a pro.
Unleash Homemade Vanilla
As I experiment with different vanilla bean infusion methods, I’ve found that the type of alcohol used can greatly impact the flavor of my homemade extract. For a richer, more complex taste, I love making vanilla extract with bourbon. The subtle oak notes in the bourbon perfectly complement the sweetness of the vanilla, creating a depth of flavor that’s hard to replicate with other spirits. This unique blend is especially great for baking, as it adds a new dimension to traditional homemade vanilla extract for baking recipes.
When it comes to storing my homemade vanilla extract, I always make sure to keep it in a cool, dark place to ensure a long vanilla extract shelf life. This allows me to enjoy my creations for months to come, and even share them with friends and family. For those just starting out, I recommend exploring diy vanilla extract kits that include everything you need to get started, from high-quality vanilla beans to glass bottles and instructions.
As I continue to experiment with new vanilla extract recipes for desserts, I’m constantly amazed by the versatility of this simple ingredient. From classic crème brûlée to innovative ice cream flavors, the possibilities are endless. By embracing the art of homemade vanilla extract, you’ll not only elevate your baking game but also develop a deeper appreciation for the craftsmanship that goes into creating truly unique flavors.
Bean There Diy Extract Kits
I love putting together DIY extract kits for friends and family – it’s a great way to share the joy of homemade vanilla. I bundle everything they need: a few vanilla beans, a glass jar, and some neutral spirits. It’s amazing to see people’s faces light up when they realize how easy it is to create their own extract. I’ve even started selling these kits at local markets, and they’ve become a hit. There’s something special about having control over the quality and flavor of your ingredients, and these kits make it easy for anyone to get started.
Bourbon Infused Vanilla Magic
Now that we’ve unleashed the magic of homemade vanilla, let’s take it to the next level. I’m obsessed with infusing my vanilla extract with a hint of bourbon – it adds a depth of flavor that’s just incredible. I like to think of it as a match made in heaven: the creamy sweetness of vanilla beans paired with the rich, velvety smoothness of bourbon.
To try it out, simply add a splash of good-quality bourbon to your homemade vanilla extract and let it mingle for a few weeks. The result is a truly unique flavor that’s perfect for baking, cooking, or even mixing up a fancy cocktail. Trust me, the wait is worth it – this bourbon infused vanilla magic will elevate your desserts and drinks to a whole new level!
Extracting the Best: 5 Tips for Homemade Vanilla Perfection
- Start with high-quality vanilla beans – the difference in flavor is worth the extra cost, trust me, I’ve experimented with plenty
- Use a neutral-tasting alcohol like vodka or rum to avoid imparting unwanted flavors to your extract
- Don’t be afraid to get creative with your infusion times – some people swear by a shorter steep, while others prefer a longer, more intense extraction
- Resist the temptation to over-complicate your extract with too many additives or flavorings – sometimes, less is more, and the beauty of vanilla lies in its simplicity
- Experiment with different ratios of vanilla beans to alcohol to find your perfect balance – and don’t be surprised if you find yourself tweaking the recipe every time you make it, that’s half the fun
Homemade Vanilla Extract Essentials
By making your own vanilla extract, you can avoid additives and preservatives found in store-bought varieties, and instead, infuse your baked goods and desserts with a rich, authentic flavor
Experimenting with different types of vanilla beans, such as Madagascar or Tahitian, and infusion methods, like using bourbon or rum, can help you discover unique flavor profiles to elevate your recipes
With a little patience and practice, you can create your own signature vanilla extract blends, from classic and straightforward to creative and adventurous, and share them with friends and family as a thoughtful, homemade gift
The Essence of Homemade Vanilla
Making homemade vanilla extract is like unlocking a secret flavor dimension – it’s a journey of discovery, experimentation, and patience, where the end result is a taste that’s as personal as it is sublime.
Tom Navarro
Conclusion: Savoring the Flavor of Homemade Vanilla
As we wrap up this journey of creating homemade vanilla extract, let’s recap the key takeaways: we’ve learned to unleash the magic of homemade vanilla, explored the richness of bourbon-infused vanilla, and discovered the convenience of DIY extract kits. It’s been a hands-on adventure, and I hope you’ve had as much fun as I have, getting your hands dirty and experimenting with the simplicity of making your own flavorings. From the initial steps of selecting the perfect beans to the final touches of straining and storing, every moment has been a celebration of the art of creation. Whether you’re a seasoned maker or just starting out, the process of crafting something from scratch is incredibly rewarding.
As you move forward, remember that the true beauty of homemade vanilla extract lies not just in its incredible flavor, but in the journey itself – the experimentation, the learning, and the sharing. So, don’t be afraid to push the boundaries of what’s possible with your homemade extract. Try new recipes, infuse it with other flavors, and most importantly, enjoy the process. With every bottle you fill, you’re not just creating a delicious ingredient; you’re crafting a piece of yourself to share with others. Happy making!
Frequently Asked Questions
What's the best type of vanilla bean to use for making homemade extract?
For homemade vanilla extract, I swear by Madagascar or Tahitian beans – their rich, creamy flavor is unbeatable. I like to mix and match, but if I had to pick one, Madagascar’s the way to go. The key is to find beans that are plump, oily, and fragrant – those will give you the most incredible extract.
How long does it take for the vanilla extract to mature and be ready to use?
The wait is the hardest part! Your homemade vanilla extract will typically take 4-6 weeks to mature, but trust me, it’s worth it. The longer it steeps, the deeper the flavor. I like to let mine sit for at least 2 months, shaking the jar every week or so, before straining and bottling. Patience, my friend, your taste buds will thank you!
Can I customize the flavor of my homemade vanilla extract by adding other ingredients or spices?
Absolutely, get creative! I love adding a pinch of cinnamon or a few coffee beans to my vanilla extract for a unique twist. You can also try throwing in some citrus zest or a few cloves – the possibilities are endless. Just remember, a little goes a long way, so start with small batches and taste as you go.