I still remember the first time I tried canning my own pickles – it was a disaster. I had read all the books, watched all the videos, but somehow I still managed to end up with a batch of jars that were more suitable for the trash than the pantry. It wasn’t until I learned about the common canning mistakes to avoid that I was able to turn my canning game around. One of the biggest myths out there is that canning is a precise science, but the truth is, it’s more of an art – and like any art, it requires a little experimentation and patience.
So, if you’re like me and you’re tired of throwing away jar after jar of failed canning experiments, then this article is for you. In the following guide, I’ll be sharing my top tips for avoiding those common canning mistakes that can make all the difference between a successful batch and a failed one. From preparing your jars to sealing them up tight, I’ll cover it all – and I promise, it’s not just about following a recipe, it’s about understanding the process and having fun with it. By the end of this article, you’ll be well on your way to becoming a canning master, and you’ll be enjoying the fruits of your labor (or should I say, the pickles of your labor) in no time.
Table of Contents
Guide Overview: What You'll Need
Total Time: 1 hour 30 minutes
Estimated Cost: $10 – $30
Difficulty Level: Easy
Tools Required
- Canning Funnel (for easy jar filling)
- Acid Tester (for checking acidity levels)
- Pressure Canner (for low-acid foods)
Supplies & Materials
- Canning Jars (sterilized, 8 inches tall)
- Lids and Rings (new, for each jar)
- Canning Salt (for preserving and flavoring)
- Jar Lifter (for safe handling of hot jars)
Step-by-Step Instructions
- 1. First, let’s talk about sterilization, because if you don’t get this right, you’re already off to a bad start. Make sure all your jars, lids, and utensils are sparkling clean and sterilized in boiling water for at least 10 minutes. I like to think of this step as setting the foundation for a successful canning process – you want to ensure that everything is clean and free of any bacteria that could ruin your preserves.
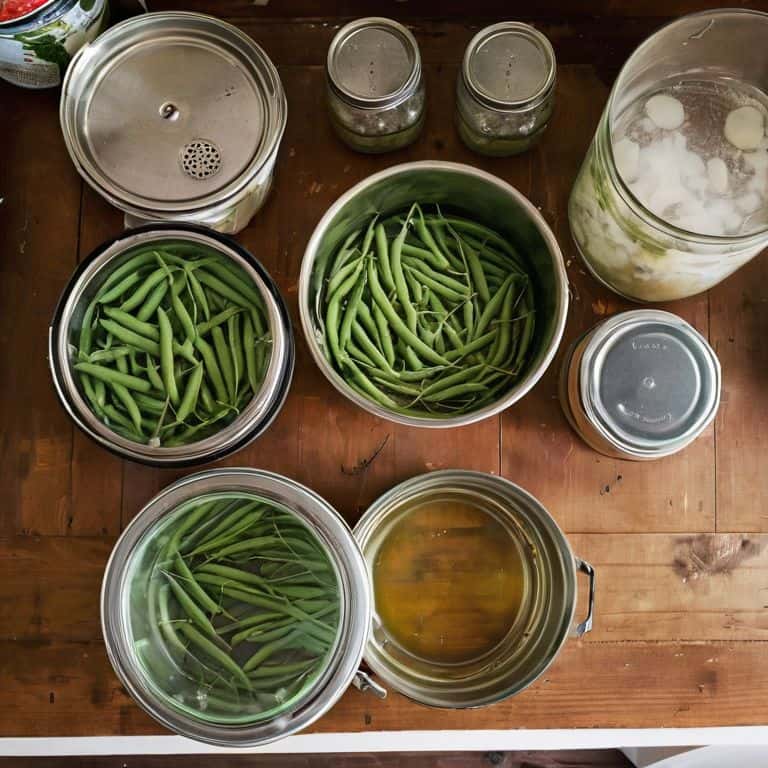
- 2. Next, you need to prepare your ingredients, and this is where the magic happens. I’m a big believer in using fresh, seasonal produce to get the best flavors out of your canned goods. Take the time to carefully wash, peel, chop, and cook your ingredients according to your recipe. Don’t rush this step, as it’s crucial for both the taste and texture of your final product.
- 3. Now it’s time to fill your jars, and this is where leaving headspace comes into play. You need to leave just the right amount of space between the top of the food and the lid – too little, and you risk the jars not sealing properly; too much, and you’ll end up with a weak vacuum seal. Generally, you want to aim for about 1/4 inch of headspace, but be sure to check your specific recipe for any variations.
- 4. After filling your jars, it’s essential to remove air bubbles to prevent any unwanted surprises when you open your jars later. I use a non-metallic utensil, like a plastic spatula, to gently remove any air pockets that may have formed. This step is often overlooked, but trust me, it’s crucial for achieving that perfect seal.
- 5. With your jars filled and air bubbles removed, it’s time to add the lids and rings. Make sure the lids are properly aligned and the rings are tightened just until they’re finger-tight – you don’t want to overtighten, as this can prevent the jars from sealing correctly during the canning process.
- 6. Next, you’ll need to submerge your jars in a boiling water bath, making sure they’re completely covered by at least an inch of water. This is where the canning process really begins, and you’ll start to see the jars seal as they cool. Keep an eye on the time, as different recipes will have varying processing times – and don’t even think about skipping this step, or you’ll be inviting all sorts of bacterial growth into your jars.
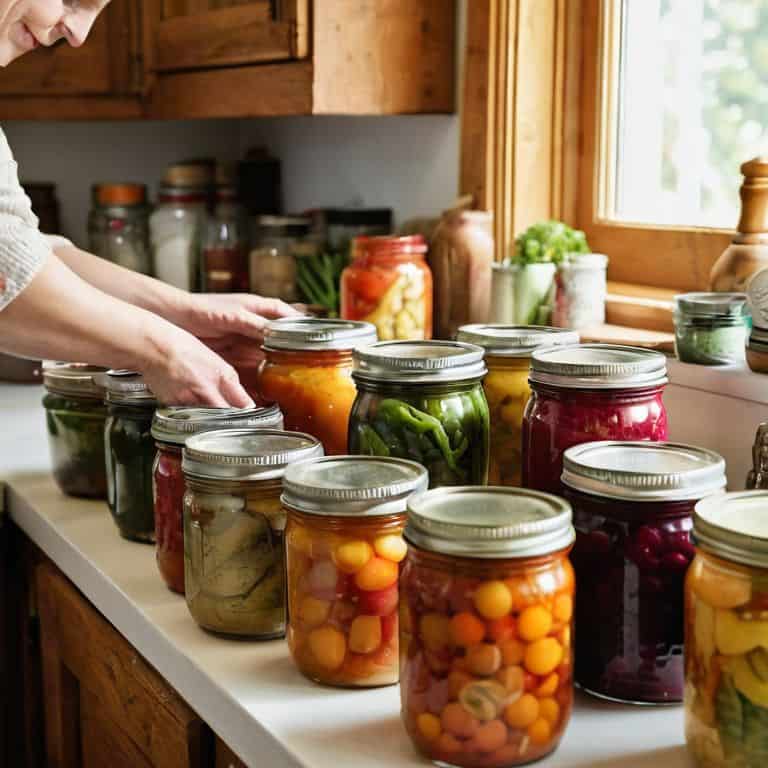
- 7. Once the processing time is up, carefully remove the jars from the water bath using a jar lifter, and let them cool on a wire rack. As they cool, you’ll start to hear the satisfying pop of the lids sealing – music to my ears, every time. Resist the temptation to touch or tighten the lids, as this can interfere with the sealing process.
- 8. Finally, after the jars have cooled completely, it’s time to check the seals. Press the top of each lid – if it doesn’t move and the lid is concave, you’ve got a good seal. If not, you’ll need to refrigerate the jar and use the contents within a few days. Don’t worry if it takes a few tries to get the hang of it – with practice, you’ll be a canning pro in no time, and you’ll be enjoying your delicious homemade preserves all year round.
Avoid Common Canning Mistakes
When it comes to canning, I’ve learned that paying attention to detail is crucial. One of the most important things to keep in mind is canning jar sterilization techniques. You want to make sure those jars are spotless before filling them with your delicious creations. I like to think of it as setting the stage for a perfect preservation process. A simple mistake in sterilization can lead to a big mess down the line.
As a beginner, it’s easy to get overwhelmed with all the equipment and guidelines. That’s why I always recommend checking out pressure canner safety guidelines before starting a new project. It’s better to be safe than sorry, especially when working with high-pressure equipment. Plus, understanding how to use your gear correctly will help you avoid common pitfalls and ensure your canned goods turn out amazing.
For those new to canning, I recommend starting with acidic food canning methods, like pickling or jam-making. These projects are not only delicious, but they’re also great for building confidence in the kitchen. And don’t forget to consider canning at high altitudes if you live in a mountainous region – it can affect the entire canning process. With a little practice and patience, you’ll be creating mouth-watering treats in no time.
Canning for Beginners Safety First
Safety first – it’s the mantra I live by when it comes to canning. I’ve had my fair share of close calls, and trust me, you don’t want to risk spoiling your batch or, worse, compromising the safety of your food. Always sterilize your equipment and jars, and make sure you’re using the right lids and seals. It’s also crucial to follow tested recipes and guidelines, especially when it comes to acidity levels and processing times. Don’t be tempted to skip steps or take shortcuts – your safety (and your taste buds) will thank you.
I like to think of canning as a fun science experiment, but with great power comes great responsibility. Keep your workspace clean and organized, and never leave your canner unattended. With a little common sense and caution, you’ll be well on your way to creating delicious, safe, and healthy canned goods that will impress your friends and family.
Pressure Canner Pitfalls to Watch
When I first started canning, I thought pressure canning was the most intimidating part. And honestly, it still requires some finesse. One major pitfall to watch out for is incorrect pressure gauge calibration. If your gauge is off, you risk under or over-processing your food, which can lead to spoilage or worse. I learned this the hard way with a batch of pickled carrots that ended up being a science experiment gone wrong.
To avoid this, make sure to get your pressure canner’s gauge checked regularly. It’s also crucial to follow the manufacturer’s instructions to the letter. Don’t be like me, thinking you can wing it – trust me, it’s not worth the risk. Take the time to get it right, and you’ll be enjoying perfectly preserved foods in no time.
Don't Get Jammed Up! My Top 5 Tips for Avoiding Canning Catastrophes
- Make sure you’re using the right jars for the job – I’ve learned the hard way that not all jars are created equal, and some just aren’t meant for canning
- Acid levels matter, folks! Don’t even think about canning something without checking the pH levels, or you might end up with a batch of spoiled goodies
- Head space is crucial – leave too little, and you’ll have a jar that’s practically begging to be contaminated; leave too much, and you’ll be wondering why your preserves are all dry and flavorless
- Keep it clean, keep it hot! Sterilization is key when it comes to canning, so make sure you’re washing those jars and lids in hot soapy water before filling them up
- Don’t overpack your jars, my friends – I know it’s tempting to cram as much goodness in there as possible, but trust me, you want to leave a little room for the magic to happen (and by magic, I mean the expansion of your delicious creations during the canning process)
My Top 3 Takeaways for Canning Success
Don’t be a slave to the recipe – trust your instincts and taste as you go, adjusting seasoning and spices to make your canned creations truly shine
Keep it real, keep it local: using seasonal ingredients will not only ensure your canned goods are bursting with flavor, but also help reduce your carbon footprint and support your local farming community
Get comfortable with experimentation and embracing the unknown – after all, some of the best canned creations come from happy accidents and a willingness to push the boundaries of what’s possible in the kitchen
The Canning Truth
The biggest mistake people make when canning is being too afraid to get it wrong – newsflash, it’s in those messy, imperfect moments that we discover the most incredible flavors and techniques!
Tom Navarro
Sealing the Deal: Canning with Confidence
Canning can be a wild ride, but with the right mindset and a few key precautions, you’ll be well on your way to preserving like a pro. I’ve walked you through the basics, highlighted common canning mistakes to avoid, and offered tips for safety first and navigating pressure canner pitfalls. Remember, it’s all about feeling your way through the process, and don’t be too hard on yourself if things don’t turn out as expected – it’s all part of the journey. Whether you’re a seasoned pro or just starting out, the world of canning is full of surprises, and with practice, you’ll develop your own signature style.
As you close this chapter and move on to your next canning adventure, I want to leave you with a final thought: preserving is a labor of love. It’s about connecting with the food you eat, the people you share it with, and the stories behind every jar. So don’t be afraid to experiment, try new things, and make mistakes – they’re all part of the fermentation journey. With every successful batch, you’ll grow more confident in your abilities, and before you know it, you’ll be hooked on canning for life. Happy preserving, and I’ll catch you in the next post!
Frequently Asked Questions
What are the most common causes of spoilage in home-canned goods?
Spoiler alert: it’s usually a combo of under-processing, contamination, or improper storage. I’ve learned the hard way that even a tiny crack in the seal or a forgotten jar in the pantry can lead to spoilage. Now, I’m super diligent about tracking my cans and storing them in a cool, dark place.
How can I ensure that my canning jars are properly sterilized to prevent contamination?
Ah, sterilization – the secret to contamination-free canning! I swear by the old-school water bath method: submerge those jars in boiling water for 10-15 minutes. You can also use a dishwasher on the sterilize setting. Either way, make sure they’re hot and dry before filling – trust me, it’s worth the extra step!
What are the warning signs of a canning mistake, such as a jar that hasn't sealed properly or is showing signs of botulism?
Hey, if you notice a jar that’s not sealed tight, or see bubbles, mold, or an off smell, something’s gone wrong. Check for loose lids, and always keep an eye out for slimy or discolored food – those are red flags for spoilage or worse, botulism. Trust your instincts, and when in doubt, toss it out!